Women’s Backpacking Gear List — My Ultralight Approach
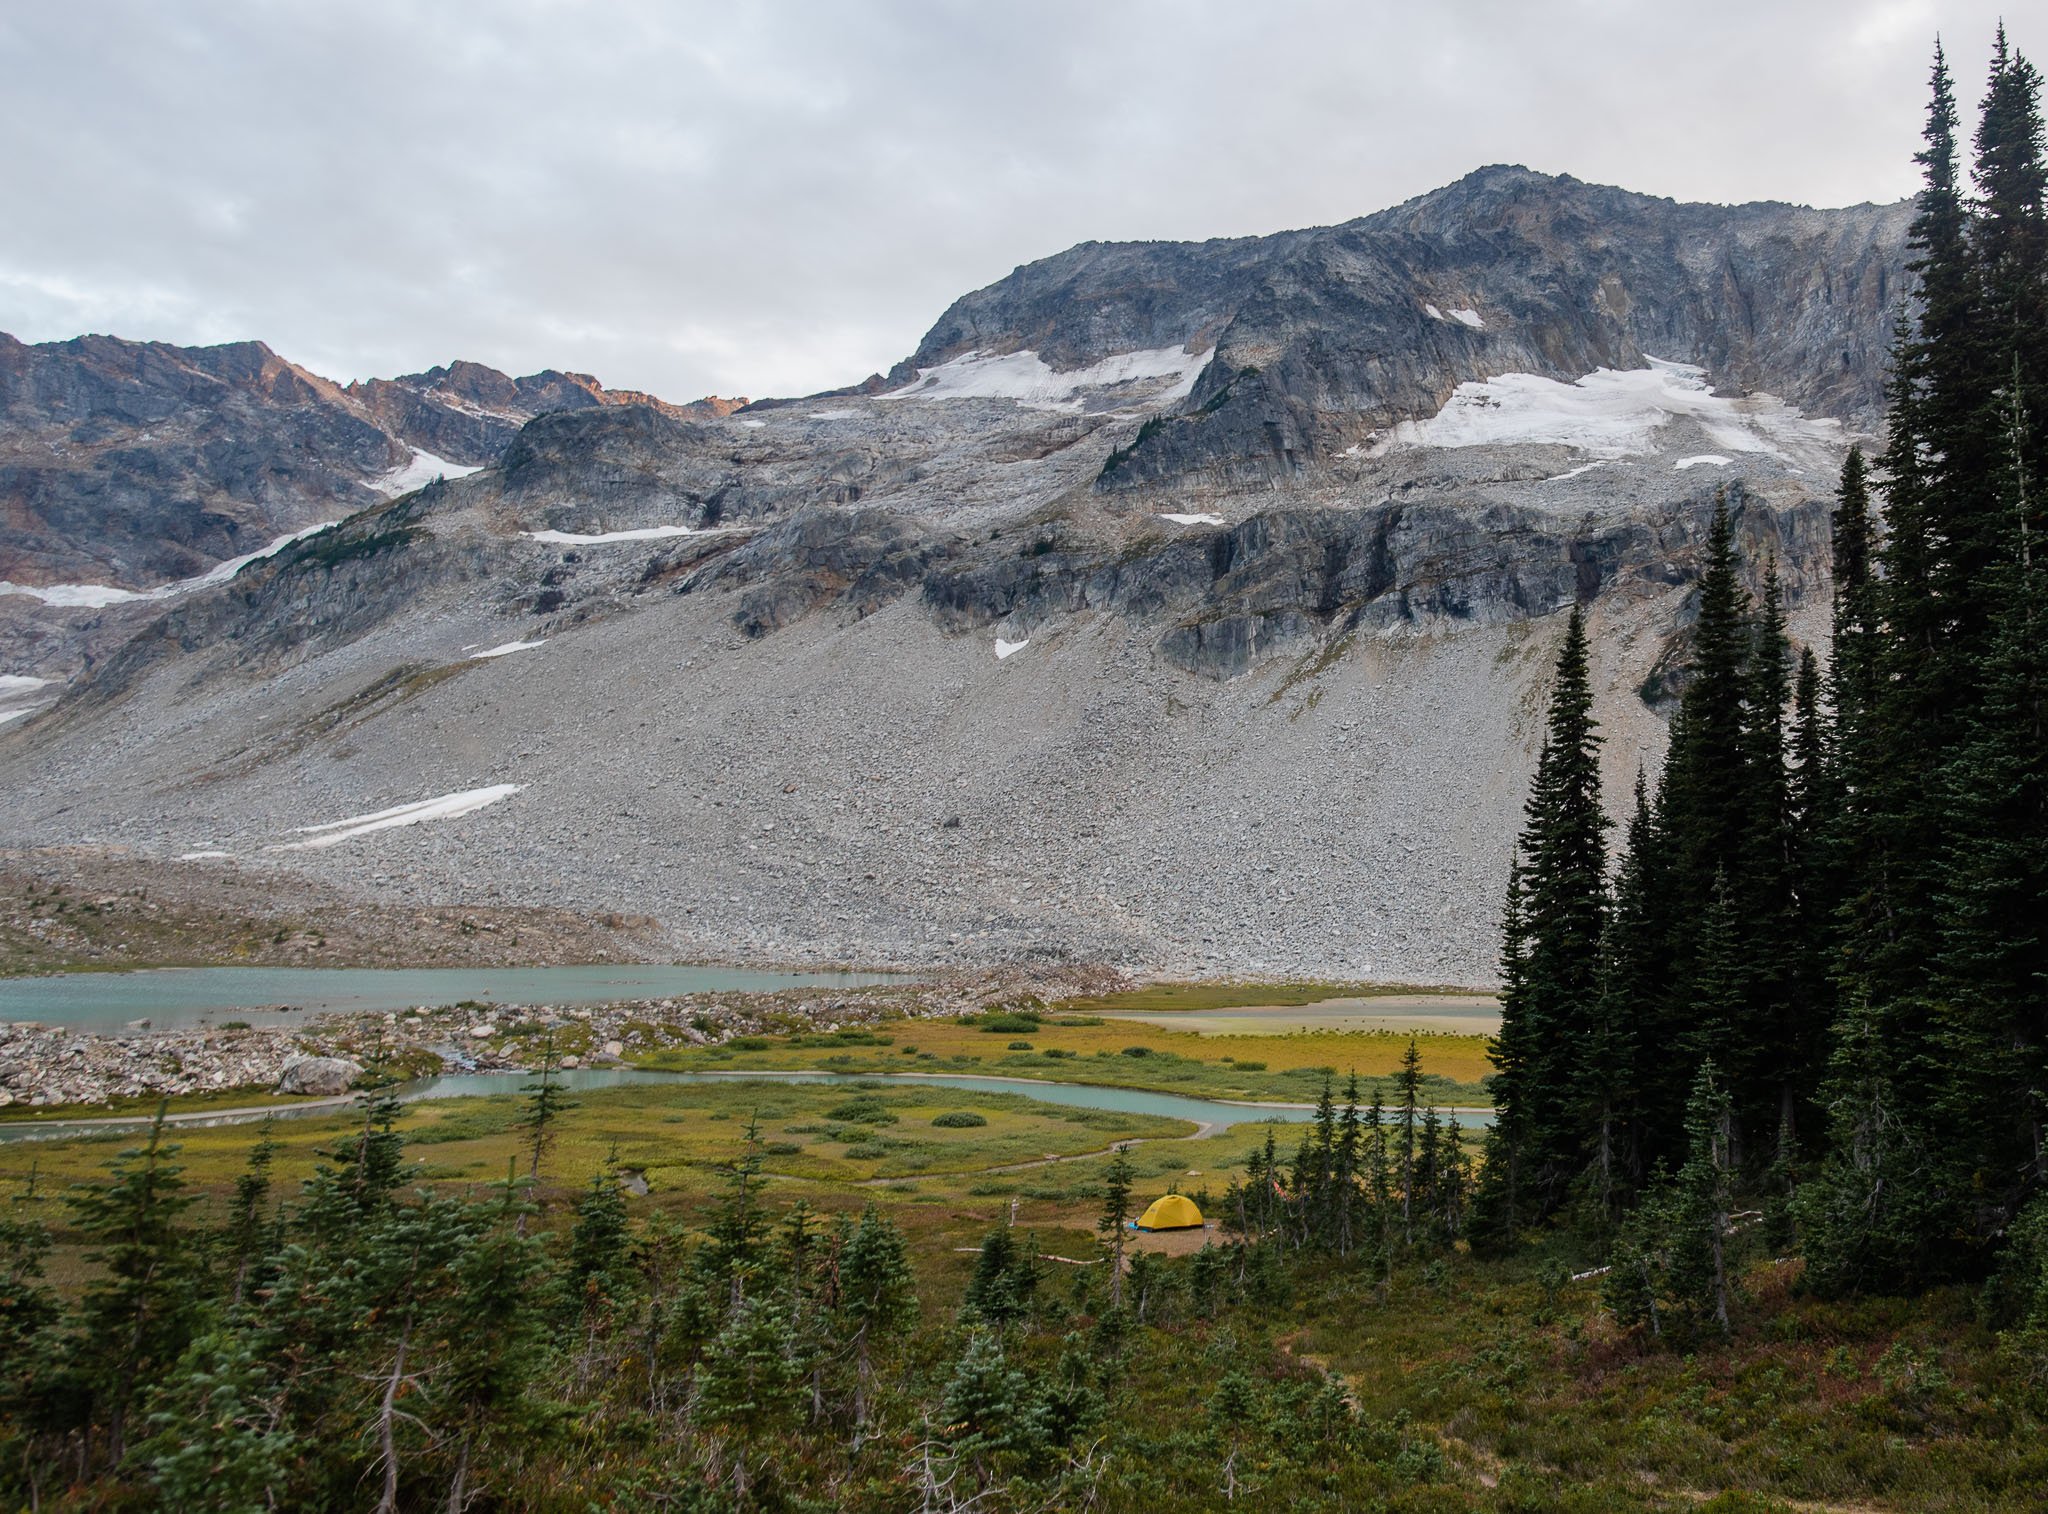
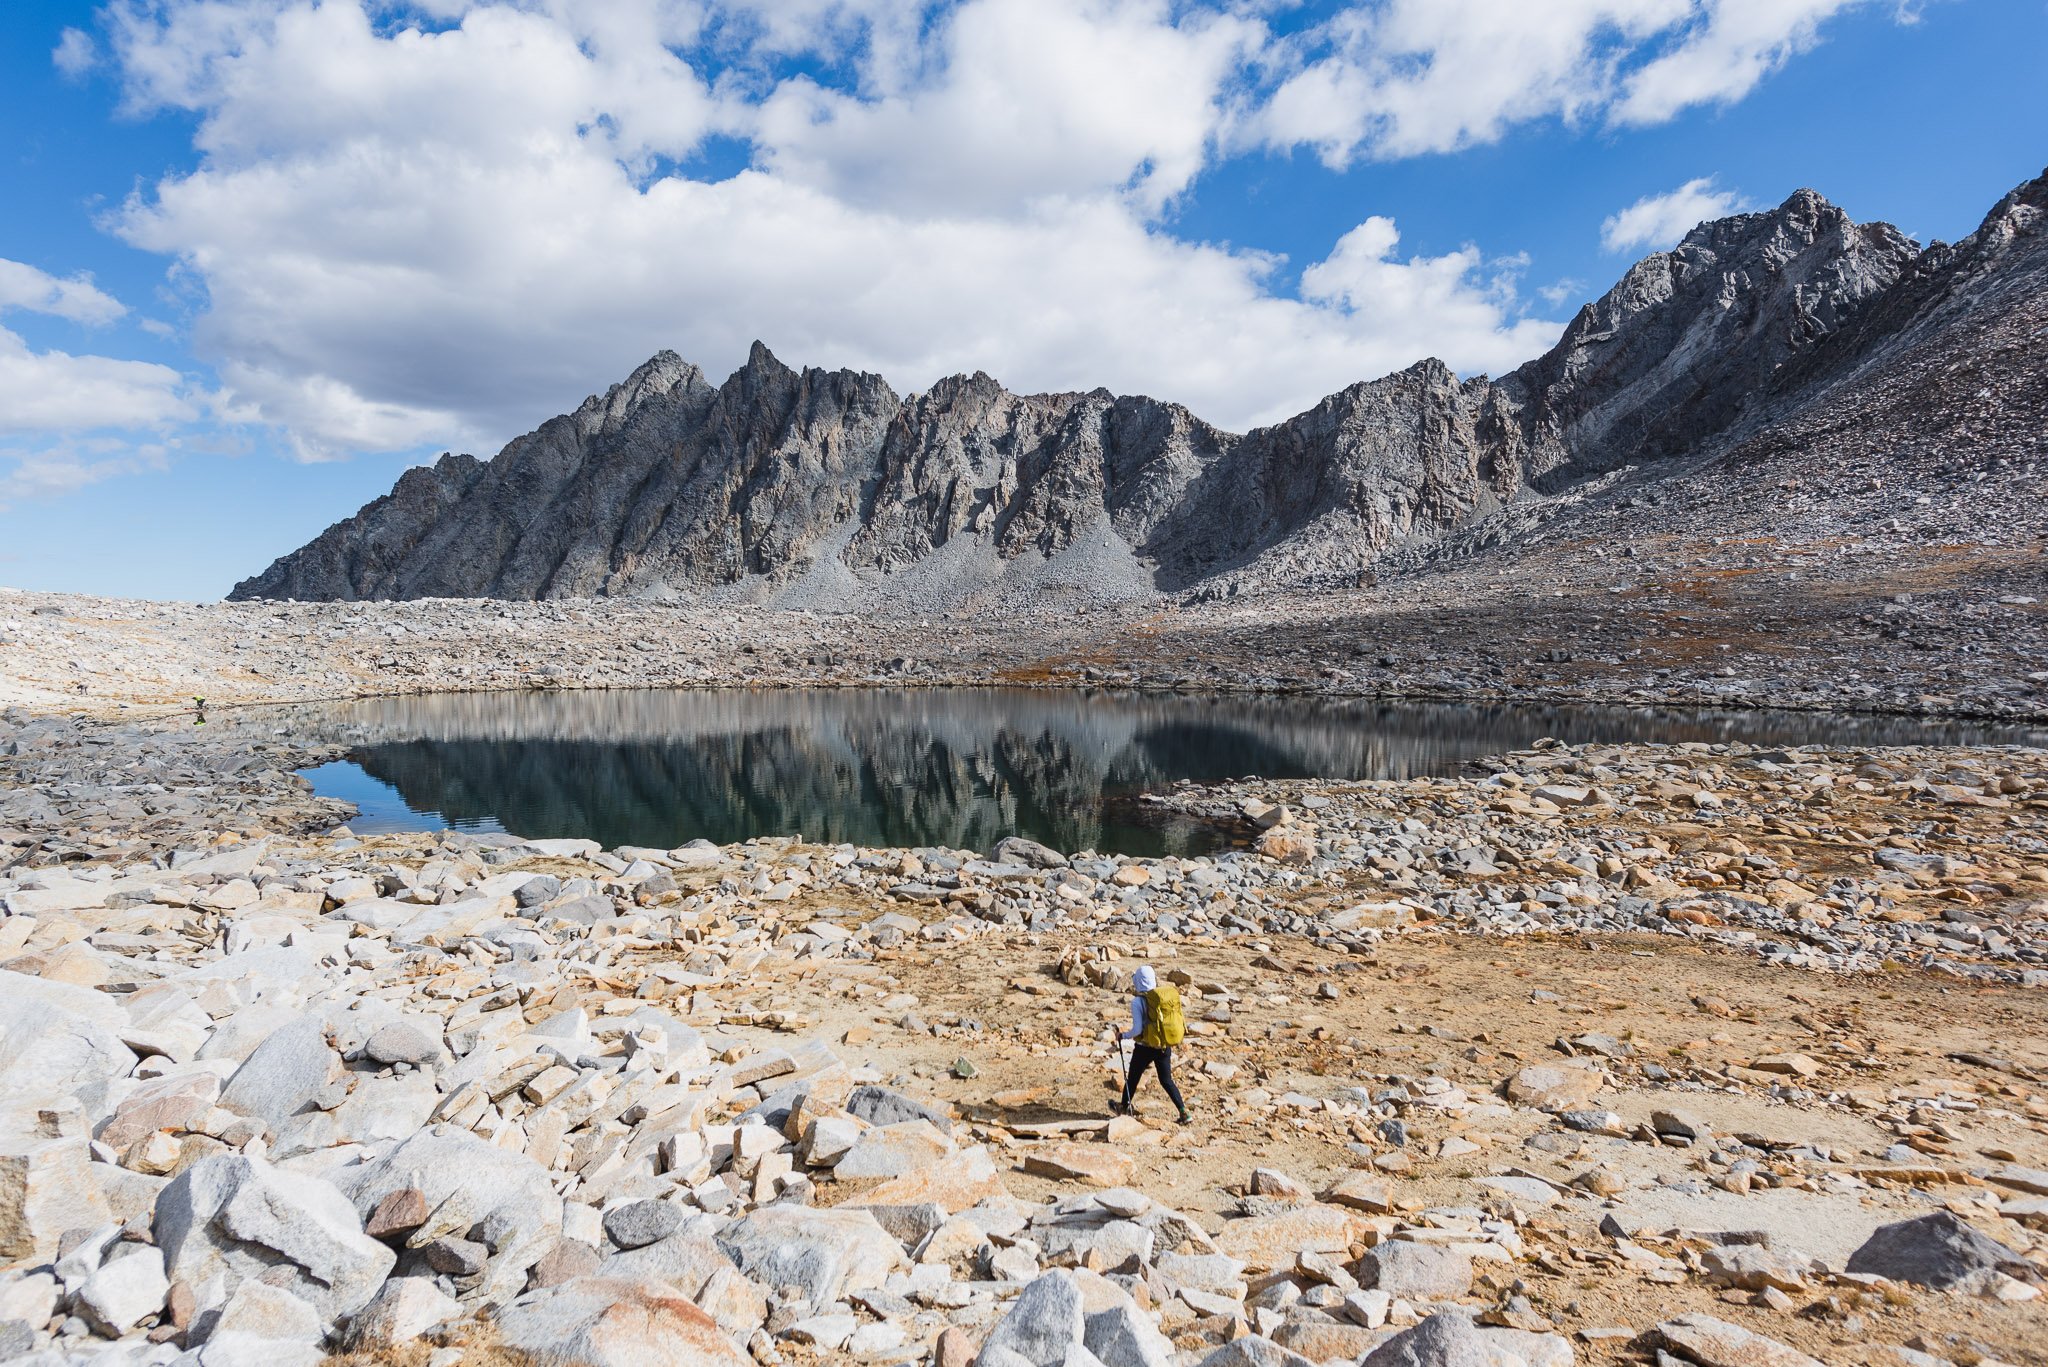
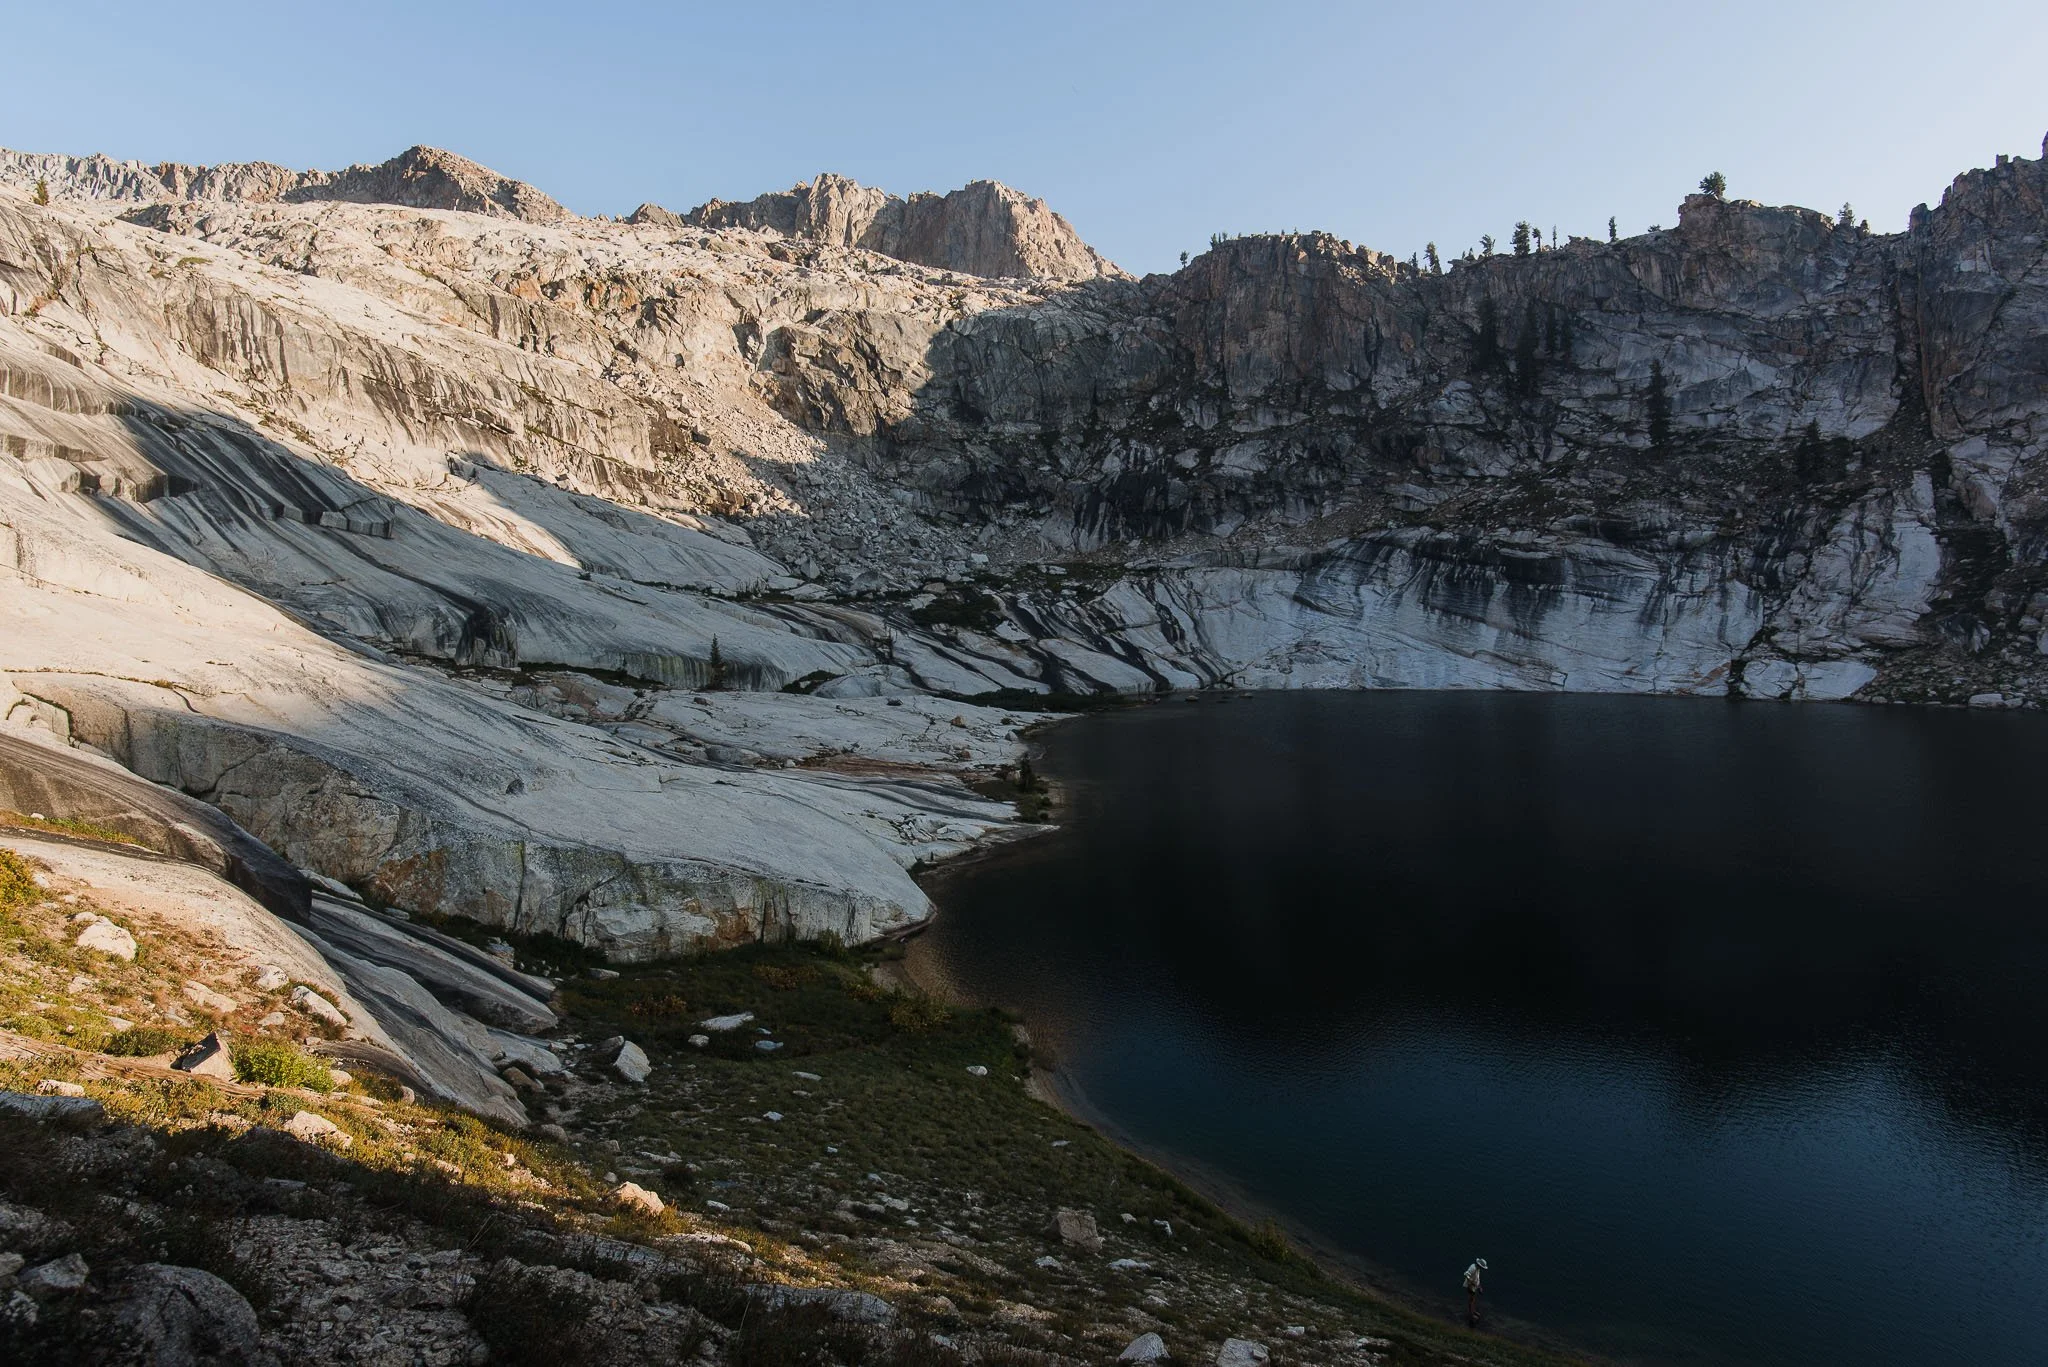
Lyman Lakes, Glacier Peak Wilderness, Washington
Whether you are a beginner researching your first set of gear or an experienced backpacker looking to make some upgrades, everyone can benefit from a more ultralight approach to their backpacking gear.
Ultralight can mean something different for everyone. For me, it’s not about getting my base weight below some arbitrary number or about sacrificing comfort or safety. It’s more of a philosophy of minimalism. Ask yourself: what is the least amount of gear I could get away with to be happy and safe in the backcountry?
The gear that works for you is a very personal choice, but I hope my list can be a helpful starting point, especially for the women hikers out there! I will be going over my packing list in detail in the post below. If you just want to see my list at a glance, head over to my LighterPack, aka the gear list that all the ultralight nerds use.
Jump to Gear
Why Does Ultralight Matter?
Hiking with a heavy pack was one of the most intimidating aspects of starting backpacking for me back in 2019. Little did I know about the world of ultralight backpacking. These are just some of the benefits of a lighter pack:
Less strain on your joints and muscles. Hiking is already a physically strenuous activity. Why make it even harder by carrying unnecessary weight?
Better balance and agility. I’m less likely to fall and injure myself, especially on hard terrain involving river crossings, downed trees, and scrambling.
The above points mean I can hike comfortably, longer, and further.
Going ultralight does not mean removing the fun from backpacking. I bring less in necessary gear to splurge on backcountry “luxuries”, like 3 lbs of camera gear. For you, luxuries might be a chair, games, alcohol, fresh fruit, a comfortable pillow, etc.
Packing and unpacking is simpler and faster. For example, I don’t have to struggle with stuffing my sleeping pad back in its stuff sack or worry about losing the stuff sack. I don’t bring stuff sacks!
At the end of the day, I go ultralight to enjoy my time in the outdoors more. A lighter pack gives me more energy to hike and take in the scenery. If you’re making sacrifices that make you unhappy or uncomfortable, then it’s not worth it!
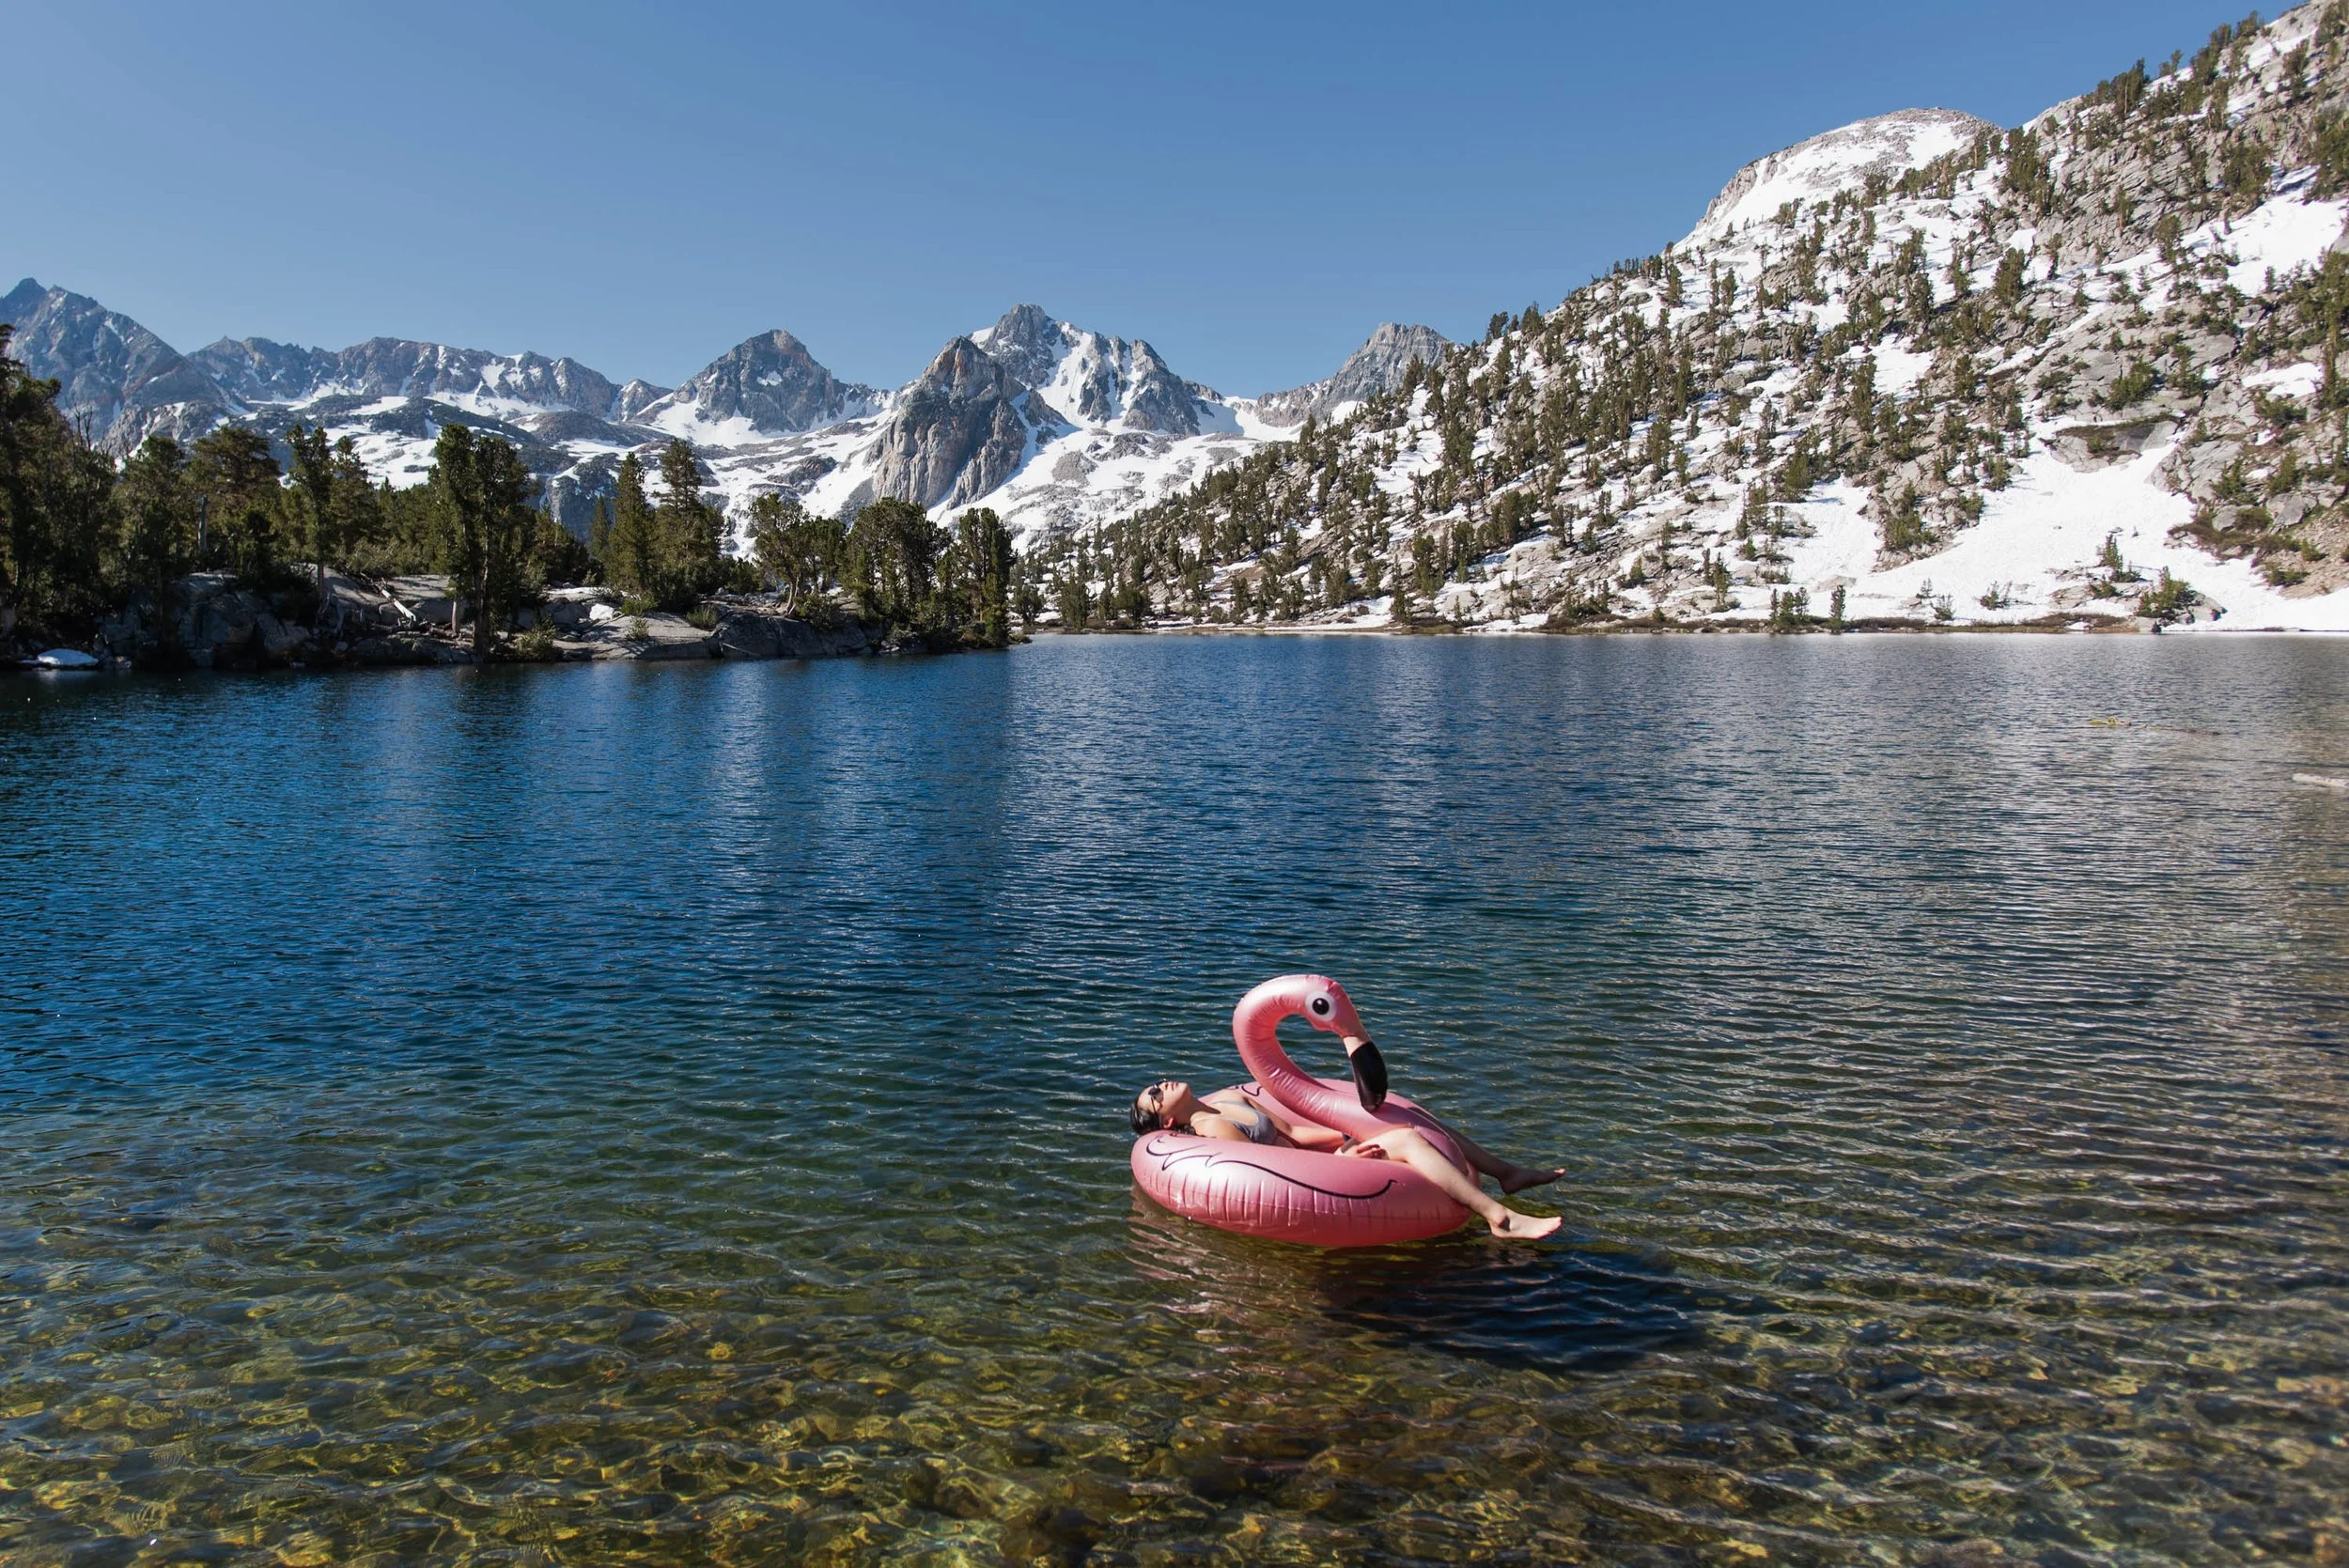
How about an inflatable flamingo for a luxury item? Rae Lakes Loop, California
How to Start
Make a Packing List
Create a list of your typical backpacking gear. I recommend using LighterPack. It’s free and popular with backpackers for creating and sharing packing lists.
Weigh Everything
Knowing the weight of each item you bring will help inform where you can reduce the most amount of weight. Use a kitchen scale to weigh each item and record its weight.
Next, determine your base weight, pack weight, and total weight.

Base weight is the weight of your pack without food and water, aka consumables.
Pack weight is the weight of your pack when you head out on trail. This includes consumables but not worn weight like the clothes you’re wearing, hiking shoes, hiking sticks, etc.
Total weight aka skin-out weight includes worn weight. Worn weight is relevant since it’s still weight that your body has to carry, but I would argue it’s less important than your pack weight because worn weight does not affect the carrying comfort of your pack.
After you figure out these numbers, prioritize minimizing your base weight. Base weight is a good benchmark because it does not vary as much trip to trip. My base weight is 9.5 lbs and my pack weight with food and water and my camera gear is 16-20 lbs.
The general recommendation is to keep your pack weight under 20% of your body weight. A base weight of 10-20 lbs is a reasonable target for most people that will make it easy to stick to this.
Figure Out What You can Leave Behind
Most people have heavy packs because they bring too much, not just because their gear is heavy. Being more of a minimalist can get you a long way without needing to spend money on new gear.
Bring the right gear for a trip. Examples: carry fewer water bottles when water sources are abundant, opt for a cheap poncho over a rain jacket if no rain is in the forecast, use a lighter sleeping bag if you only backpack in the summer.
Compare your list to other LighterPack lists (like mine!) to see what other people do.
Evaluate your packing list after each trip. Consider leaving unused items behind next time (with the exception of essential first aid and emergency gear).
Find multiple purposes for a single piece of gear, like using your down jacket as a pillow or eating from your pot instead of a separate dish. See the Things I Don't Bring section for more ideas.

Setting up camp above Yosemite Valley.
Upgrade Your Gear
A good way to decide where to upgrade first is to consider $ per ounce, aka how many dollars you’re paying per ounce you save.
Save weight in certain categories first. A lightweight cook kit like the 1000 mL pot and stove from the Soto Amicus set weighs 8 oz and costs $50. A lightweight water filter like the Katadyn BeFree weighs 2.3 oz and costs $45, and it’s the lightest water filter you’ll ever need. Compare this to getting a lighter sleeping bag, which will almost always cost more than a heavier sleeping bag of the same warmth because sleeping bags achieve a lighter weight by using more expensive, higher quality down.
Beware of diminishing returns. Going from traditional to lightweight gear is going to cost less than going from lightweight to ultralight gear. If you currently have a Kelty Cosmic 20, a relatively lightweight sleeping bag, upgrading to an even lighter sleeping bag like the Therm-a-Rest Questar 20 will be $350 to shave off just 9 oz.
It will always be expensive to upgrade to a lighter setup when you already have perfectly usable, but heavier gear. That’s why my first tip is to be a minimalist, because that’s free!
Acquiring Gear
Starting backpacking can be daunting and a big investment because of all the gear involved. Here are some tips.
Borrow or rent. This helps you learn about gear you like without committing to it.
Buy on sale. Outdoor gear goes on sale ALL THE TIME. REI will find any excuse to hold a sale. I’ve gotten especially great deals during holiday sales like REI Anniversary (around Memorial Day), Labor Day, and 4th of July. Also watch out for clearance sales; I got the REI Magma 30 and Therm-a-Rest XLite for 50% off.
Buy used. If you know for sure what you want, you can buy used from other backpackers (no returns obviously) on Facebook Marketplace, Reddit’s Ultralight Gear Trade, and Facebook groups like Ultralight Outdoor Gear - Buy & Sell and USA - Backpacking Gear Flea Market for Women. Some retailers have also begun to offer used gear divisions like REI Re/Supply that do offer returns.
Buy quality gear from well-known brands. Quality gear will last you a long time and has better resale value if you ever choose to upgrade. I buy a lot of my gear from REI and Sports Basement (not affiliated with either, but I love them and they both have locations in my city). They have generous return policies, a huge selection, and it’s just nice to shop in-person sometimes.

Small businesses also make up an important part of the ultralight gear industry. Ultralight gear can be more niche and not sold by big retailers. Below are some marketplaces and cottage brands that I’m a fan of:
Garage Grown Gear - an online marketplace focused on cottage brands
Durston Gear - this brand has a cult following for its X-Mid tents and ultralight packs. The backpacker behind the company, Dan Durston, is also highly active in the ultralight community and known for personally responding to feedback in forums and Facebook groups.
Litesmith - for those random odds and ends like shock cord by the foot and tiny containers of many sizes
Chicken Tramper Ultralight Gear - colorful custom and semi-custom backpack accessories
Gossamer Gear - known for their ultralight packs and tents
Lastly, don’t worry too much about getting everything right from the start. Most of what I use now is different from what I took on my first season of backpacking!

A few notes before we get into my gear list:
For each item, I included the gear I use and alternatives popular with other backpackers. I won’t get into detailed comparisons or reviews, as that's not the focus of this post.
Some of the gear I use is from a past season. I'll provide a link to the current season's model, which may have slightly different specifications than what is on my LighterPack.
I listed the full retail price, but outdoor gear goes on sale all the time. For the big purchases, I’d highly recommend waiting for a sale.
I am not sponsored by any of these brands, and all opinions are my own. Some product links are affiliate links. Using them for a purchase supports my blog at no extra cost to you. Thanks for your support!
The Big 4: Pack, Shelter, Sleeping Bag and Pad
In backpacking gear discussions, you may come across the term "big 4”. This refers to the 4 heaviest items: backpack, shelter, sleeping bag, and sleeping pad. Replacing these will likely provide the largest reductions in weight, but generally also at the highest cost. If heavier gear is all you can afford now, I would try to reduce weight in other categories before the big 4.
For each item, I give an approximate weight target so you know where your gear falls from ultralight, lightweight, to traditional.
Pack
Ultralight: < 2 lbs | Lightweight: 2-3.5 lbs | Traditional: > 3.5 lbs
Packs are a tricky category to reduce weight. It’s a category where lighter is not always better. Your pack choice is highly dependent on the weight and volume of your other gear.
Tip: I recommend that your pack be the last item in the Big 4 that you upgrade. This way, you can better determine the volume and support you need in your new pack based on the weight and volume of your upgraded gear.
Traditional packs. What you see on the shelves at REI. Examples include the Osprey Aura AG 65 and the Gregory Deva 60 which weigh a whopping 4.5 lbs each. Traditional packs have heavy-duty fabrics and frames, as well as extra bells and whistles such as a sleeping bag compartment, adjustable torso, contoured mesh back, hydration bladder sleeve, and integrated day pack. High volumes encourage overpacking, and extra features make these packs expensive and heavy.
Lightweight packs. Lightweight, framed packs in the 2-3.5 lbs range are in my opinion the best choice for most backpackers. These packs reduce weight by removing nonessential features and using lighter fabrics, but still prioritize comfort by keeping padded hip belts and supportive frames that transfer the load to your hips.
Ultralight packs. Most suitable for people with lower base weights (<10-12 lbs). Some of these packs are frameless and have no hip belt or just a minimal, non-padded one.

My fully loaded 40L Kakwa pack for a 3 day backpacking trip.
What I use
Durston Kakwa 40 Backpack (26.5 oz, $250)
The Durston Kakwa pack prioritizes minimalism but has several features that make the pack much more comfortable and functional than its ultralight competitors: a padded hip belt with hip belt pockets, shoulder strap pockets, 1 zippered side pocket for small items, and a sturdy U-shaped frame that makes it comfortable even with heavier loads. It’s extremely reasonably priced for its feature set and the fact that it uses the newly developed, ultralight and waterproof Ultra 200 fabric. If 40L is too low volume for you, the pack is also offered in a more versatile, 55L size.
Alternatives
Lightweight
ULA OHM (2 lbs 1.8 oz, $260) - a no-nonsense framed pack made with extremely durable fabric. Very popular pack on the PCT.
Granite Gear Crown3 60 (2 lbs 6.4 oz, $240) - a minimalist, high-volume pack with a removable frame. I used the Crown2 60 for many years before switching to the Durston Kakwa.
REI Flash 55 (2 lbs 11 oz, $200) - a stripped down pack sold by REI, which means you get the benefit of REI’s return policy and in-person try ons. It’s frequently discounted in REI sales.
Osprey Eja 58 (2 lbs 11 oz, $260) - a lightweight offering from Osprey with the familiar look and feel of an Osprey pack
Ultralight
REI Flash Air (1 lb 13 oz, $299) - REI’s first foray into ultralight packs, and it comes with REI’s generous return policy if it doesn’t work out for you!
Gossamer Gear Mariposa 60 (31.2 oz, $285) - removable frame and full of pockets.
Arc Haul Ultra 40L/60L (20.0 oz/20.9 oz, $400) - carbon fiber frame, ventilated back, padded hip belt.
Hyperlite Mountain Gear Southwest 40 (32 oz, $349) - a framed pack that uses a thicker DCF fabric for increased durability.
Mountain Laurel Designs Burn 38L (16.5 oz, $325) - ultra-minimalist, frameless pack with padded hip belt. Only recommended for loads <25 lbs.
My friend using the REI Flash 55 pack.
Shelter
Ultralight: < 2.5 lbs | Lightweight: 2.5-4 lbs | Traditional: > 4 lbs (for 2 person tents)
Shelters are a HUGE topic. While ultralighters may venture beyond tents to tarps, hammocks, or bivys, I'll focus on tents since they're what I and most people are familiar with. Here is a quick look at decisions you might encounter.
Freestanding vs non-freestanding. Freestanding tents stand on their own. They don’t need to be staked out to hold their shape, making them easier to set up. Non-freestanding tents have a bit more of a learning curve to get a good pitch, but many are lighter and more compact.
Double-wall vs single-wall. A double-wall tent has a mesh inner tent and a rainfly. Single-wall tents just have one waterproof wall so they are lighter. Managing condensation may be a challenge with single-wall tents since the condensation forms inside your tent rather than on the rainfly.
Trekking pole tent vs non-trekking pole tent. Trekking pole tents swap dedicated tent poles for trekking poles. This means you save the weight of the tent poles since you’re probably already carrying trekking poles. Trekking pole tents are always non-freestanding, but can be very spacious, light, and inexpensive.
The most ultralight of tents are all single-wall (usually made of expensive DCF), non-freestanding, and trekking-pole tents.

Setting up the Big Agnes Copper Spur HV UL2 at Nelson Lake, Yosemite
What I use
Big Agnes Copper Spur HV UL2 (3 lb 1 oz, $550)
This popular lightweight 2-person Big Agnes tent is freestanding and double-wall. I’ve been using it since my first season of backpacking in 2019. I regularly use this with one other person and it’s the perfect balance of weight, durability, and roominess.
Alternatives
Lightweight
Big Agnes Tiger Wall UL 2 Solution-Dyed Tent (2 lbs 8 oz, $430) - A double-wall, semi-freestanding tent that is a lighter and cheaper alternative to the Copper Spur.
MSR Hubba Hubba 2 (3 lbs 4 oz, $550) - Very comparable to the Copper Spur. Very popular tent as well.
Ultralight
Durston Gear X-Mid 2 (2 lbs 6.4 oz, $300) - A double-wall, spacious trekking-pole tent at a great price.
Durston X-Mid Pro 2 (1 lb 6.2 oz, $679) - The pro version of the X-Mid 2 uses the DCF fabric and a single-wall design to achieve an extremely light tent.
Gossamer Gear The Two (1 lb 13 oz, $320) - A single-wall trekking-pole tent.
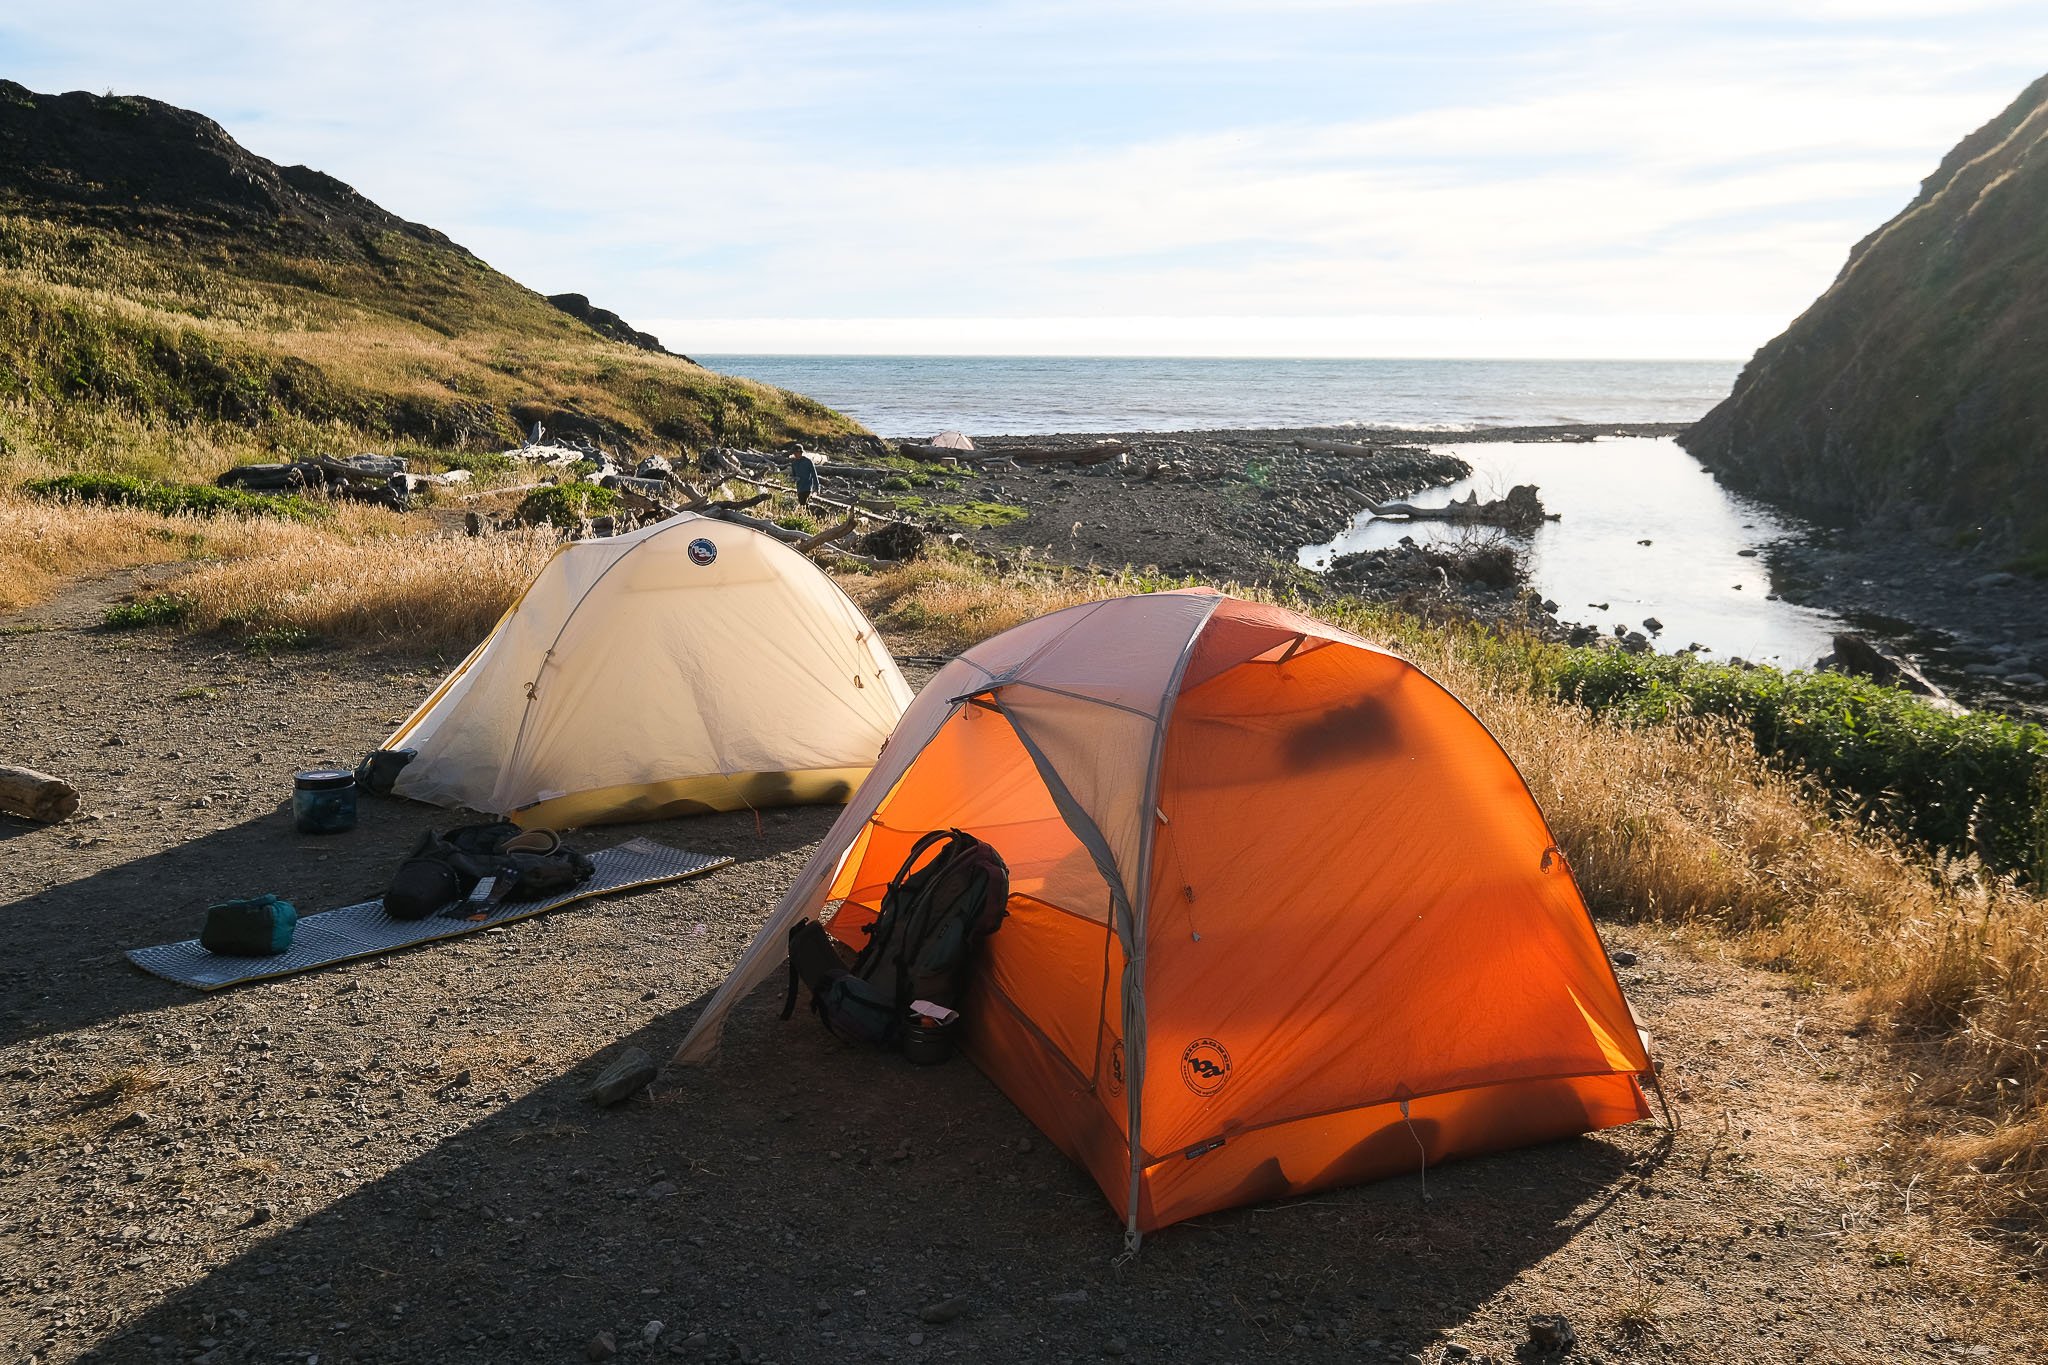
The Big Agnes Copper Spur HV UL2 and Tiger Wall UL3 behind it on the Lost Coast Trail in California
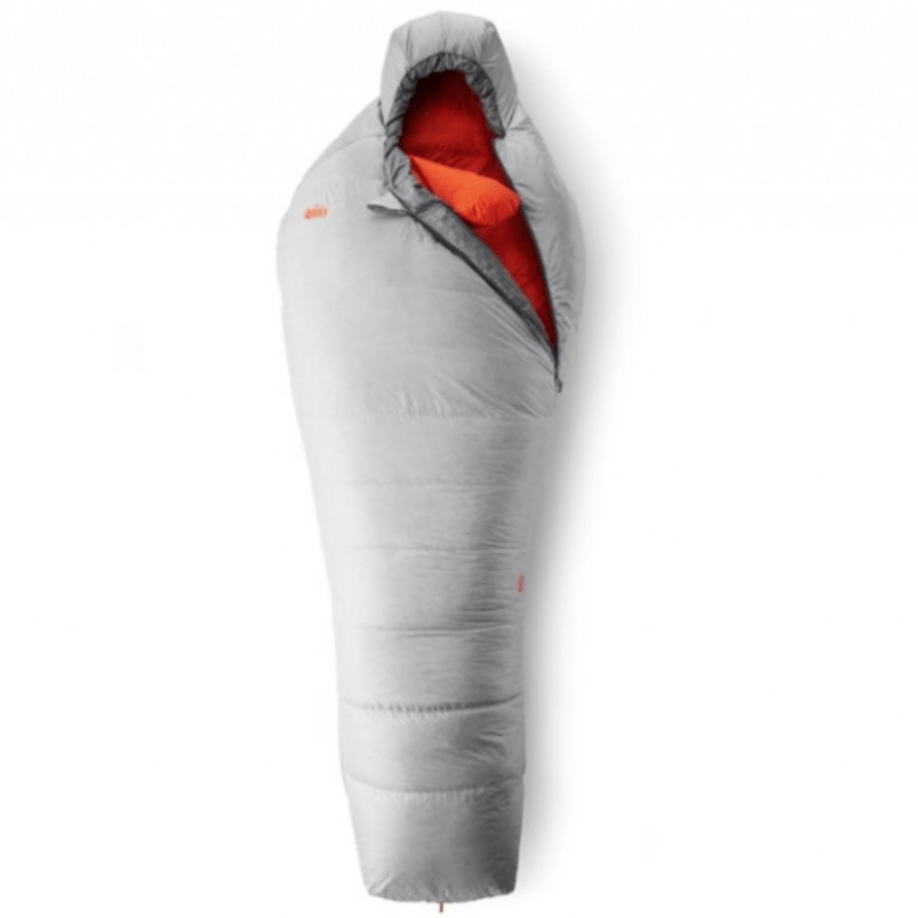
Sleeping Bag
Ultralight: < 2 lbs | Lightweight: 2-3 lbs | Traditional: > 3 lbs
Because sleeping bags don’t have a lot of differentiation in features and function besides keeping you warm, weight is strongly directly correlated to price. Lighter sleeping bags achieve a better warmth-to-weight ratio by using higher fill-power down, which is more expensive. I recommend buying the least warm sleeping bag that you need so you aren’t carrying around unnecessary weight. For 3-season backpacking, I’d generally recommend a sleeping bag rated to 30 F.

Our camp somewhere above Cathedral Lakes in Tuolumne, Yosemite
Down vs synthetic. Down bags cost more, but are usually lighter, compress smaller, and last longer. Synthetic insulation loses loft over time, and it’s also bulkier and heavier.
Sleeping bag vs quilt. Some ultralighters use quilts instead of a sleeping bag. Quilts are lighter, more compact, and cheaper than their equivalent sleeping bag. How? They are used like a blanket and insulate you only on top. Your sleeping pad is actually what provides bottom insulation. The underside of a sleeping bag is compressed and does nothing to insulate you, so it’s useless weight. Quilts are not for everyone though. Because they are not a closed tube, they can be drafty and cold. They also don’t have hoods, so you need to insulate your head/neck some other way. Others prefer quilts since they’re less restrictive.
Temperature ratings tip: sleeping bags have a comfort (higher) and limit (lower) rating. Women-specific bags use the comfort rating and will have more fill than a men’s bag rated for the same temperature (eg. the women’s Kelty Cosmic 20 has a 20F comfort rating while the men’s Kelty Cosmic 20 has a 31F comfort rating. That’s also why the women’s bag is more than a pound heavier!)


What I use
REI Magma 30 - Short (1 lb 6.8 oz, $379, 34F)
The REI Magma 30 is an 850 fill-power down sleeping bag. It’s a steal for a sleeping bag of this temperature rating and weight especially when it’s often steeply discounted (25-75% off!) in REI sales.
Alternatives
Lightweight Sleeping Bags
Kelty Cosmic 20 - Men's Short (2 lbs 3 oz, $150, 31F) - Hands-down the lightest down sleeping bag I’ve seen for this price and warmth. I recommend saving the 1 lb and $40 and going with the men’s version over the women’s version if you’re sleeping at above freezing temperatures.
REI Magma 15 (2 lbs 1.9 oz, $429, 21F) - the warmer version of the Magma 30
Ultralight Sleeping Bags
Enlightened Equipment Revelation Sleeping Quilt (1 lb 4.7 oz, $355, 30F) - Enlightened Equipment is known for its down quilts. The website offers many customization options and the weight of each customization.
Feathered Friends Egret UL 30 Small (1 lb 7.5 oz, $529, 30F) - Feathered Friends is known for its premium down sleeping bags. It should be warmer than the REI Magma since it has more down fill (higher fill weight), but it’s in a completely different price range.
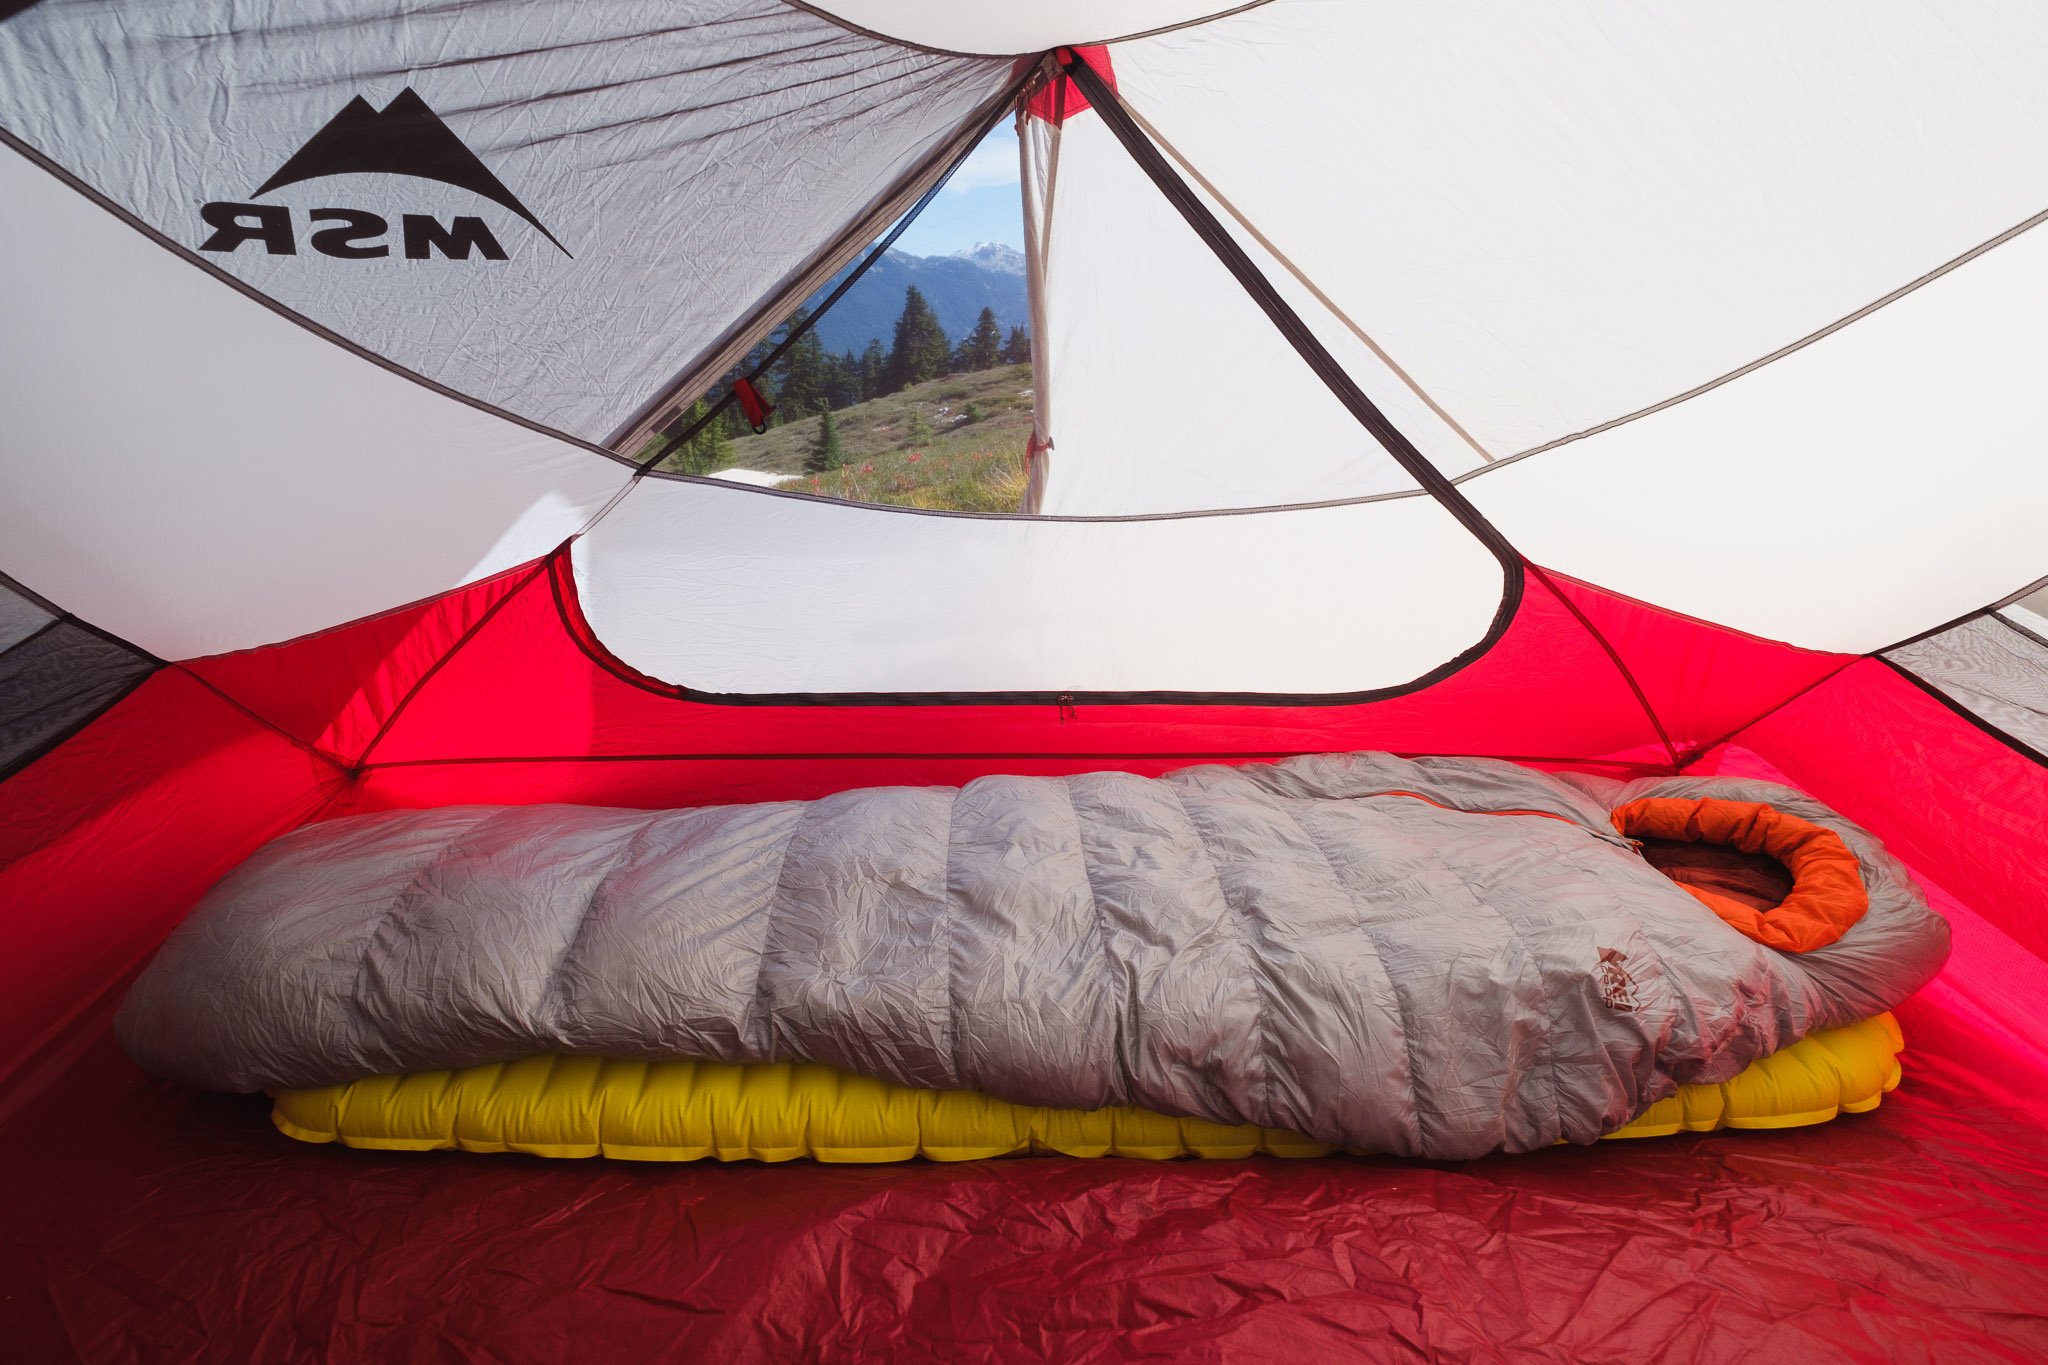
The REI Magma 30 with the Therm-a-Rest NeoAir X Lite sleeping pad.
Sleeping Pad
Ultralight: < 1 lb | Lightweight: 1-2 lbs | Traditional: > 2 lbs
While your sleeping bag insulates you from the outside air, your sleeping pad insulates you from the ground. I would recommend going with the lightest sleeping pad that is comfortable enough for you. Notice that in my alternatives below, the lightweight ones are not necessarily cheaper than the ultralight ones, but some people may find them more comfortable.
Foam vs inflatable. These are the 2 broad categories of sleeping pads. There are some amazing inflatable sleeping pads that are ultralight, insulating, and comfortable, but also expensive. Foam pads can also be ultralight, and are cheap, indestructible, and require no setup. I love using mine to sit on and take a nap on. The downside is they are bulky and must be strapped to the outside of your pack, and some people can’t sleep well on them.

Foam pads are strapped to the outside of the pack. They make a great sit/nap pad during the day.
What I use
Therm-a-Rest NeoAir X Lite Regular Short (11.5 oz, $200, R-value 4.5)
This inflatable pad is my choice for most trips. The Therm-a-Rest X Lite has an unbeatable warmth to weight ratio. A common complaint is that it’s too narrow, but I sleep just fine on it. Plus, there’s a wide size for only 1 lb if the regular is too narrow! I use the Nylofume pack liner trick to inflate my sleeping pad and leave the included pump sack at home.
Alternatives
Lightweight Sleeping Pads
Insulated Klymit Static V (1 lb 8 oz, $90, R-value 4.4) - A budget, heavier inflatable sleeping pad pick.
Sea to Summit Ether Light XT Short Mummy (1 lb, $189, R-value 3.2)
Big Agnes Rapide SL (1 lb 1 oz, $150, R-value 4.2) - A thick and cushy rectangular sleeping pad.
Ultralight Sleeping Pads
Therm-a-Rest Lite SOL Sleeping Pad (14 oz, $58, R-value 2) - A classic choice for an ultralight foam sleeping pad.
Nemo Switchback (14.5 oz, $55, R-value 2) - Basically the same as the Z Lite but I find it folds down more compact.
Nemo Tensor Insulated (13.9 oz, $190, R-value 4.2) - A popular inflatable sleeping pad alternative to the X Lite. Some people find the dimpled surface more comfortable than the horizontal baffles of the X Lite.
Clothing
After the Big 4, clothes are the heaviest chunk of your base weight. Many people can reduce weight here by not packing redundant clothing. Extra clothes are a luxury, not a necessity. For every hiking trip, I only wear one set of hiking clothes and pack one set of sleep clothes. I do not pack more clothing for longer trips, with the exception of spare socks and underwear.
The layering system of base layer, mid layers (fleece and insulated jacket), and shell layer is extremely versatile and is all you need for 3-season backpacking. If you run cold, pack warmer layers rather than more layers. For example, swap out the sun hoodie for a merino wool base layer and bring a heavier-weight fleece or warmer down jacket. This is what I do when I go winter backpacking.
The list below is for 3-season backpacking in alpine and subalpine climates. Daytime temperatures are 50-70F. Night temperatures are above freezing.
Note: The suggested weights are just a guide as weight is dependent on clothing size. I’m basing my suggestions on a women’s size M.
Base Layer
Suggested weight: < 10 oz
I used to wear tank tops and needed to slather a whole bunch of sunscreen on my arms and back, but now I wear a sun hoodie as my base layer. I am obsessed with it. Besides the UV protection it offers, the hood is also surprisingly useful. I wear my hood in the morning when I haven’t gotten around to putting on sunscreen yet, under my hat if my neck feels too hot, when my head is a little cold, and when it’s buggy.
What I use: Patagonia Capilene Cool Daily Hoody (5.2 oz, $59)
The fabric is soft, it looks (reasonably) cute, and the hood is the perfect size.
Alternatives: Mountain Hardwear Crater Lake Sun Hoody (4.2 oz, $65) | REI Sahara Shade Hoodie (6.4 oz, $50)

Wearing the Patagonia Capilene Cool Daily Hoody and Arctery’x Sabria Pants
Mid Layer
Suggested weight: < 10 oz
I wear a fleece during the day while hiking or during breaks. I find that a puffy isn’t good for this purpose as it is too warm and not breathable to be an active layer. Even if it doesn’t get cold enough at night to need the fleece and puffy at the same time, I still like the versatility of having a mid layer.
What I use: Patagonia Micro D 1/4 Zip (6.4 oz, $69)
My mid layer will always be a fleece because it’s lightweight, durable, quick-drying, and moisture-wicking. This Patagonia fleece comes in a lot of colors, and is the perfect snugness to go over my base layer and under my down jacket. I also use the Microdini Half-Zip Fleece Pullover, which is very similar and has a useful zipper chest pocket.
Alternatives: Quechua MH100 Hiking Fleece [budget] (6.7 oz, $20) | Patagonia R1 Fleece Pullover (9.7 oz, $139)
Insulated Layer
Suggested weight: < 1 lb
An insulated layer is used at camp in the evenings and mornings when you’re not moving. I use a down jacket. Down has the best weight to warmth ratio but is more expensive. Insulated synthetic jackets like the Arctery’x Proton LT jacket prioritize breathability and have better performance than down as an active layer. I’ve seen people skip the mid layer and just use an insulated synthetic jacket as an active layer too.
Hood or no hood? I find a hood to be warmer and more weight-efficient, since I would want to bring a beanie to use with a non-hooded jacket.
What I use: Montbell Superior Down Parka (7.3 oz, $249)
This Montbell down jacket is on the lightweight side but I find it warm enough for me. I like the look of the diagonal stitching compared to the horizontal baffles found on every other down jacket (I know, this is silly).
Alternatives: Decathlon Forclaz MT100 [budget] (9.7 oz, $100) | Mountain Hardwear Ghost Whisperer (7.8 oz, $360) | Patagonia Down Sweater Hoody (12.1 oz, $329) | Arctery’x Cerium Hoody (10.2 oz, $400) | EE Torrid Jacket (8.3 oz, $274, synthetic)

Wearing the Montbell Superior Down Parka
Shell
Suggested weight: < 1 lb
A weatherproof shell protects you from precipitation and wind. If the forecast suggests wet, cold, or windy weather, then I prefer a jacket. In nice weather, I might only bring a lightweight poncho just in case.
The 2-layer Gore-Tex Montbell Versalite is a very popular ultralight rain jacket. Pit-zips increase breathability and prevent overheating. I personally use a 3-layer Gore-Tex shell, the Arctery’x Beta LT, that I also use for skiing and winter backpacking. It’s kind of overkill for 3-season backpacking, but I don’t have a separate rain jacket.
What I use: A generic poncho (6.3 oz, $10?) for when I don’t expect rain. Otherwise, the Arctery’x Beta LT (12.3 oz, $450).
Alternatives: poncho (budget) | Frog Toggs UL2 (budget, 5.5 oz, $20) | Montbell Versalite (5.8 oz, $249)

Bottoms
Suggested weight: < 14 oz
I used to hike in shorts, then leggings, and have since graduated to hiking pants. I like hiking pants for their functional pockets and protection from sun, overgrown vegetation, scrambling over logs, mosquitoes, etc. Pants that use a nylon/elastane blend have a good balance of durability, stretch, and weight.
Shorts have their time and place too, and I know some people prefer shorts exclusively. I like to bring shorts if hiking in warm temperatures (like on the Kalalau Trail in Kauai) or if it’s going to rain (I prefer my legs getting wet over wet hiking pants sticking to my legs).
Tip: if you’re buying pants online, the weight gives you an idea of how thick the pants are. I like pants in the 6-8 oz range (women’s, size S) for warm weather hiking.
What I use: Arctery’x Sabria Pants (discontinued), Arctery’x Alroy Shorts (discontinued)
The Sabria pants are full-length on me (I’m 5’3”), very thin and breathable, and slim fitting. The Alroy shots are quick-drying and lightweight, but also have a bit of extra length to them which I like for hiking.
Alternatives: Mountain Hardwear Dynama 2 Ankle (7.1 oz, $85) | Arctery'x Gamma Pant (10.4 oz, $180)
Sleep Clothes
Suggested weight: < 1 lb total
This is usually one top and one bottom that you only wear to sleep. This helps keep your sleeping bag clean, and sleep clothes double as spare clothing in case you get wet. I honestly just sleep in my sun hoodie most of the time, but I do bring sleep pants because my hiking pants are more likely to get dusty and dirty.
What I use: Lululemon Align leggings (5.3 oz), Patagonia Micro D Fleece Joggers for winter (8.4 oz, $99)
Hiking Socks
Merino wool is sweat-wicking and odor-resistant, which makes it an excellent material for hiking socks. I usually hike in the same pair of socks for multiple days and change into my spare pair to sleep.
What I use: Darn Tough Micro Crew Socks (2.2 oz, $20-25)
These socks are merino wool, cushioned in all the right places, come in fun patterns, and have a lifetime warranty. The midweight socks are thicker and have more cushioning. The lightweight socks are good for warmer weather.

Hiking Gear
These items are usually worn weight since I use them while hiking. However, worn weight is still important because it’s still weight that your body carries, just not in your pack.
Shoes
What I use: Salomon X Ultra 3 Gore-Tex (1 lb 7.2 oz, $160) (Ultra 4s are the current model)
I love these hiking shoes so much I bought them again when my first pair wore out after 800 miles. They’re a Goldilocks shoe between trail-runners and hiking boots. Compared to trail runners, the Ultra 3s have more rigid uppers and are more supportive and protective. They are low cut and lightweight compared to boots. The quick-lace system on these makes putting on and taking off my shoes very fast. It reduces bulk, makes the shoes easy to strap to my pack for travel, and lets me wear my shoes “untied” at camp, since I don’t usually bring separate camp shoes.

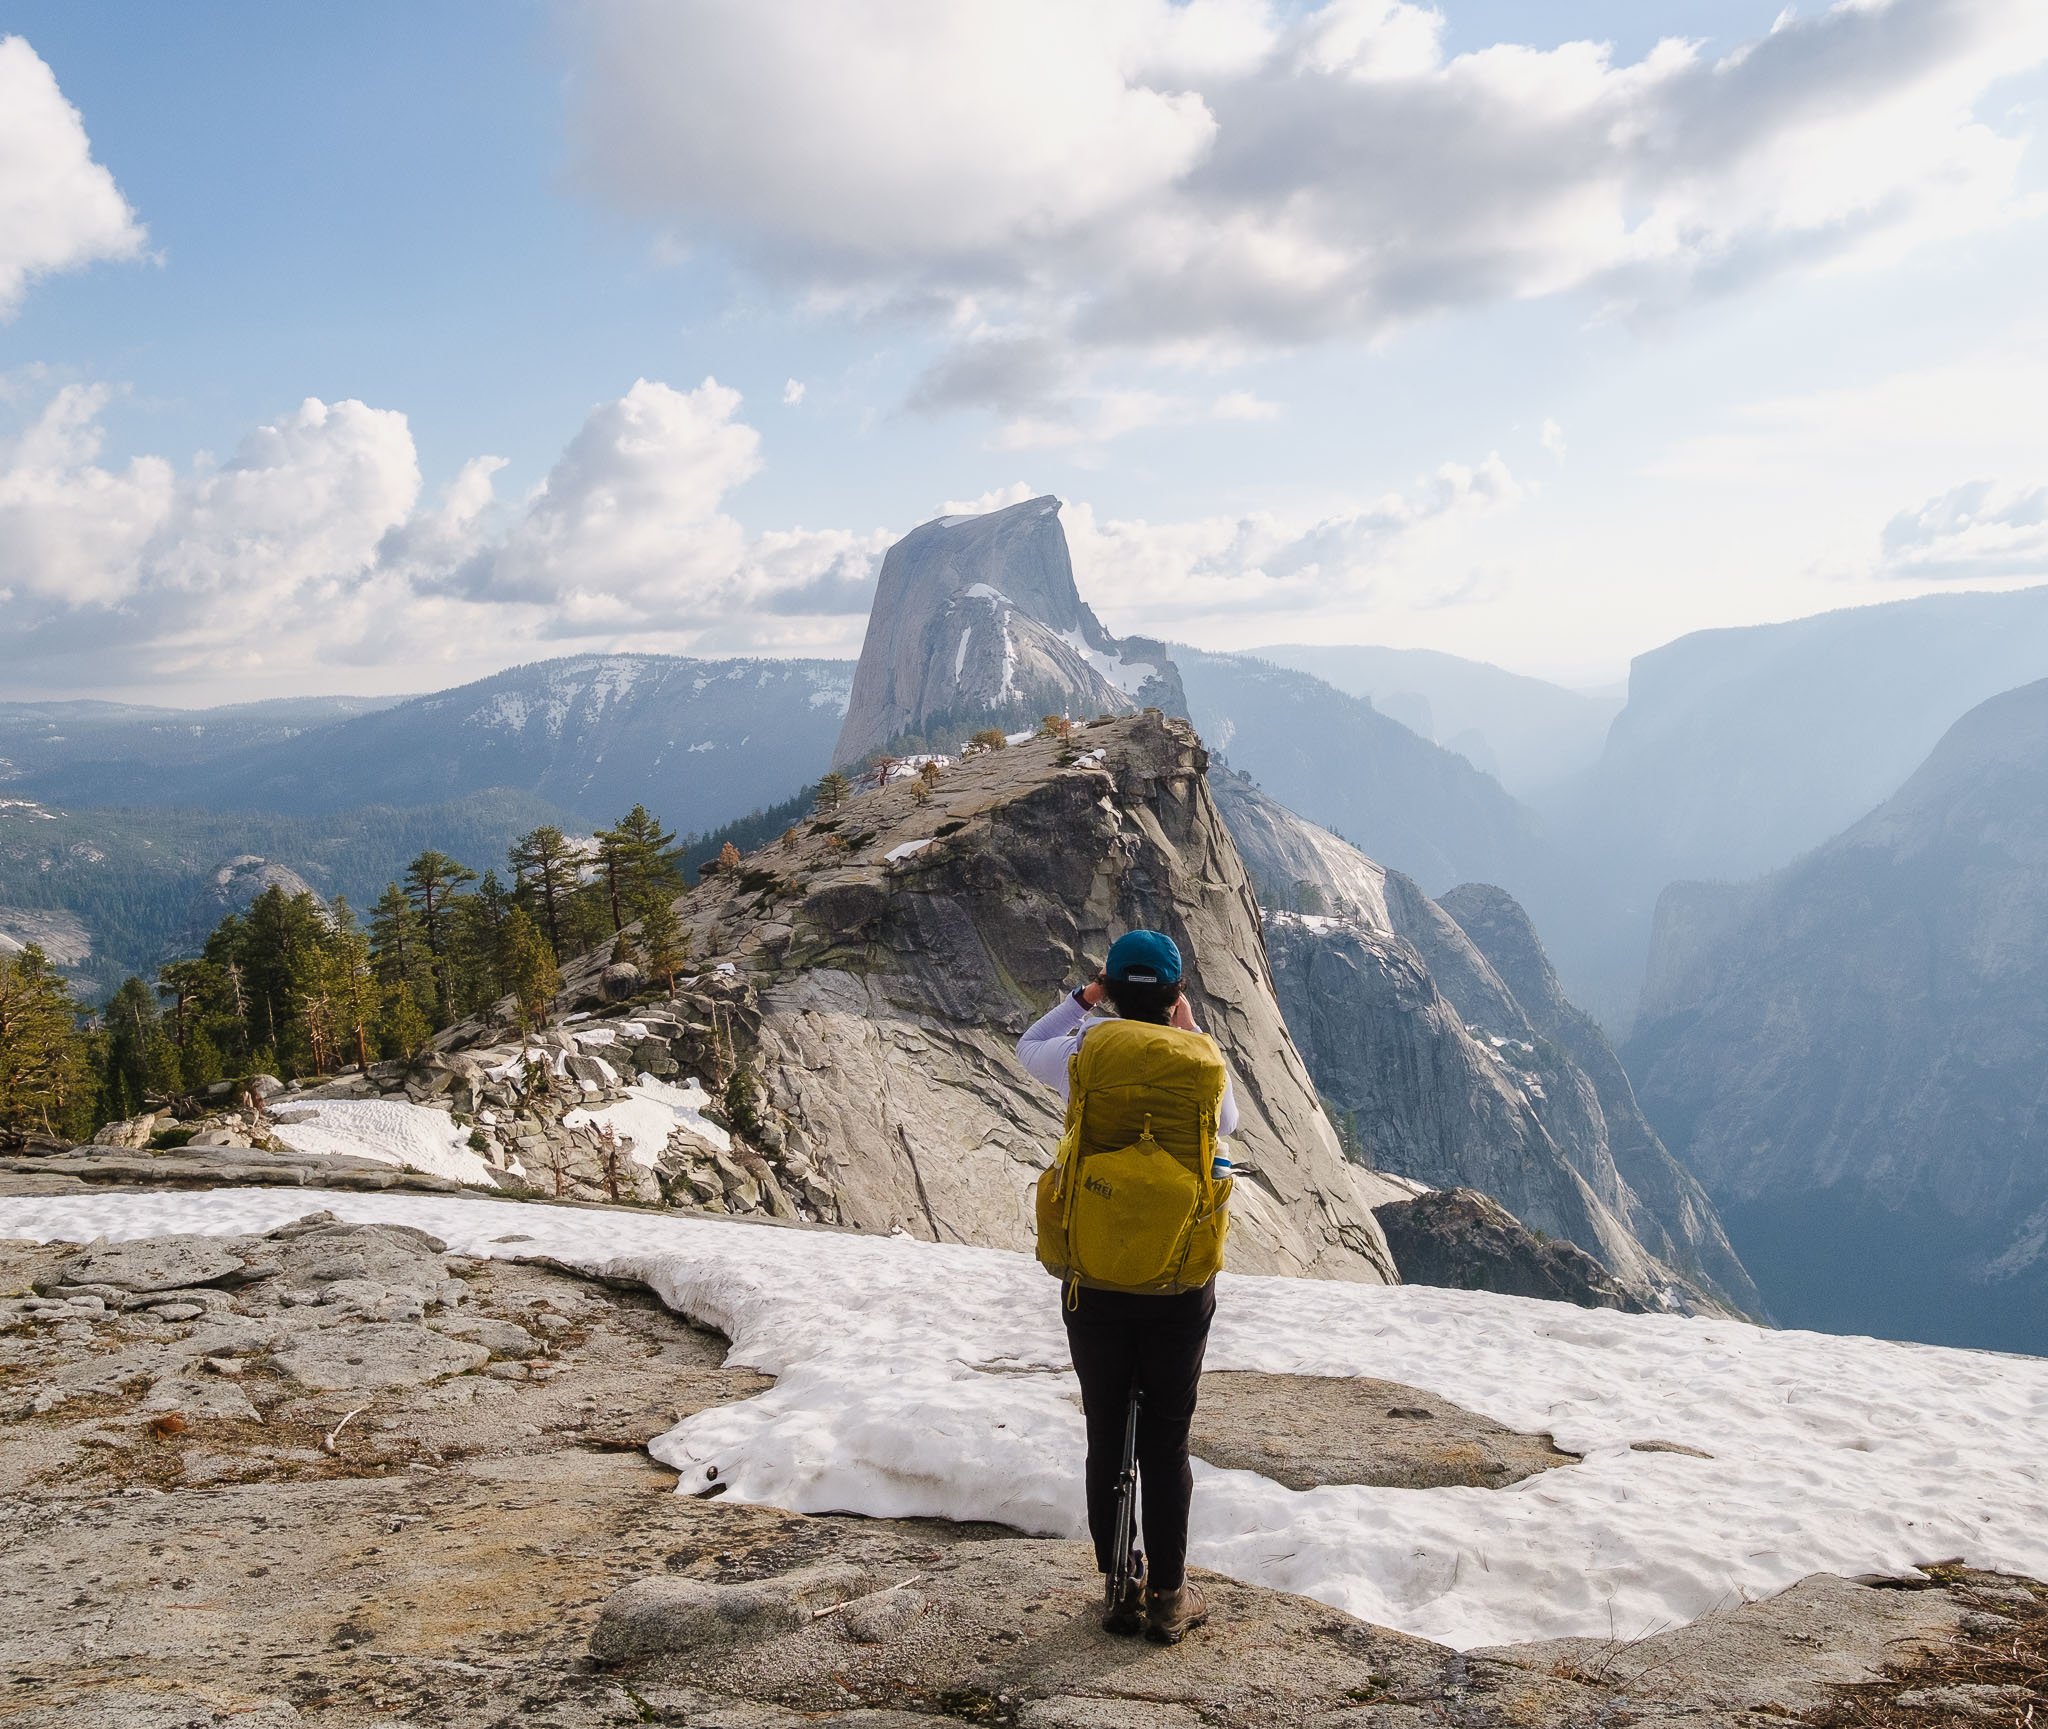
Wearing the Salomon X Ultra 3 Gore-Tex on top of Half Dome.
Hiking Sticks
Hiking sticks are a requirement for me. They help with balance and make my arms do some work so that hiking becomes more of a full-body activity.
What I use: Cascade Mountain Tech Carbon Fiber Poles (15.6 oz, $55)
These hiking sticks are lighter than more expensive poles at REI and have all the features I need. They have moisture-absorbing cork grips and an easy-to-use locking mechanism. They also come with all the tips that you will ever need, and a carrying case. I’ve checked my sticks in just the carrying case since hiking sticks aren’t allowed in carry-on luggage, and they survived just fine.
Alternatives: Black Diamond Distance Carbon FLZ Trekking Poles (11.6 oz, $210) Several of my friends use these. They are much more compact and even lighter than the Cascade Mountain Tech ones, but definitely a splurge.

Using hiking sticks on the Kalalau Trail in Kauai
Sunglasses
This is a requirement when hiking over snow on a sunny day, and also nice to have in general when hiking above treeline.
What I use: A cheap pair because I lose them all the time (0.9 oz, $15?)
Hat
What I use: Tilley LTM6 Airflo Broad Brim Hat (3.5 oz, $99) REI Co-Op On the Trail Cap ($33)
This hat is so expensive, but Tilley offers a lifetime warranty on it so I intend for it to be the last hat I ever buy. I like the style, and the cord mechanism works really well and is comfortable even when pulled tight. I’m also obsessed with the REI Co-Op On the Trail Cap because it’s so lightweight, packable, and comfortable. The only downside is caps aren’t great in the wind since they have a high chance of flying off.
Gaiters
What I use: Trail running gaiters (1.3 oz, $20)
These unisex trail running style gaiters create a seal around my shoe using a hook and a velcro sticker. Nothing gets in my shoes and I basically don’t notice they are there. I love the ones from UltraGam on Etsy because her prints are so cute, and the fit is great! They are very similar to Dirty Girl Gaiters which are another popular choice.

Trail running gaiters from UltraGam on Etsy
Cooking Gear
An ultralight cookset is a stove, fuel canister, pot, and utensil at MOST. Some ultralighters don’t even bring a cookset and only eat cold/ready-to-eat food. I think a cookset is always worth the weight to have hot food, and it’s even less heavy if you share the weight with another person. Light cookwear is inexpensive and can save you a lot of weight.
Stove
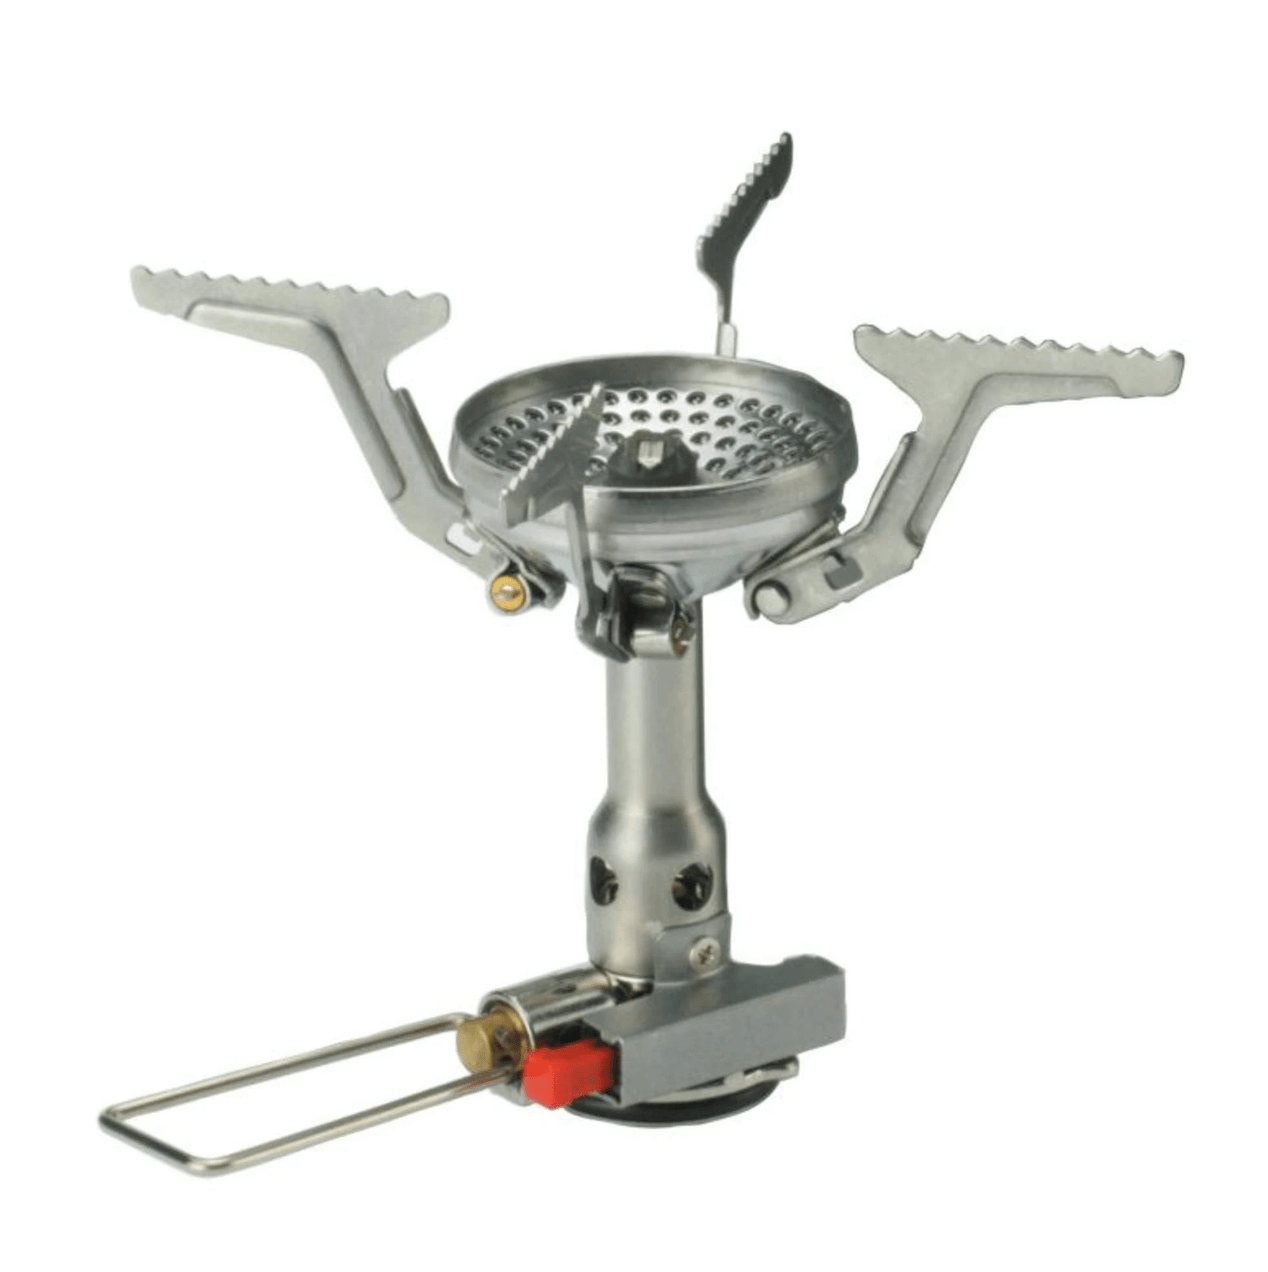
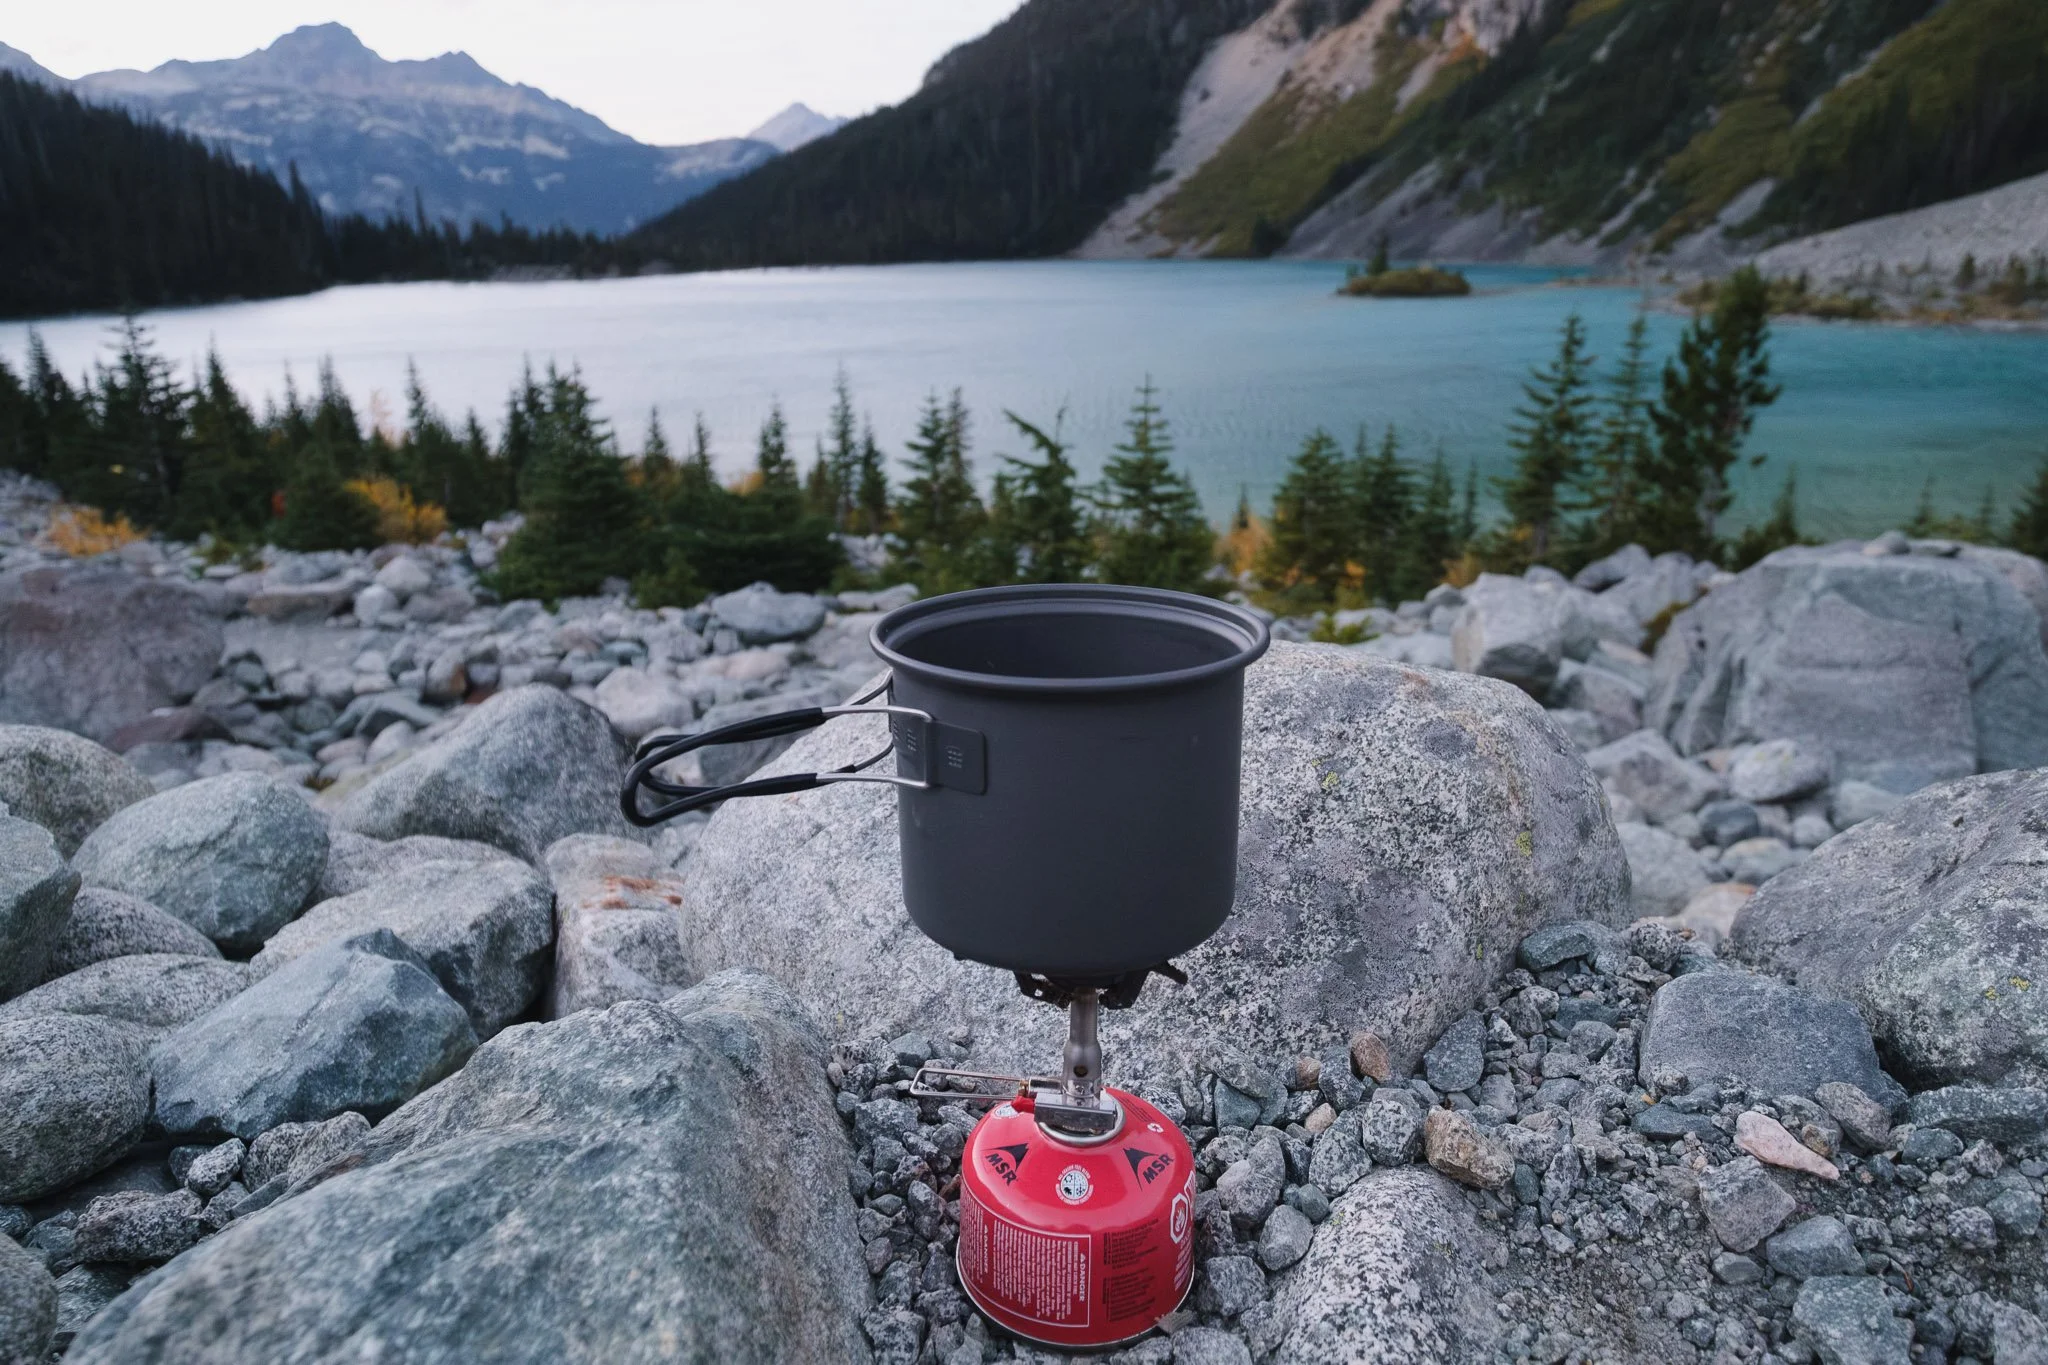
What I use: Soto Amicus Stove (2.8 oz, $50) including pots or by itself
This stove is part of the Soto Amicus cookset combo. It’s similar to the MSR Pocket Rocket. I recommend these stoves over the integrated stove/pot systems like the JetBoil MiniMo or MSR WindBurner. They might boil water much faster and perform better in wind, but that is not worth the much higher cost and extra weight. If your stove does not have an igniter, bring a lighter like the 0.4 oz Bic Mini Lighter.
Alternatives: MSR Pocket Rocket (2.6 oz, $60)
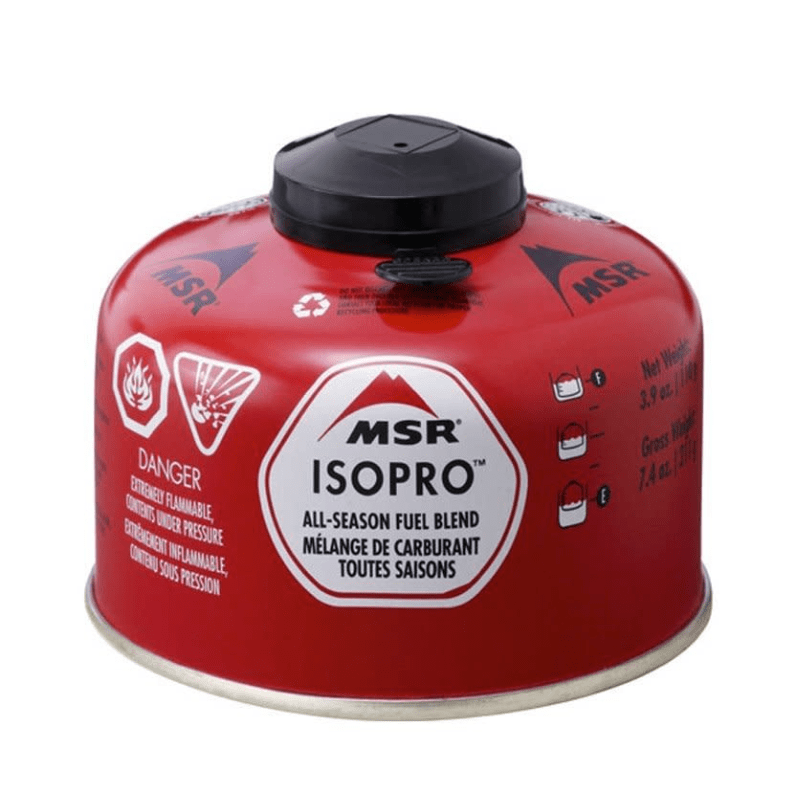
Fuel Canister
No way around this one if you’re using a stove. The smaller 3.9 oz size canisters are plenty for most trips. It’s not necessary to carry the extra weight of the 8 oz ones.
What I use: MSR IsoPro Fuel Canister - 3.9 oz. / 110g (7.4 oz, $6)
Pot
What I use: Soto Amicus Pot (4.8 oz, $50) (part of a kit)
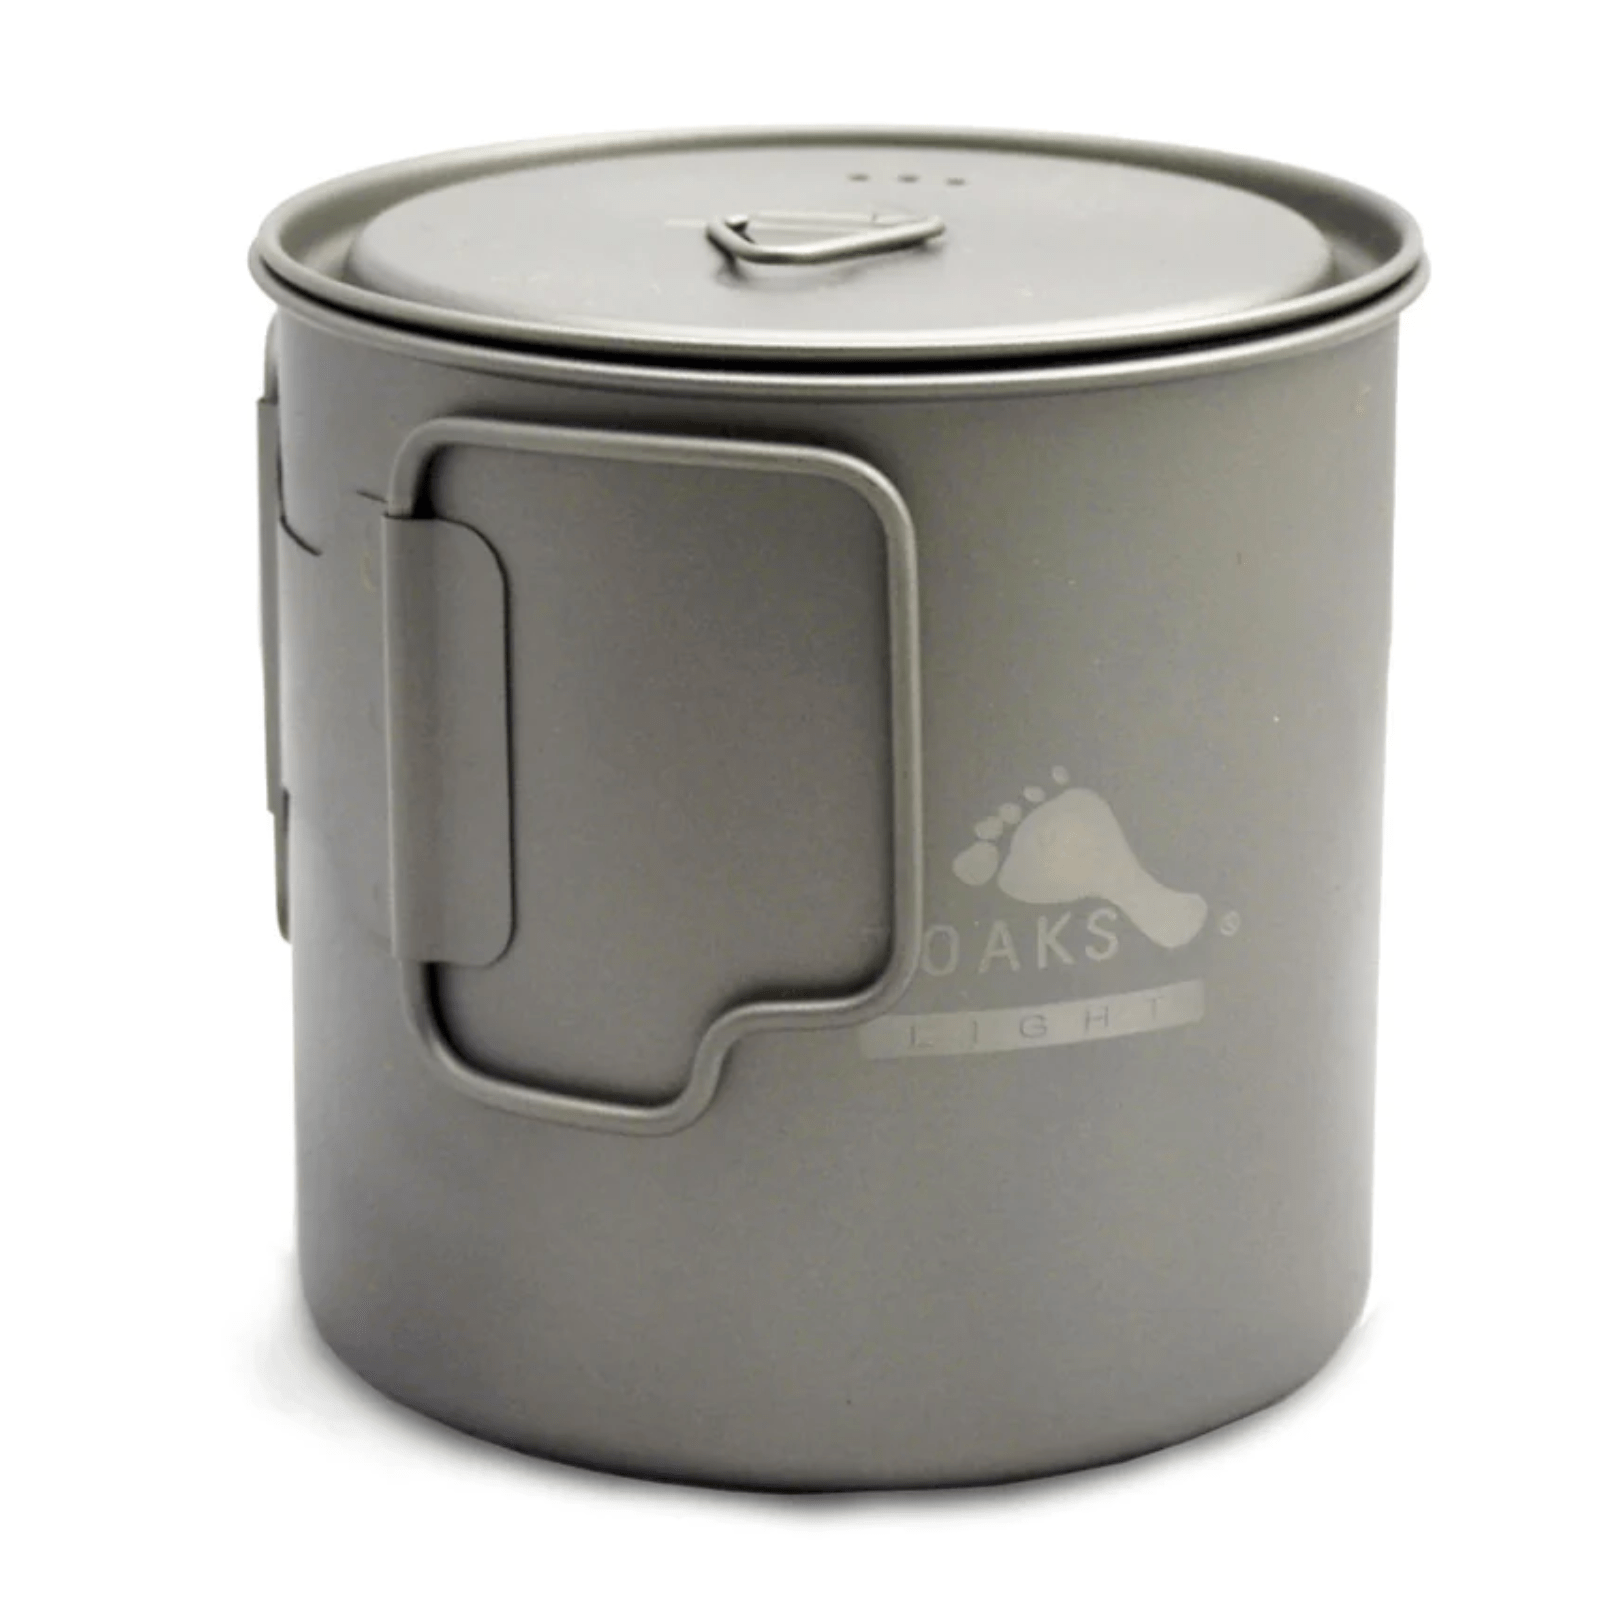
I bring the 1L pot in the Soto Amicus cookset combo and leave the 500 mL pot at home. The 1L is a good size if you’re doing any cooking. If you’re only boiling water, you could probably get away with a pot as small as 650 mL. The ultralight community also swears by TOAKS, which offers titanium pots in many sizes.
Alternatives: TOAKS Titanium 750 mL Pot (3.6 oz, $26) | TOAKS Titanium 650 mL Pot (2.8 oz, $37)
Utensil
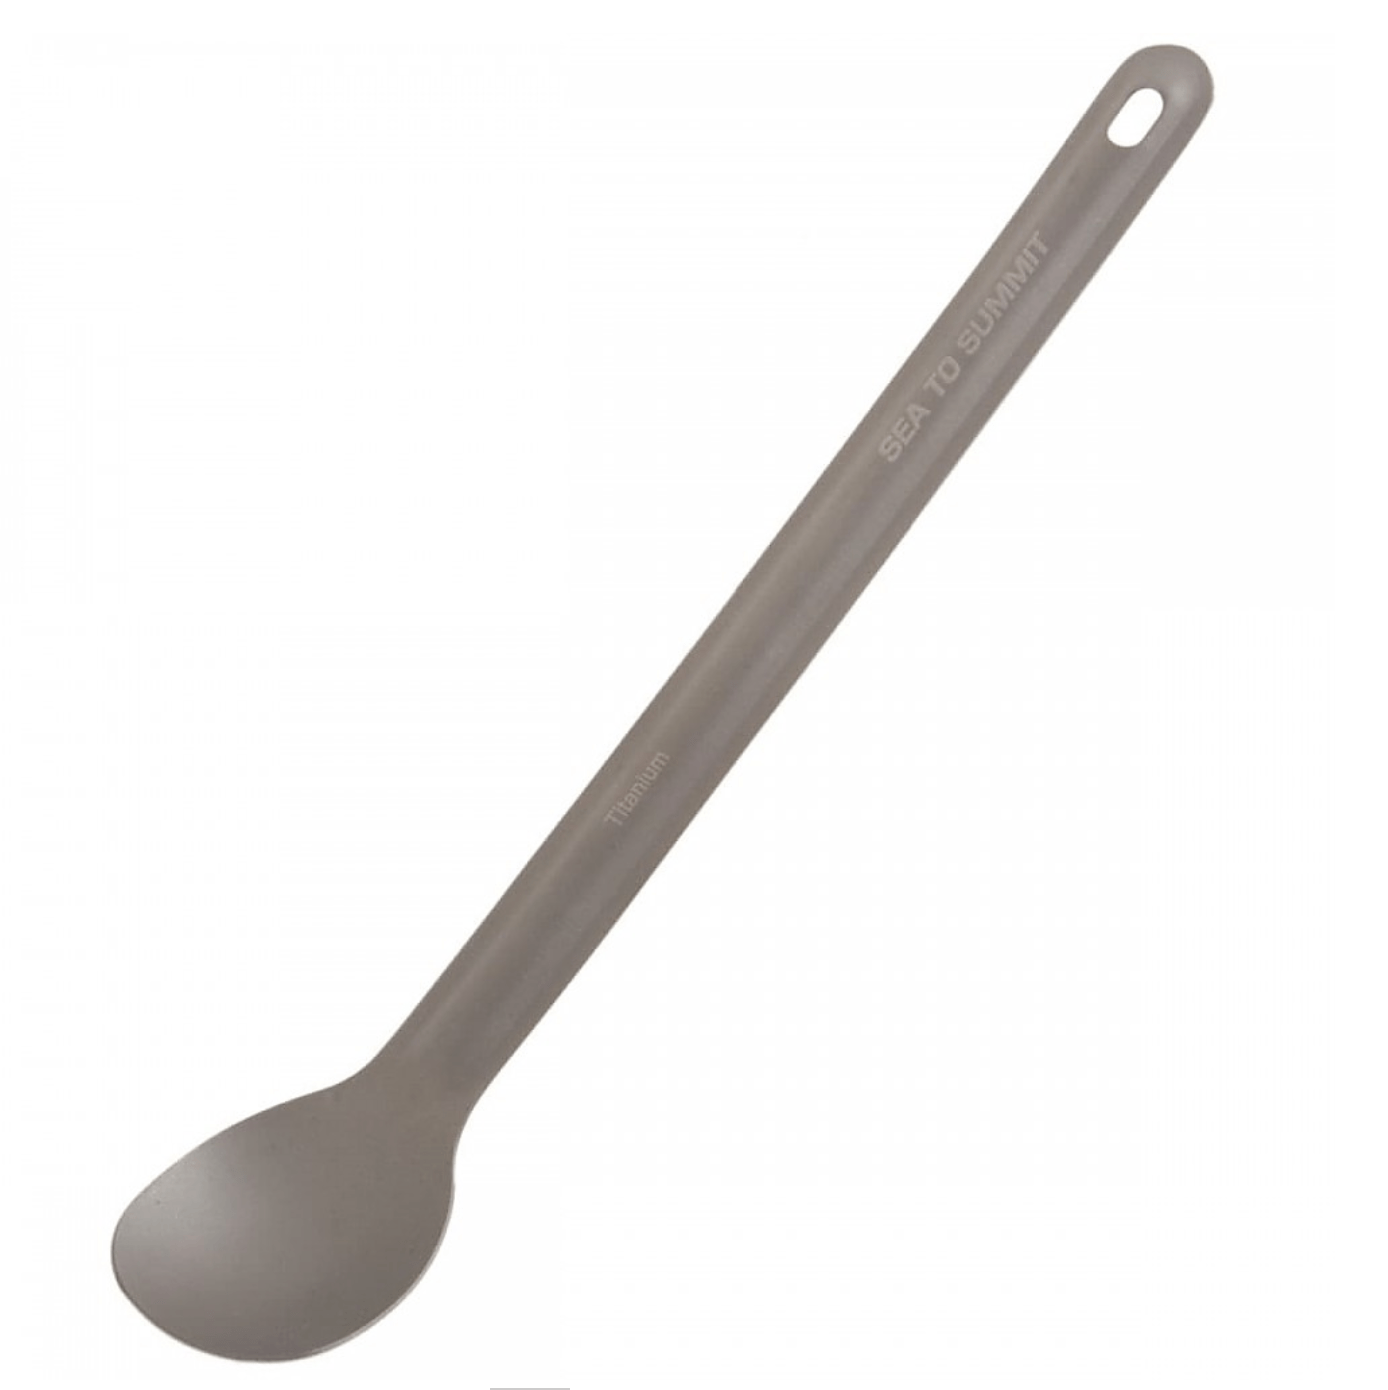
What I use: Sea to Summit Alpha Light Long Handled Spoon (0.4 oz, $12)
I definitely thought a dedicated backpacking spoon was so not necessary until I tried it. The long handle makes eating out of the freeze-dried meal bags much easier, and the angle of the spoon is delightfully ergnomic. It’s also my cooking utensil since metal is heat-resistant.
Alternatives: lightweight spoons you might already have at home like a wooden, bamboo, or plastic spoon.
Mug
What I use: Sea to Summit Cool Grip X-Tumbler (2.4 oz, $15)
I consider this a luxury item, but a mug lets me drink coffee or tea with my meal if I’m eating out of my pot. This silicone mug collapses flat and is not hot to touch even with boiling liquids. There are also measurements on the inside of the mug so I can add the right amount of water to my freeze-dried backpacking meals.
The Soto Amicus stove and pot
Backcountry Bathroom
Trowel
A must if the trail does not have pit toilets. Please Leave No Trace and dig a 6-8 inch cathole for your poop at least 200 feet from water, camp, and trails. A trowel weighs next to nothing, and digging a cathole is very hard to do properly without one.
What I use: TheTentLab The Deuce #2 UL Backcountry Trowel (0.6 oz, $16)
Pee Funnel
What I use: pStyle (1.6 oz, $12)
Ladies, this little plastic device is a game-changer. Peeing in the outdoors as a woman is not great if your legs are sore, there are mosquitoes, or you can’t go off-trail far enough to find privacy. With this pee funnel, you can just unzip your pants, or pull down the front of your waistband, and go. Afterwards, I rinse the funnel with a small amount of water, and then store it in a cloth drawstring that goes on the outside of my pack. I also don’t use toilet paper when I use this because the back edge of the pStyle works as a squeegee if you know what I mean.
Toilet Paper
Some people go TP-less by using a backcountry bidet, but I personally have not tried this yet.
What I use: A partial roll of toilet paper wrapped in a produce bag (2 oz)
Toiletries
I pack toiletries in a quart-sized Ziploc freezer bag along with my most commonly used first-aid like Band-Aids and pills. Ditty bags like these Gossamer Gear ones will last longer, but even a Ziploc bag can be reused many times. Hand sanitizer, sunscreen, and lip balm go in external backpack pockets for easy access.
I would also bring the smallest, travel-sized versions of toiletries you can find, or repackage them into mini containers from Litesmith.

Total: 6 oz
Toothpaste - The smallest one you can find. Or toothpaste tablets, but those are bulkier than just a small toothpaste.
Toothbrush - A toothbrush with a half-size handle is compact and lighter. Search travel-sized bamboo toothbrush!
Floss - I’m breaking my own rule here, but I just bring a normal-sized floss since it’s really small and light already.
Sea to Summit Soap leaves - You must use soap 200+ feet from a water source to follow Leave No Trace principles. Soap is strictly better than hand sanitizer at removing dirt and bacteria. I also like it because it’s gentler on my hands when they are already dry from exposure to the elements. For women: I use a small amount of soap to wash down there. It helps so much if I’m feeling especially gross, like when I’m on my period. I find that less than half of 1 soap leaf is enough for 1 hand wash. To rinse my hands after soaping up, I hold my water filter in between my legs and it provides a stream of water.
Hand sanitizer - I have a hand sanitizer keychain on my backpack (mine is from Daiso). Hand sanitizer is for convenience, but I use soap after the bathroom.
Sunscreen - I have a small sunscreen for my face and neck. The rest of my body is protected by long clothing.
Panty liners - I use one a day when I’m not on my period. Changing into a clean one at the end of the day almost feels like changing into fresh underwear.
Lip balm
Daily contacts
Water
I usually backpack in areas with lots of water, so I have a carrying capacity of 2L of water: a 1L Smartwater bottle, and my 1L BeFree water filter.
Water Filter
What I use: Katadyn BeFree 1.0L Water Filter (2.3 oz, $45)
This water filter is incredibly simple to use. Just fill the flexible flask with water and squeeze. Because the filter nests inside the flask and the flask itself is flexible, it is very compact compared to other filters where the filter screws on to the outside of the water reservoir (Sawyer) or gravity filters where there’s multiple parts (Platypus GravityWorks).

Water Bottle
What I use: 1L Smartwater bottle (or any similarly-shaped bottle) (1.5 oz, $1-3)
Smartwater bottles have a cult following among ultralight backpackers. They are tall and slim which makes them easy to fit in my backpack side pocket and easy to grab with one hand while wearing my backpack. They’re also extremely durable and very much reusable.
The only time I will carry a Nalgene, which weighs 6.5 oz, is if I’m winter backpacking and want the option of putting a boiling water-filled Nalgene in my sleeping bag to keep me warm at night.
Electronics
Phone
Who doesn’t bring a phone backpacking these days? I use mine for photos and navigation.
What I use: iPhone Mini 13 (4.8 oz)
Power Bank
I don’t bring a power bank on overnight trips, but for anything longer I like to have one. It charges my phone, Garmin watch, camera, and headlamp. A 10000 mAh power bank tops up my phone for multiple days. Don’t bring a larger power bank than you need!
What I use: Anker PowerCore 10000mAh Portable Charger (6.2 oz, $26)
Alternatives: Nitecore NB1000 (5.3 oz, $60)
Headlamp
What I use: Nitecore NU25 400 UL (1.6 oz, $37)
This headlamp used to only be sold with a bulky headband, so ultralight backpackers would DIY a shock cord headband replacement. Nitecore eventually started offering a shock cord version on their website. The shock cord headband makes this headlamp so compact and easy to fit into any pocket. The light is USB rechargeable, has 3 brightness settings and a red light, lasts plenty long, and is so small and light. No alternatives to suggest because it’s got no competition.

Miscellaneous
Pack Liner
A pack liner is just a giant waterproof bag that goes inside your pack. Putting important things like your sleeping bag and extra clothes inside a pack liner is extra insurance that nothing gets wet. Even with waterproof fabrics or a rain cover, water can still seep in through the stitching of a pack. Using a pack liner is cheaper and lighter than using multiple individual dry sacks. My pack liner also doubles as a pump sack for my inflatable sleeping pad (I talk more about this in the Things I Don’t Bring section).
What I use: Nylofume Pack Liner (0.9 oz, $2.50)
Food Bag
I use an ultralight dry bag to hold my food. Of course you can also use a Ziploc bag, but in bear country where proper food storage requires hanging your food, a bag with a handle is needed.
What I use: Osprey Ultralight Dry Sack (1.6 oz, $24)
The Osprey dry sacks come in sizes from 3L to 35L. I use the 12L size for all my backpacking trips.
First Aid Kit
I use a premade first aid kit and removed/replaced things to make it more useful to me. I’m no expert in this area, but at a minimum I like to have: assorted bandages, ibuprofen, antihistamines, and Leukotape for blister prevention.
What I use: Adventure Medical Kits Ultralight/Watertight .5 Medical Kit (2.6 oz, $22.45)
Head Net
A head net weighs basically nothing and is priceless on trips that are buggy. No more worrying about accidentally breathing in bugs or getting bites on your face. I also use mine to secure my pillow to my sleeping pad, so it’s dual purpose!
What I use: Coghlan's No See Um Headnet (0.6 oz, $8)
Glasses + Glasses Case
I wear contacts during the day, but I always bring my glasses as backup. Glasses are pretty lightweight but a lot of glasses cases are not. I still want a hard shell case, so I use a zippered glasses case which tends to be lighter than traditional cases. Another option is to repurpose plastic food containers like this Crystal Light glasses case hack (FarOutGuides writes about this).
What I use: Glasses (0.7 oz), glasses case (1.6 oz) (similar one)
Things I Don't Bring (Or What to Bring Instead)
Pear Lake, Sequoia National Park, California
This section is last but certainly not least, as it can make a big difference in weight at no cost.
I know what works for me will not work for everyone. And some of these tactics sound extra, but such is the nature of being an ultralight backpacker. Ounces here and there add up to pounds. Some of these may be luxury items that will never be worth giving up for you, but at least give it a try at some point and maybe you’ll realize there are things you bring here that you can get by without.
Camp shoes - I do not bring camp shoes the vast majority of the time. Camp shoes are usually in the range of 10 oz - 1 lb, so this is a significant weight reduction. The exception is if I’m hiking in cold, wet weather where I expect my shoes to get wet. I spend most of the day on the trail rather than at camp, so not bringing camp shoes isn’t a huge sacrifice for me. If you must bring camp shoes, consider just bringing a cheap pair of flip flops that weighs a few ounces.
Stuff sacks/packing cubes/cases - Instead of bringing multiple stuff sacks that weigh 1-3 oz each, just use a single pack liner. It also makes packing and unpacking simpler when there’s fewer things to keep track of. Common examples:
Sleeping bag: I put my pack liner into my pack first, then my sleeping bag goes at the bottom. Without a stuff sack, my sleeping bag can conform to whatever shape I need it to be, and only gets compressed as much as it needs to be.
Sleeping pad: I roughly fold my deflated sleeping pad up and pack it flat against my pack. It’s easier than having to get all the air out of it in order to fit it neatly into a stuff sack!
Sleep/spare clothes: they go in my sleeping bag. I don’t find packing cubes necessary since everything gets dumped out of my pack at once when I’m setting up camp anyway.

Dishes - If you are eating freeze-dried meals, you really don’t need dishes at all. If I’m cooking, I eat directly out of my pot. If you need a dish because you’re sharing food, then consider these ultralight, collapsible dishes like these Fozzils Snapfold ones.
Water bladder - Bladders are expensive, heavy, and inconvenient: they make it hard to keep track of how much water you have left, are difficult to refill on trail, are a hassle to use at camp; the list of negatives goes on. If you prefer drinking from a straw, consider using this bottle straw adapter for the best of both worlds.
Reusable water bottles/Nalgenes - Reusable water bottles are great for everyday use, but I don’t bring them backpacking. They are much heavier than a Smartwater bottle or any “single-use” plastic bottle, especially when you are bringing multiple bottles. I reuse my Smartwater bottles on multiple trips so it is not as wasteful as it seems.
Extra water - Water is easily the heaviest thing in your pack at 2.2 lbs per liter. Carry less water by being aware of upcoming water sources and drinking a lot of water while at a water source. I usually only carry between half a liter and 1 liter of water at a time when water is plentiful. A related note about bladders: bladders encourage people to carry way more water than they need since they’re hard to refill while on trail. Instead, use a water bottle that can be easily topped up throughout the day.
Sleeping pad pump sack - Instead of bringing a pump bag for my XLite, I use my pack liner. This is what I’m doing in the photo below, but the YouTube video will explain it better.
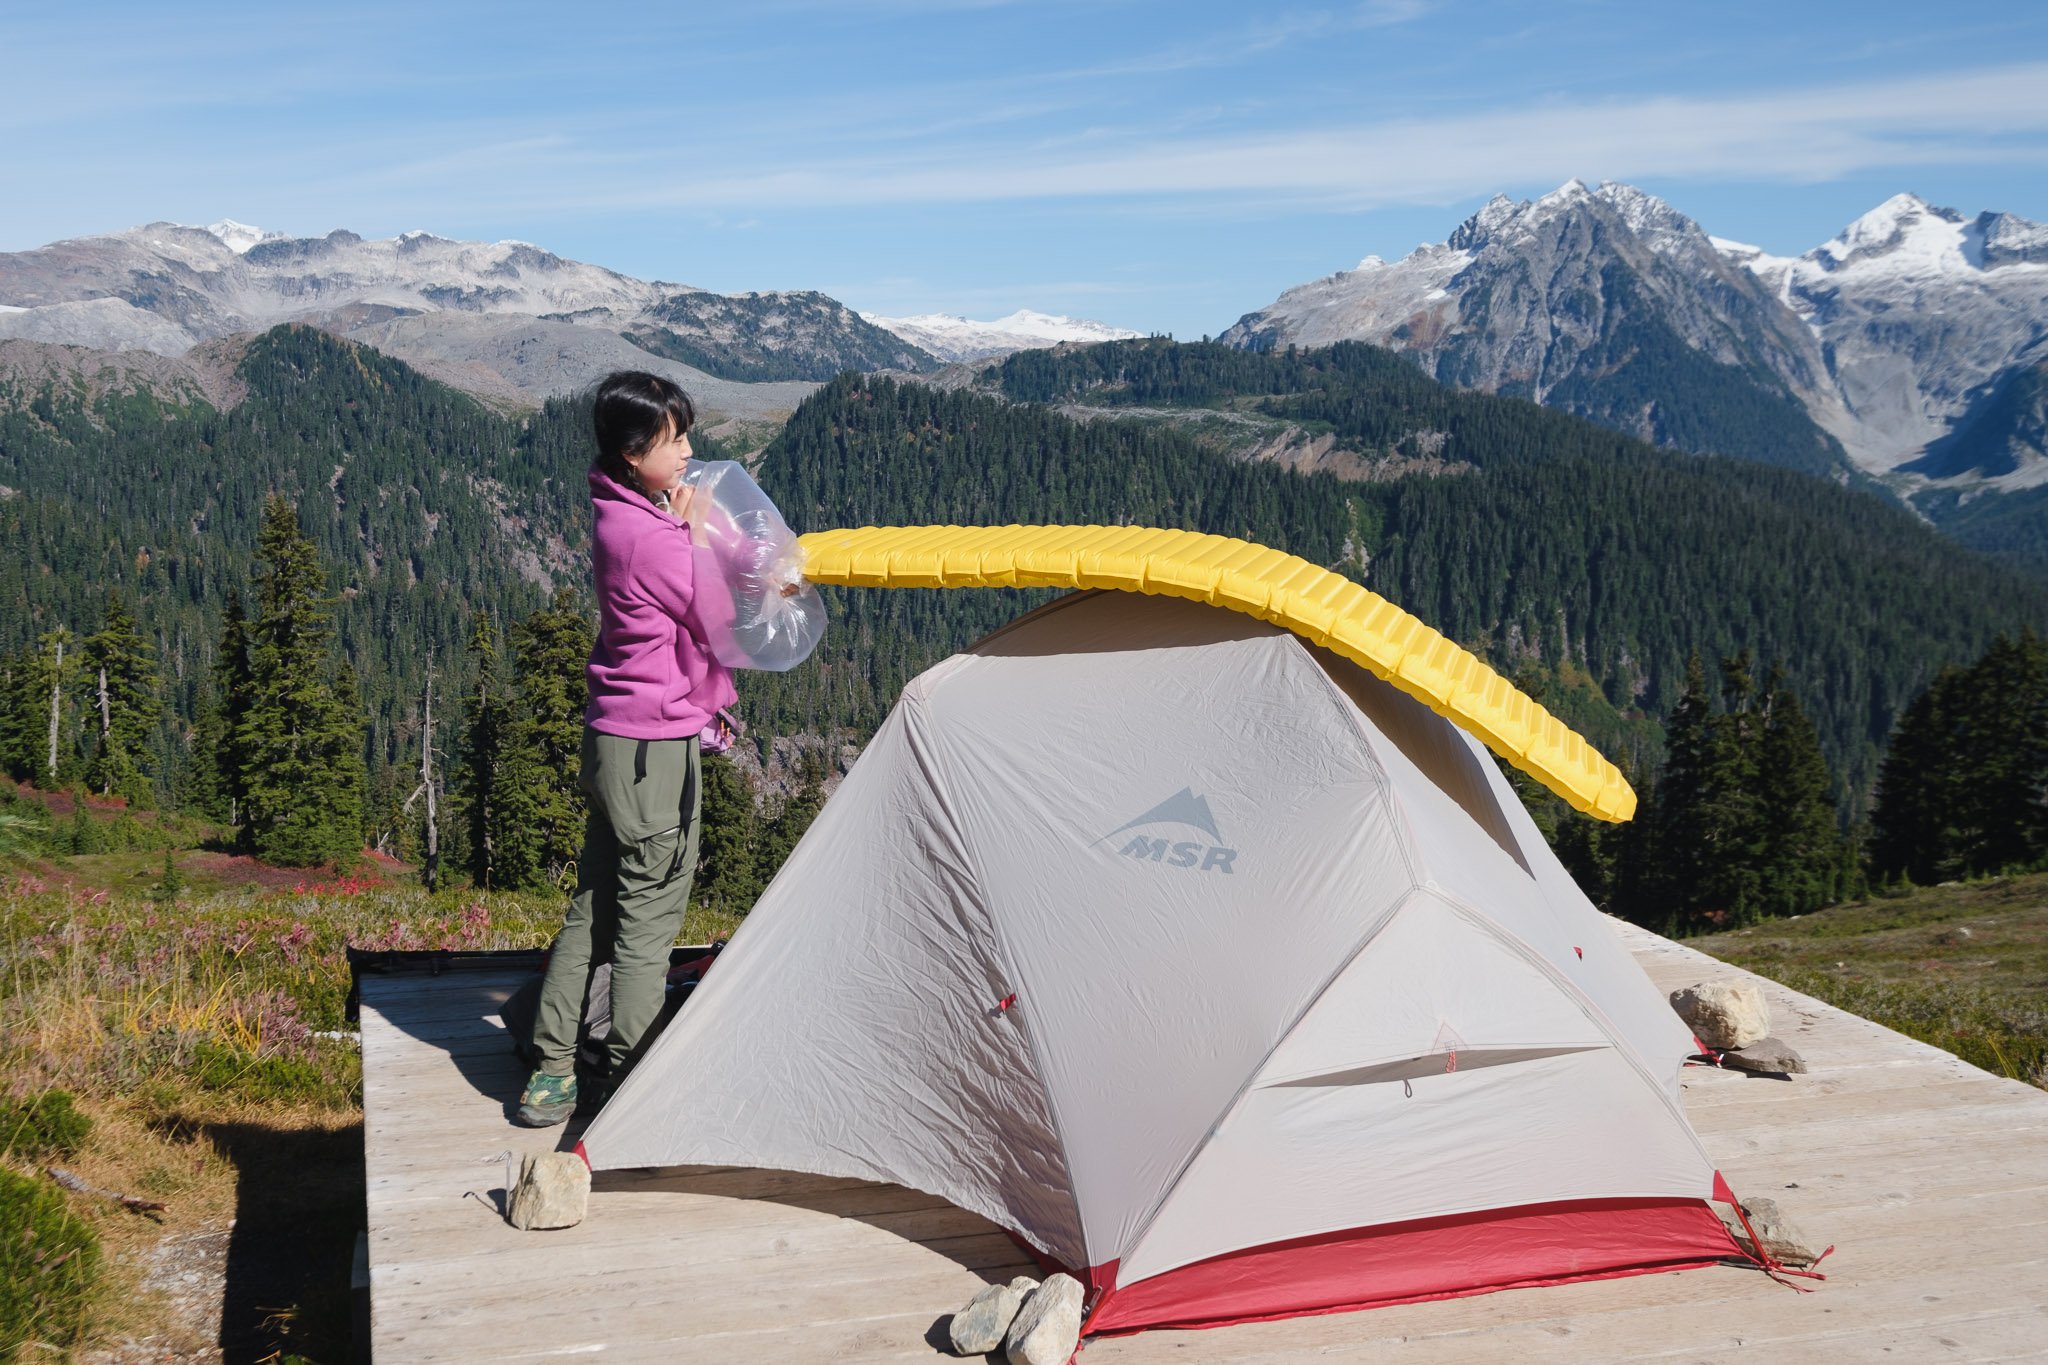
Using my pack liner instead of a sleeping pad pump sack to blow up my sleeping pad.
Sleeping bag liner - If you’re using a sleeping liner to keep you sleeping bag clean, wearing sleep clothes basically does the same thing. Sleep clothes also double as spare clothes, which you probably already bring.
Pillow - I use a folded up down jacket. To keep it in place, I slide my bug head net on to my sleeping pad like a sleeve, and tuck the down jacket pillow under the net. Down is soft and compresses nicely, and I find it even more comfortable than the inflatable backpacking pillow I tried. Adding more clothes underneath the down jacket gives the pillow extra height if desired. Pillows are a common luxury item; definitely don’t give up a pillow if you can’t get good sleep without one.
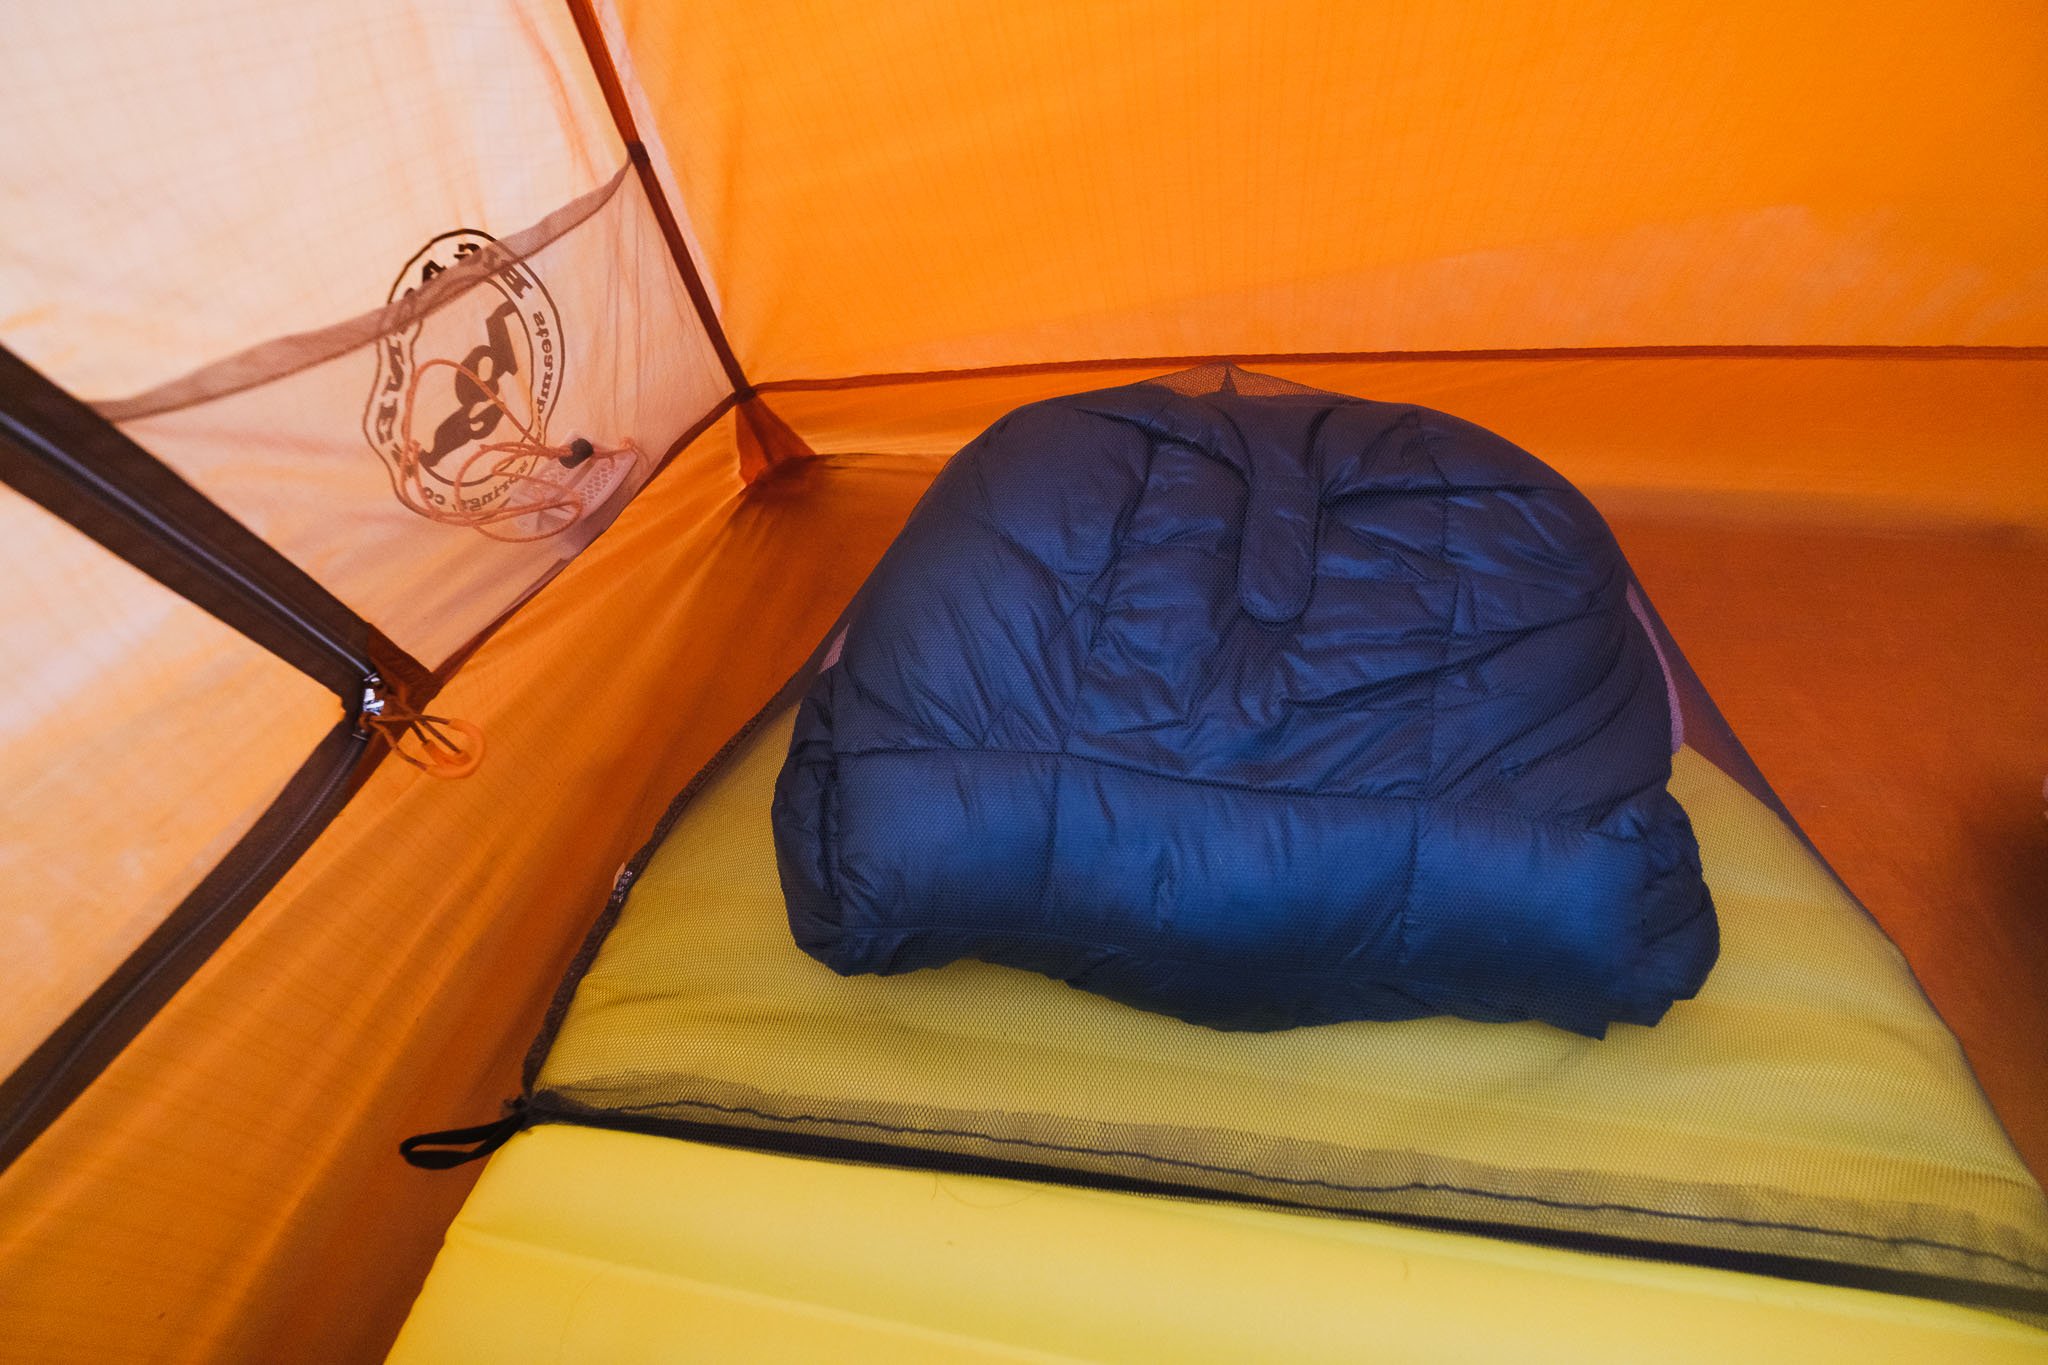
My down jacket pillow!
Pack cover - Compared to a pack liner, pack covers are less reliable, more expensive, heavier, and block access to your pack. Although, in heavy rain you may still want to use a pack cover or a poncho over your pack in addition to a pack liner depending on your pack. Pack fabrics that absorb water can become quite heavy when wet.
Extra clothes - It is very easy to overpack when it comes to clothing, but I encourage you to try to keep it minimal. Besides your hiking outfit, insulating layers, and shell layer, I would at most bring 1 extra set of clothes to sleep in.
Share gear - If you are backpacking with friends, consider sharing gear! I share a tent, a stove, and a bear can if applicable.