Guide to Backpacking the Lost Coast Trail
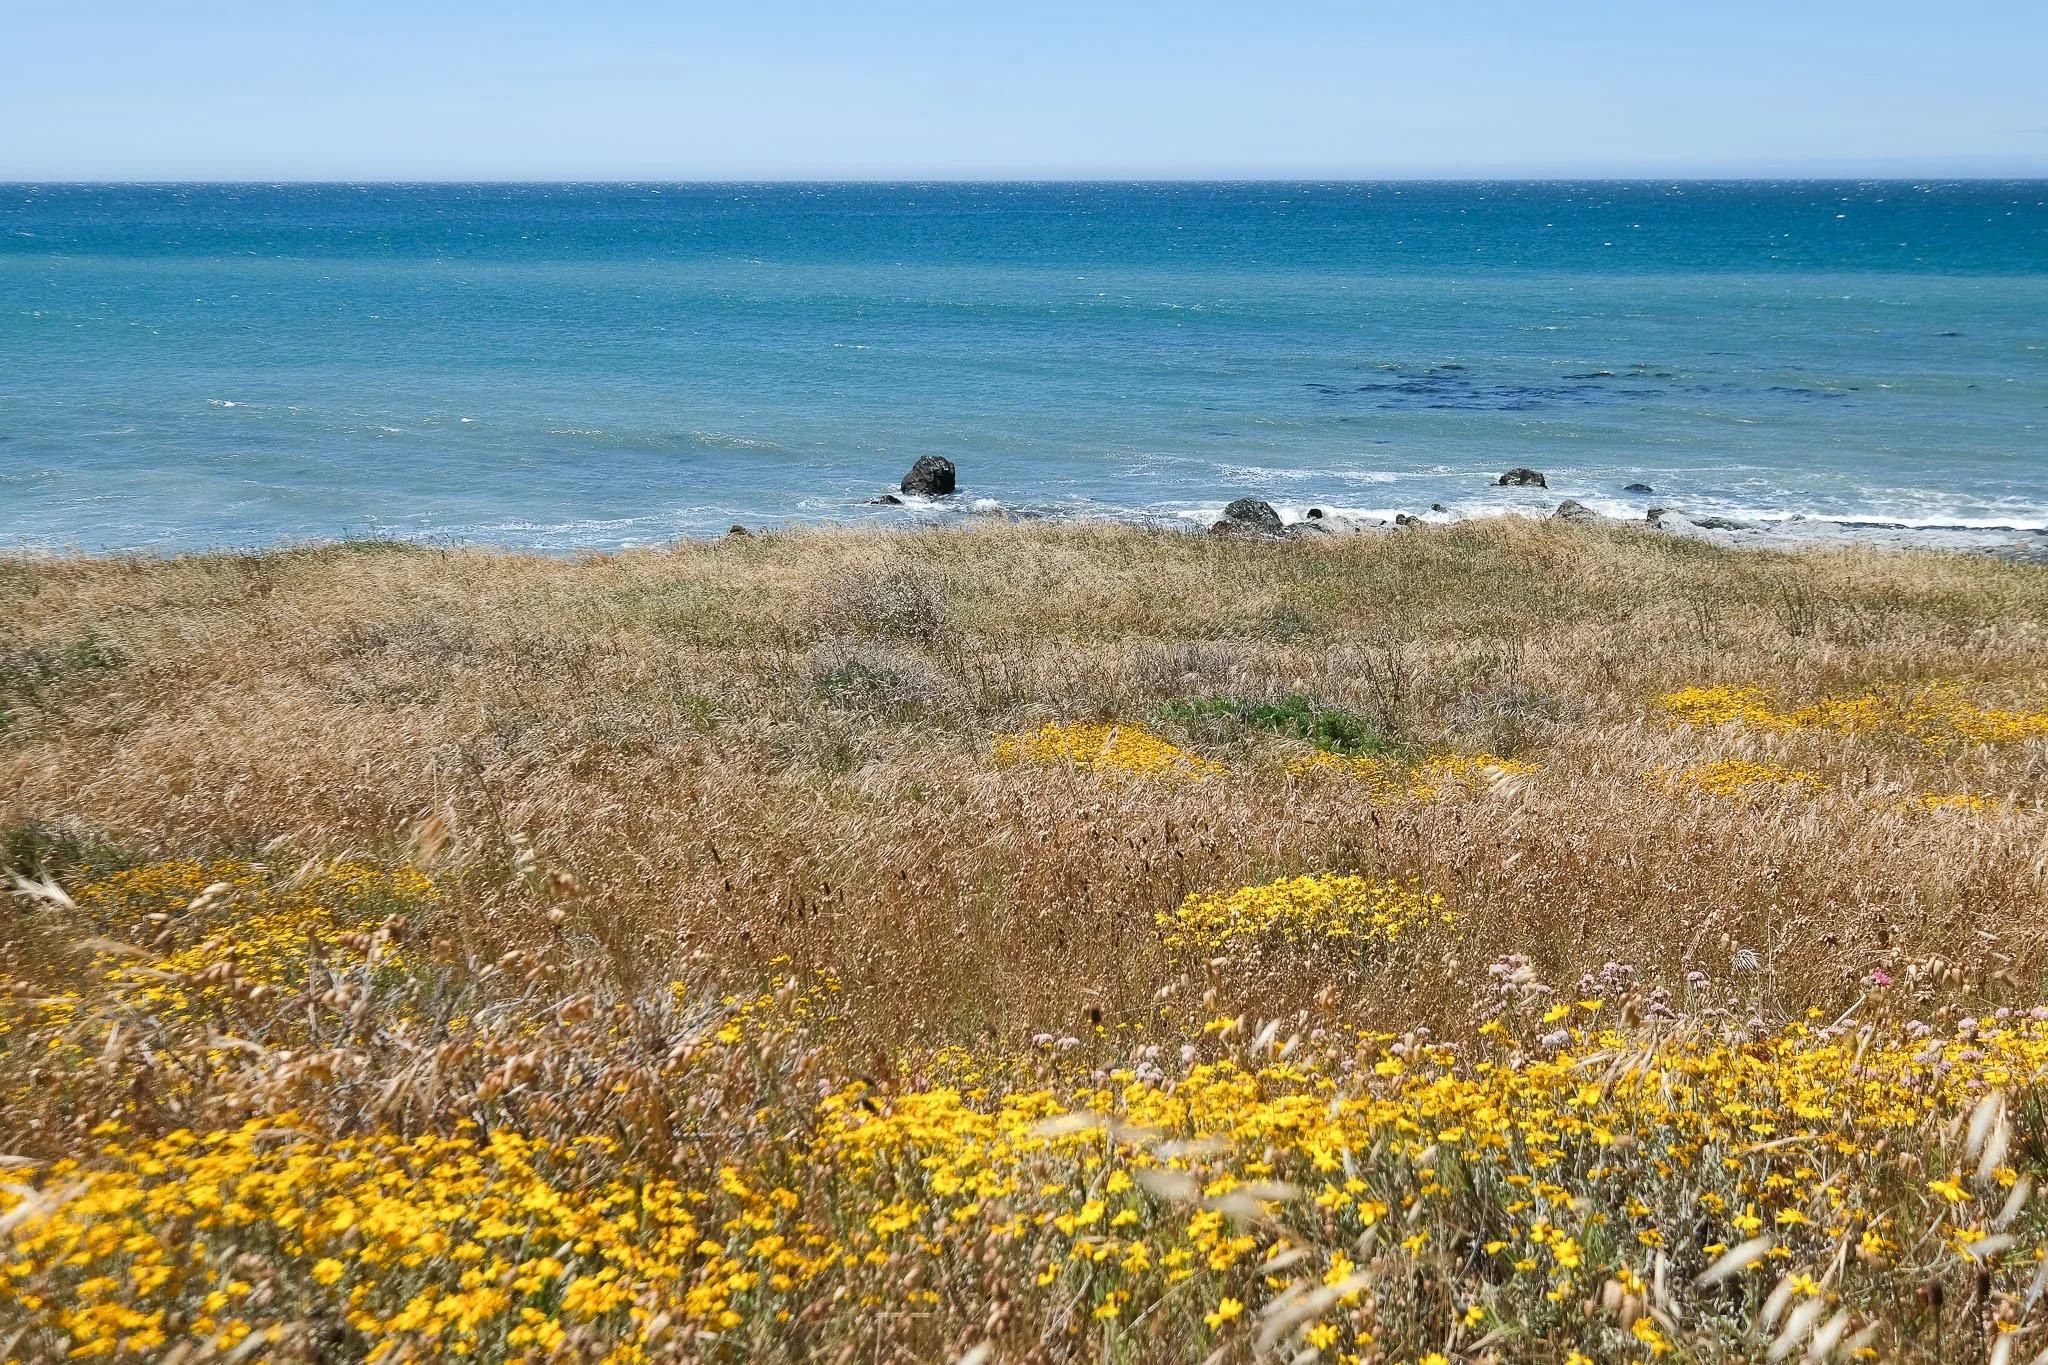
The Lost Coast Trail spans 25 miles of remote coastline in the King Range National Conservation Area. It’s usually done as a multi-night backpacking trip. You’ll hike directly on the beach for miles and enjoy sunsets from your beachfront camp every night. You’ll find footprints in the sand left by prowling bears, circling vultures, elephant seals, sea otters, decaying animal carcasses, starfish, and seagulls eating starfish. This hike immerses you in a diverse marine and coastal ecosystem. It’s isolated, wild, and there’s no other backpacking trip like it in California.
Because the trail is usually done one-way and has impassable zones that require timing your hike around low tides, planning for it is a bit more complicated than it is for the usual backpacking trip.
This guide will cover the classic northern section from Mattole Beach to Black Sands Beach, which is what most people refer to when they say Lost Coast Trail. (The Lost Coast Trail also has a southern section that continues on from Black Sands Beach to Usal Beach. It is a coastal hike but does not have beach hiking or tide concerns.)

Basics
| Distance | 25 miles |
| Elevation Gain | <1,000 feet |
| Elevation Range | 0 feet - 130 feet |
| Recommended Time | 3-4 days |
| Type | Point-to-point |
| Start Trailhead | Mattole Beach |
| End Trailhead | Black Sands Beach |
| Campsites | Cooskie Creek, Big Flat, Sea Lion Gulch, Randall Creek, etc. |
| Difficulty | Moderate |
| Permit | King Range Wilderness Permit on Recreation.gov |
| Cost | $6 per permit (up to 3 hikers per permit) |
| Bear Cans Required? | Yes |
| Highlights | Punta Gorda Lighthouse, Big Flat, Black Sands Beach, tons of wildlife sightings! |
Permit Info
Permits are required to camp on the Lost Coast Trail. The Lost Coast trail is popular, so permits are often fully booked. Permits can be obtained at Recreation.gov.
Permits are released on a 3-month rolling window.
An in-person walkup quota of 2 spots will be available daily at the King Range Visitor Center.
Up to 3 people can be on one permit. Only 1 permit per Recreation.gov account, so additional permits need to be booked on different accounts.
Permits are a flat rate of $6 each.
Permits and tides are date dependent, so it is best to figure out your itinerary BEFORE booking your permit.
Understanding the Tides and Impassable Zones
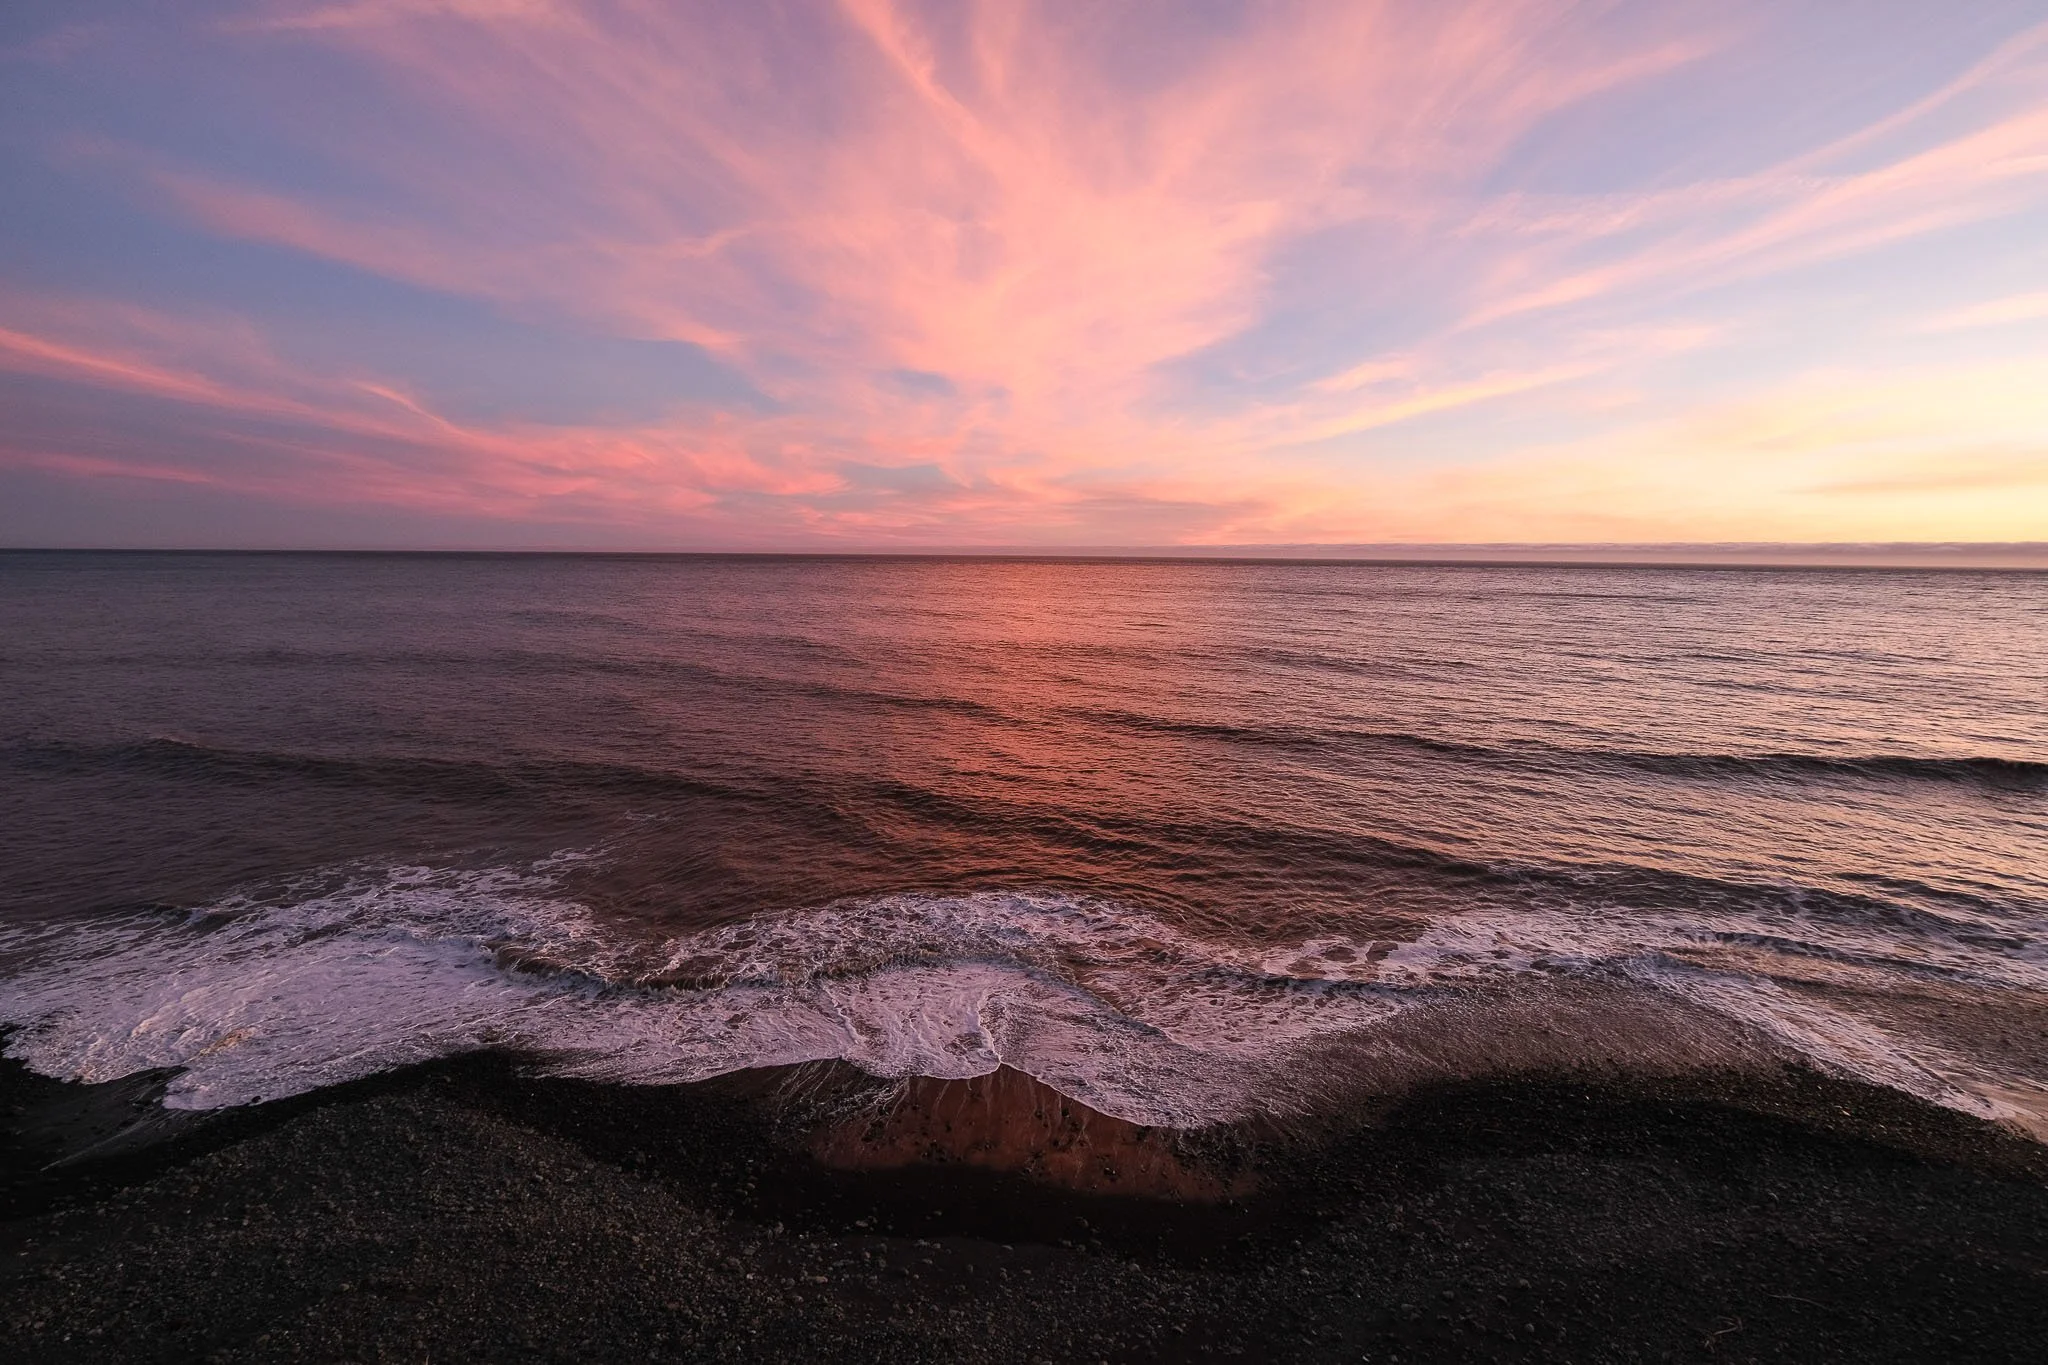
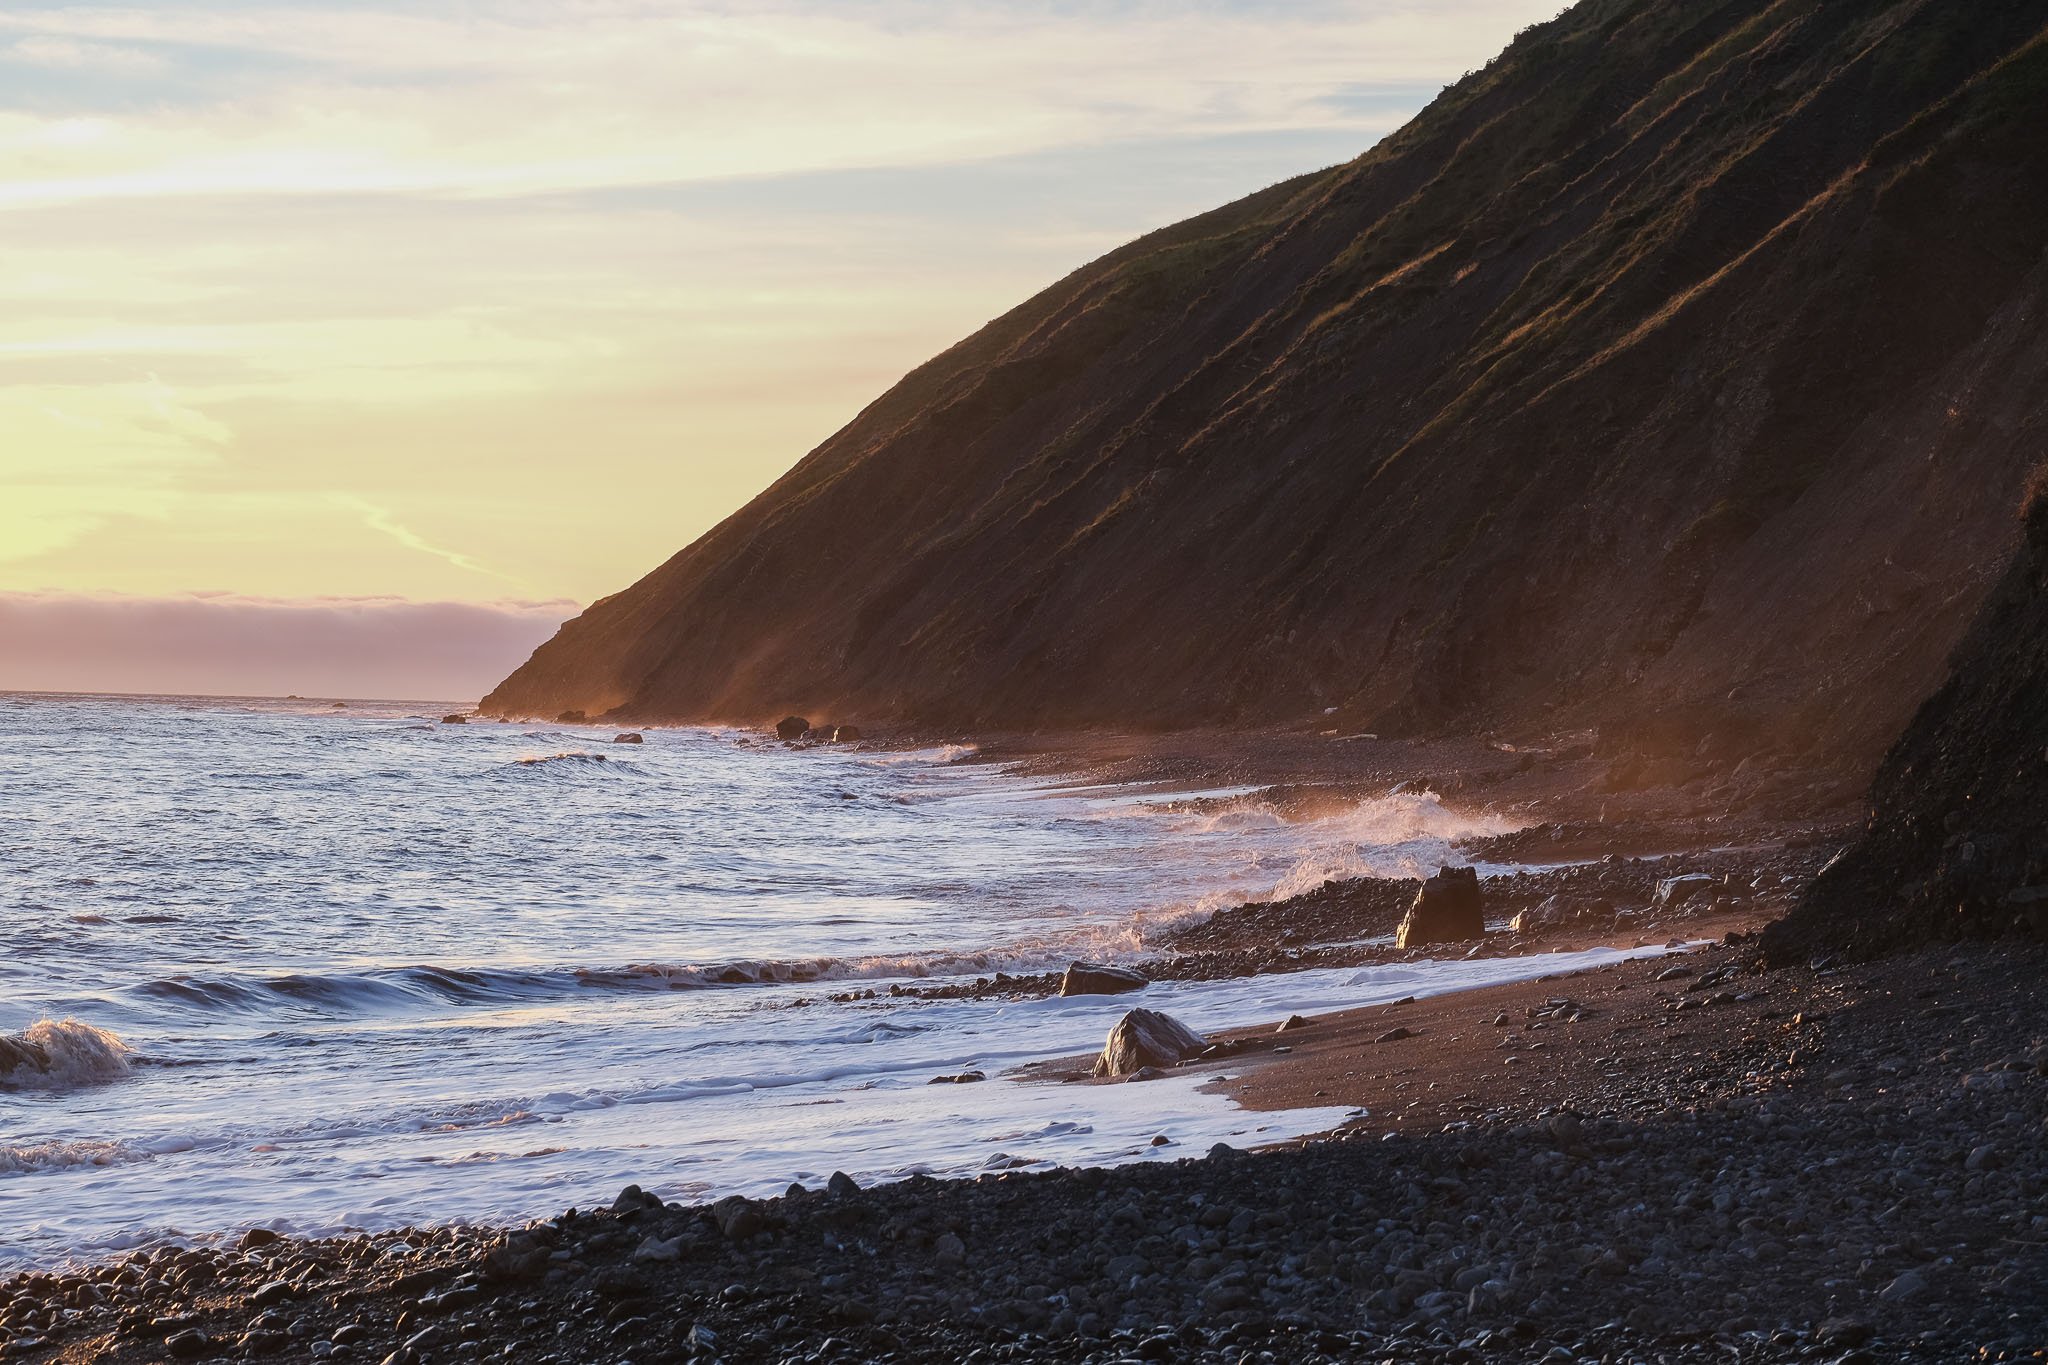
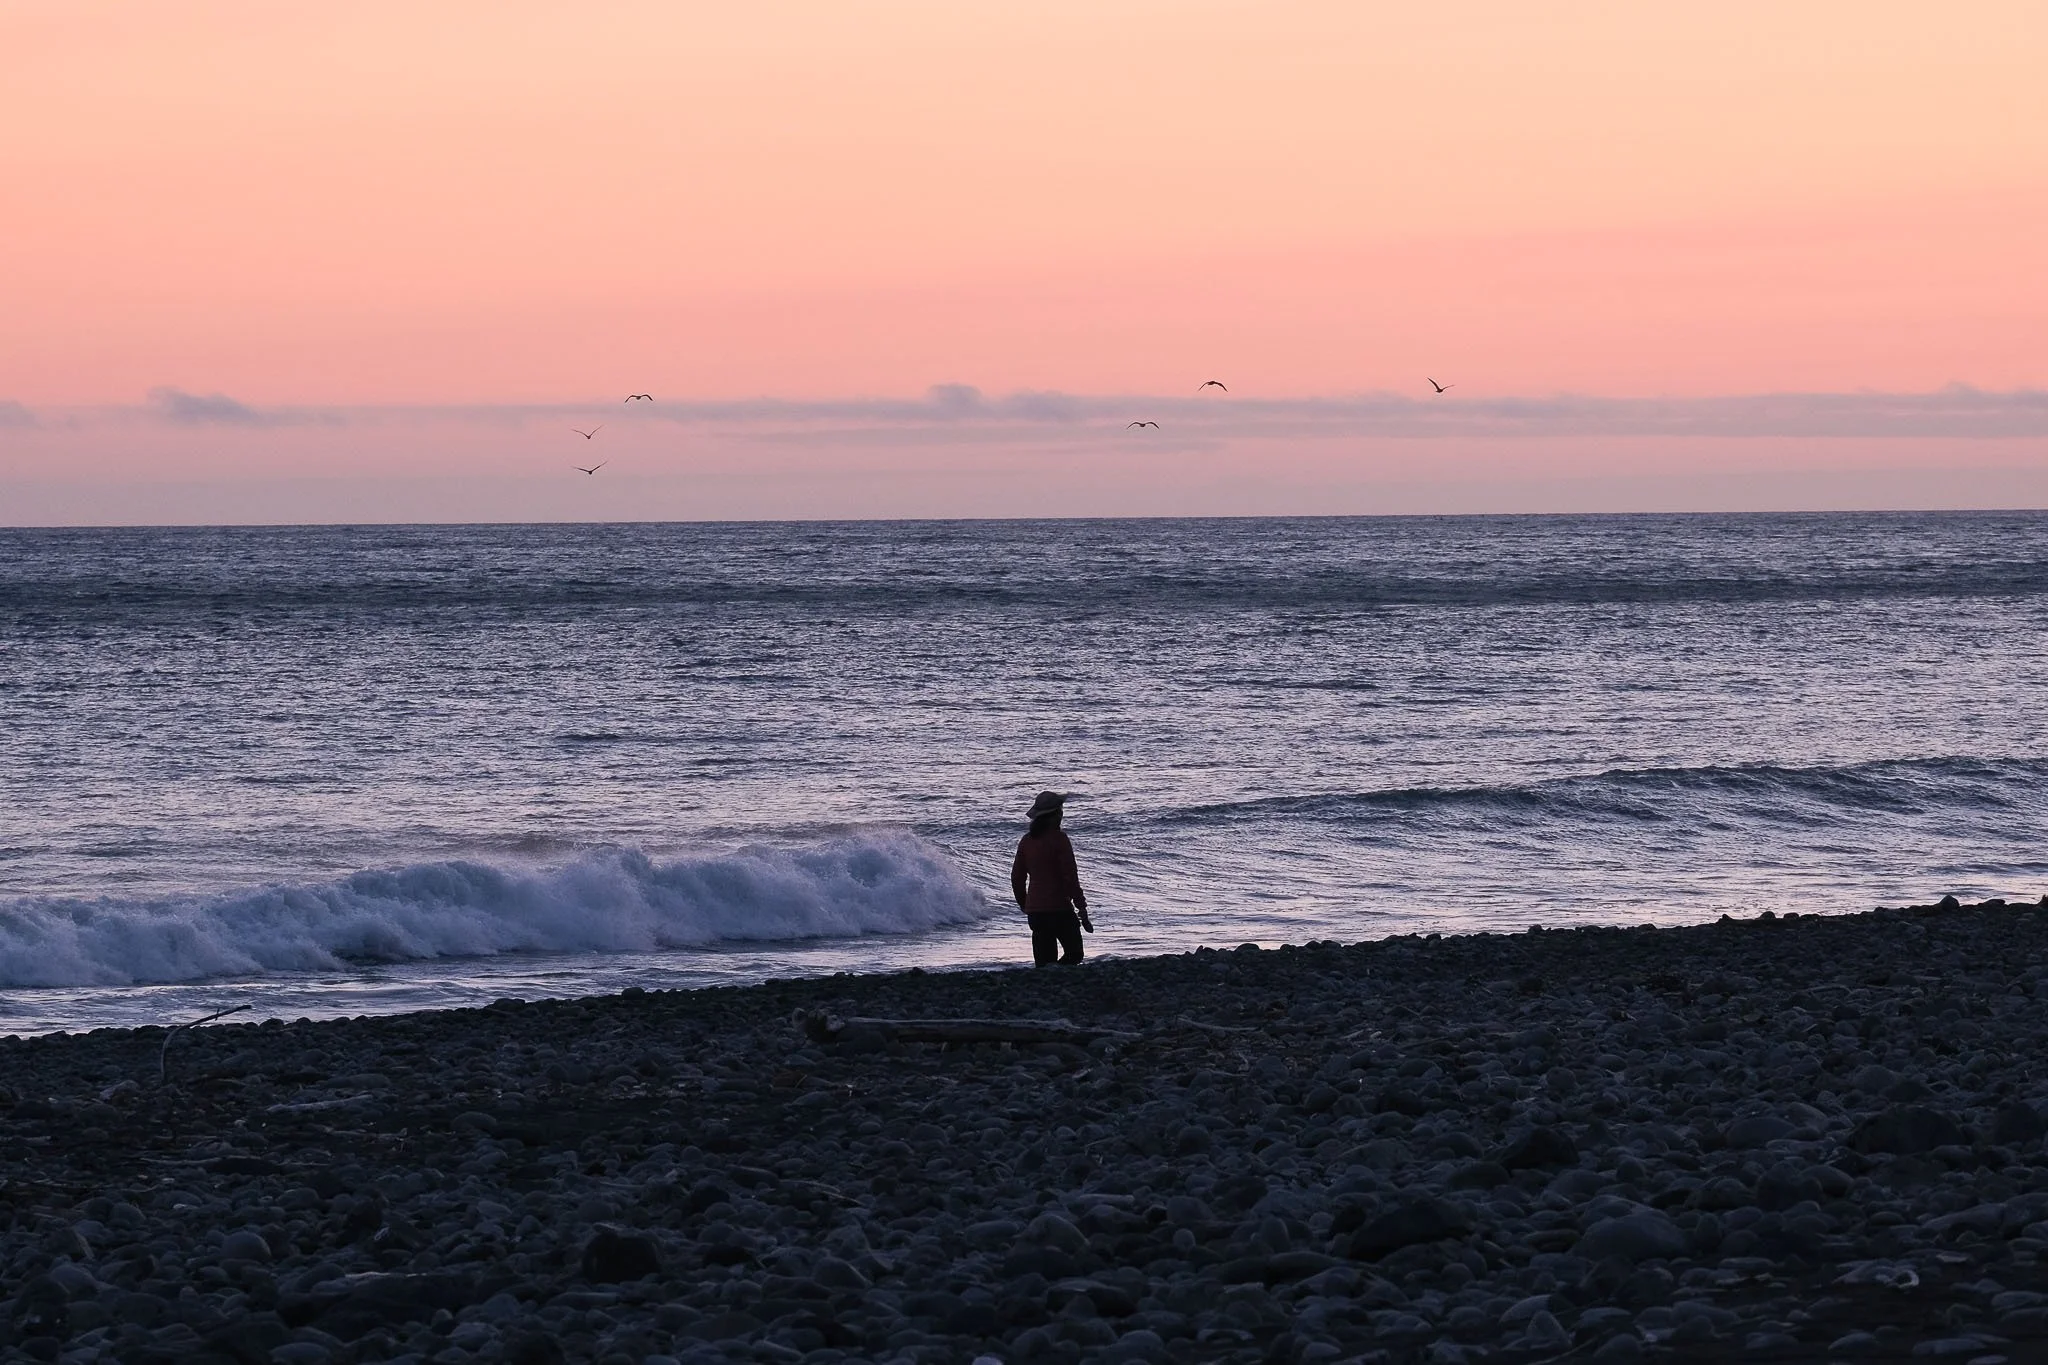
Sunset from atop a ridge near Cooskie Creek
The Lost Coast Trail is a coastal hike where tides can make or break your itinerary. Some trip dates will not be viable if tides do not fall below the recommended tide threshold during daylight hours. Recreation.gov lists these dates under the “Need to Know” tab. Therefore, it is important to look at the tide charts to determine your hiking dates and itinerary.
Impassable Zones
The impassable zones are 3 sections of the trail that should not be hiked when the tide is above a certain tide threshold.
Impassable zone 1: Punta Gorda Lighthouse. This impassable zone is a single pinch point. The recommended tide threshold is 5 feet.
Impassable zone 2: Sea Lion Gulch to Randall Creek (4 miles). The recommended tide threshold is 2.5 feet.
Impassable zone 3: Big Flat to Gitchell Creek (4.5 miles). The recommended tide threshold is 3 feet.
Notice that there are camps in the impassable zones. You can camp in an impassable zone because the camps are located farther up the beach or on higher ground, but you will need to arrive and depart these camps when the tide is below the threshold.

I referred to this camp map from Wonderland Guides over and over when planning my trip.
Reading the Tide Chart
I recommend using NOAA’s tide prediction chart for the location: Shelter Cove, CA.
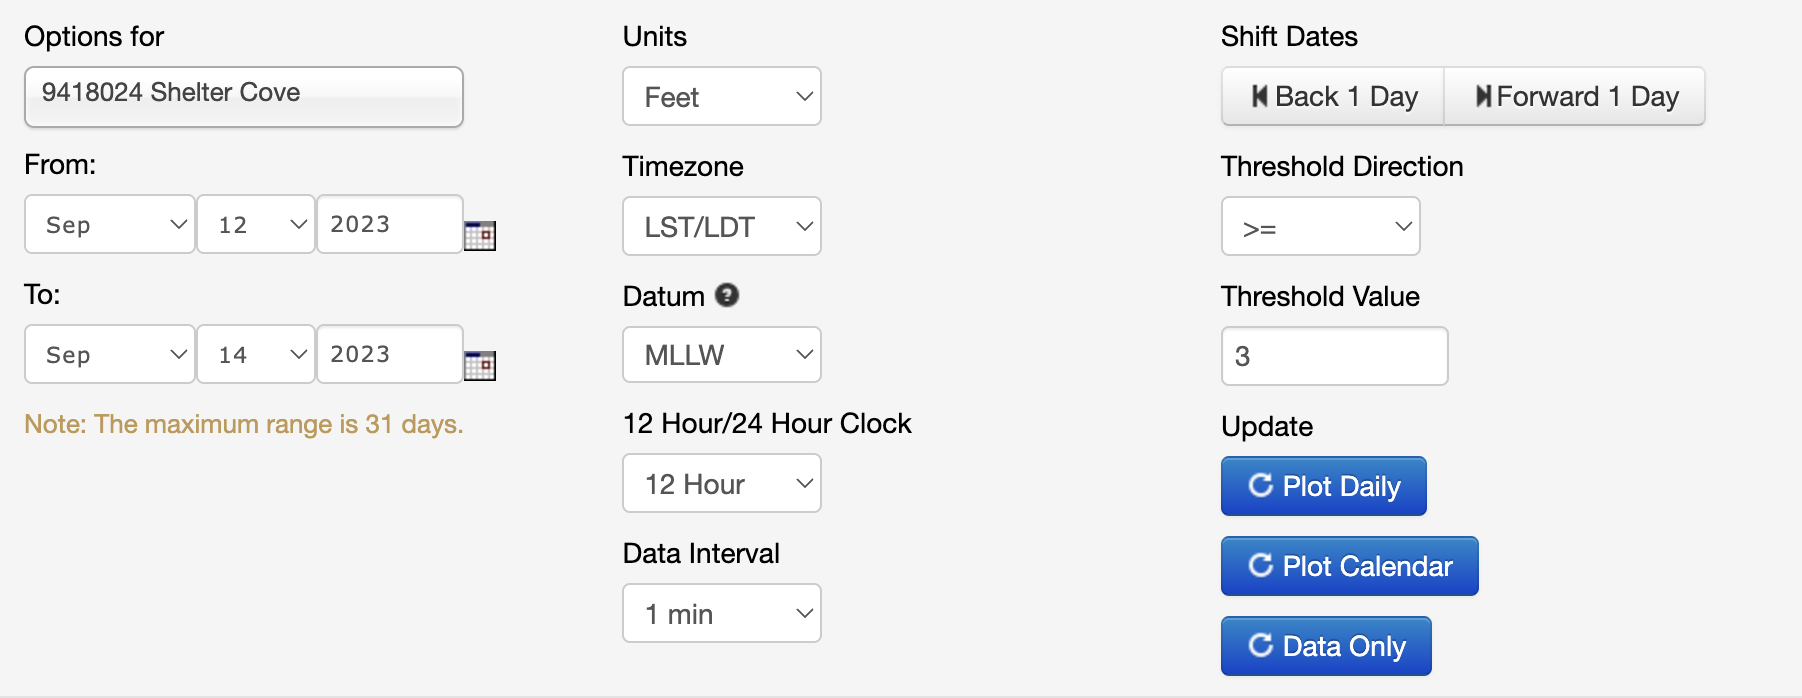
Enter a threshold value to add red highlighting. The threshold is 3 for impassable zone 3 and 2.5 for impassable zone 2.
Enter your desired start and end date.
Select data interval “1 min”.
Enter your tide threshold value.
Click “Plot Daily.”
This will generate a tide chart like the one below. I annotated in green the parts of the curve under the threshold, which indicate when the tide is low enough to cross the impassable zone.

One more thing: the low tide needs to align with daylight hours for your itinerary to be sound (see the modified chart below). It can be dangerous to hike the impassable zones in the dark since you can’t see the waves coming. You won’t be able to appreciate the views either!

Tips:
Use the Shift Dates button on the NOAA chart options to quickly view tide charts for surrounding dates.
Generally, the lower the tide, the easier the hiking will be. The low tide exposes packed wet sand that is easier to walk on than rocks and boulders higher on the beach. I also loved hiking at low tide and getting to see exposed tide pools and random washed up sea life.
To estimate how long the impassable zones will take, 1 mph is a conservative pace and 40 minutes is average.
If possible, start hiking through the impassable zone on a receding tide so that you have more time.
Read more about tides in BLM’s official Lost Coast brochure: here.
Hiking Direction
The Lost Coast trail is usually done as a one-way hike northbound (NOBO) or southbound (SOBO). The vast majority of hikers choose SOBO because:
Hiking SOBO will put the wind behind your back. Trust me, this makes a really big difference in enjoyment.
The Lost Coast shuttles run south to north. Hiking SOBO means you can take the shuttle at the beginning of your trip and get that out of the way.
If you’re coming from the Bay Area, hiking SOBO means less driving. The southern trailhead, Black Sands Beach, is 1 hour closer than the northern trailhead, Mattole Beach trailhead.
Getting There
The Lost Coast Trail is part of the King Range National Conservation Area. It’s located in northern California far from major metropolitan areas. It’s a 4.5-5 hour drive from the Bay Area and Sacramento.
Transportation
Doing the hike one-way means you need to figure out transportation between the trailheads.
I would not recommend self-shuttling with 2 cars because that would mean enduring that terrible road between the trailheads twice (as if once isn’t enough already). So here are the other options.

The Lost Coast Trail is 25 miles. The drive between the trailheads is much longer and takes 2 hours.
Paid Shuttles
If you hike SOBO, you will park your car at Black Sands Beach and travel north to Mattole Beach via a shuttle. The main shuttle operator for the Lost Coast trail is Lost Coast Adventure Tours. They run at least two shuttles a day depending on demand: once at 7 AM, and once midday at 12:30 PM.
Ride duration: ~2 hours. It’s a very bumpy and windy ride. If you are prone to motion sickness, ask to sit in the front and take motion sickness medication beforehand.
Cost: $95 per person. It’s quite expensive, but there is not really an alternative.
Key Swap
A free alternative to shuttling is doing a key swap with hikers going in the opposite direction. This takes some coordination and trust, and it will probably be hard to find a key swap as a SOBO hiker since almost everyone is doing it SOBO as well. With that being said, it’s a great option if you can arrange it. To find a key swap, you can post on the Lost Coast Trail Facebook group or on Outdoor Status’s key swap page.
How the key swap works:
Meet in Garberville, swap keys and cars. Drive to your respective trailheads.
Meet along the trail, swap back to your own car keys.
Finish the trail where your car is.
When to Go
Technically, you can do the Lost Coast trail year round. The coastal climate is moderate and it doesn’t get snowed in like the Sierra. But May to October, the usual backpacking season, is still the best time of the year to hike for a few reasons:
Summer is the dry season in California. Winter comes with a higher likelihood of rain and storms, which can create landslides and cause stream levels to rise. Stream crossings that are trivial in the summer may become tricky or even dangerous and impassable. Also, hiking in bad weather is just less fun.
Winter brings high surf conditions. Even at low tide, you may need to watch out for sneaker waves.
The days are longer. Since you have to schedule your hike around low tide and daylight hours, it is more likely that you’ll have a viable itinerary in the summer.
Even though it is harder to get the variables to line up for an off-season trip, when they do, the Lost Coast can be a great winter destination. It will be quieter in the winter too as the daily permit quota is 30, half the summer quota of 60.

Fog and rain are common, even during the summer.
Before and After the Hike
If you are taking the morning shuttle, you probably need to drive up the night before and stay somewhere close to Shelter Cove. Accommodation in Shelter Cove is more limited and expensive, and it gets pretty remote after you leave Highway 101. I would recommend searching for accommodation in Redway or Garberville.
If you finish the hike early enough, I highly recommend eating at Café Dolce, a 21 minute drive from Shelter Cove. It was recommended by someone in the Lost Coast trail Facebook group. It didn’t look too promising when we first arrived since it’s located in an abandoned-looking lumber yard, but the sandwiches were amazing! The bread and ingredients were so fresh. It was the perfect post-hike meal.
Other Things to Know
This trail is notorious for ticks. Wear long clothing, treat your clothing with permethrin, wear bug repellent, and check each other for ticks at the end of the day. On day 1, we leapfrogged a couple with a dog several times. When we saw them at camp at the end of the day, they told us they found 20 ticks on their dog and also multiple ticks on themselves. We joked that they collected all the ticks for us by hiking in front of us since we didn’t find any on ourselves. But seriously, when you get to camp, strip completely and check for ticks.
Other undesirable features: poison oak and rattlesnakes. Be vigilant when hiking through tall grass that may obscure your view of your feet.
Dig 6-8 inch catholes below the high tide line. This allows the high tide to break down your poop. You will need to get as close to the water as safely possibly to do your business. Yes, this means pooping on the beach out in the open, but you won’t really see that many people on trail anyway. If you’re at camp, just walk a bit. People will give you space. The plus is that these will be the easiest catholes you will ever dig!
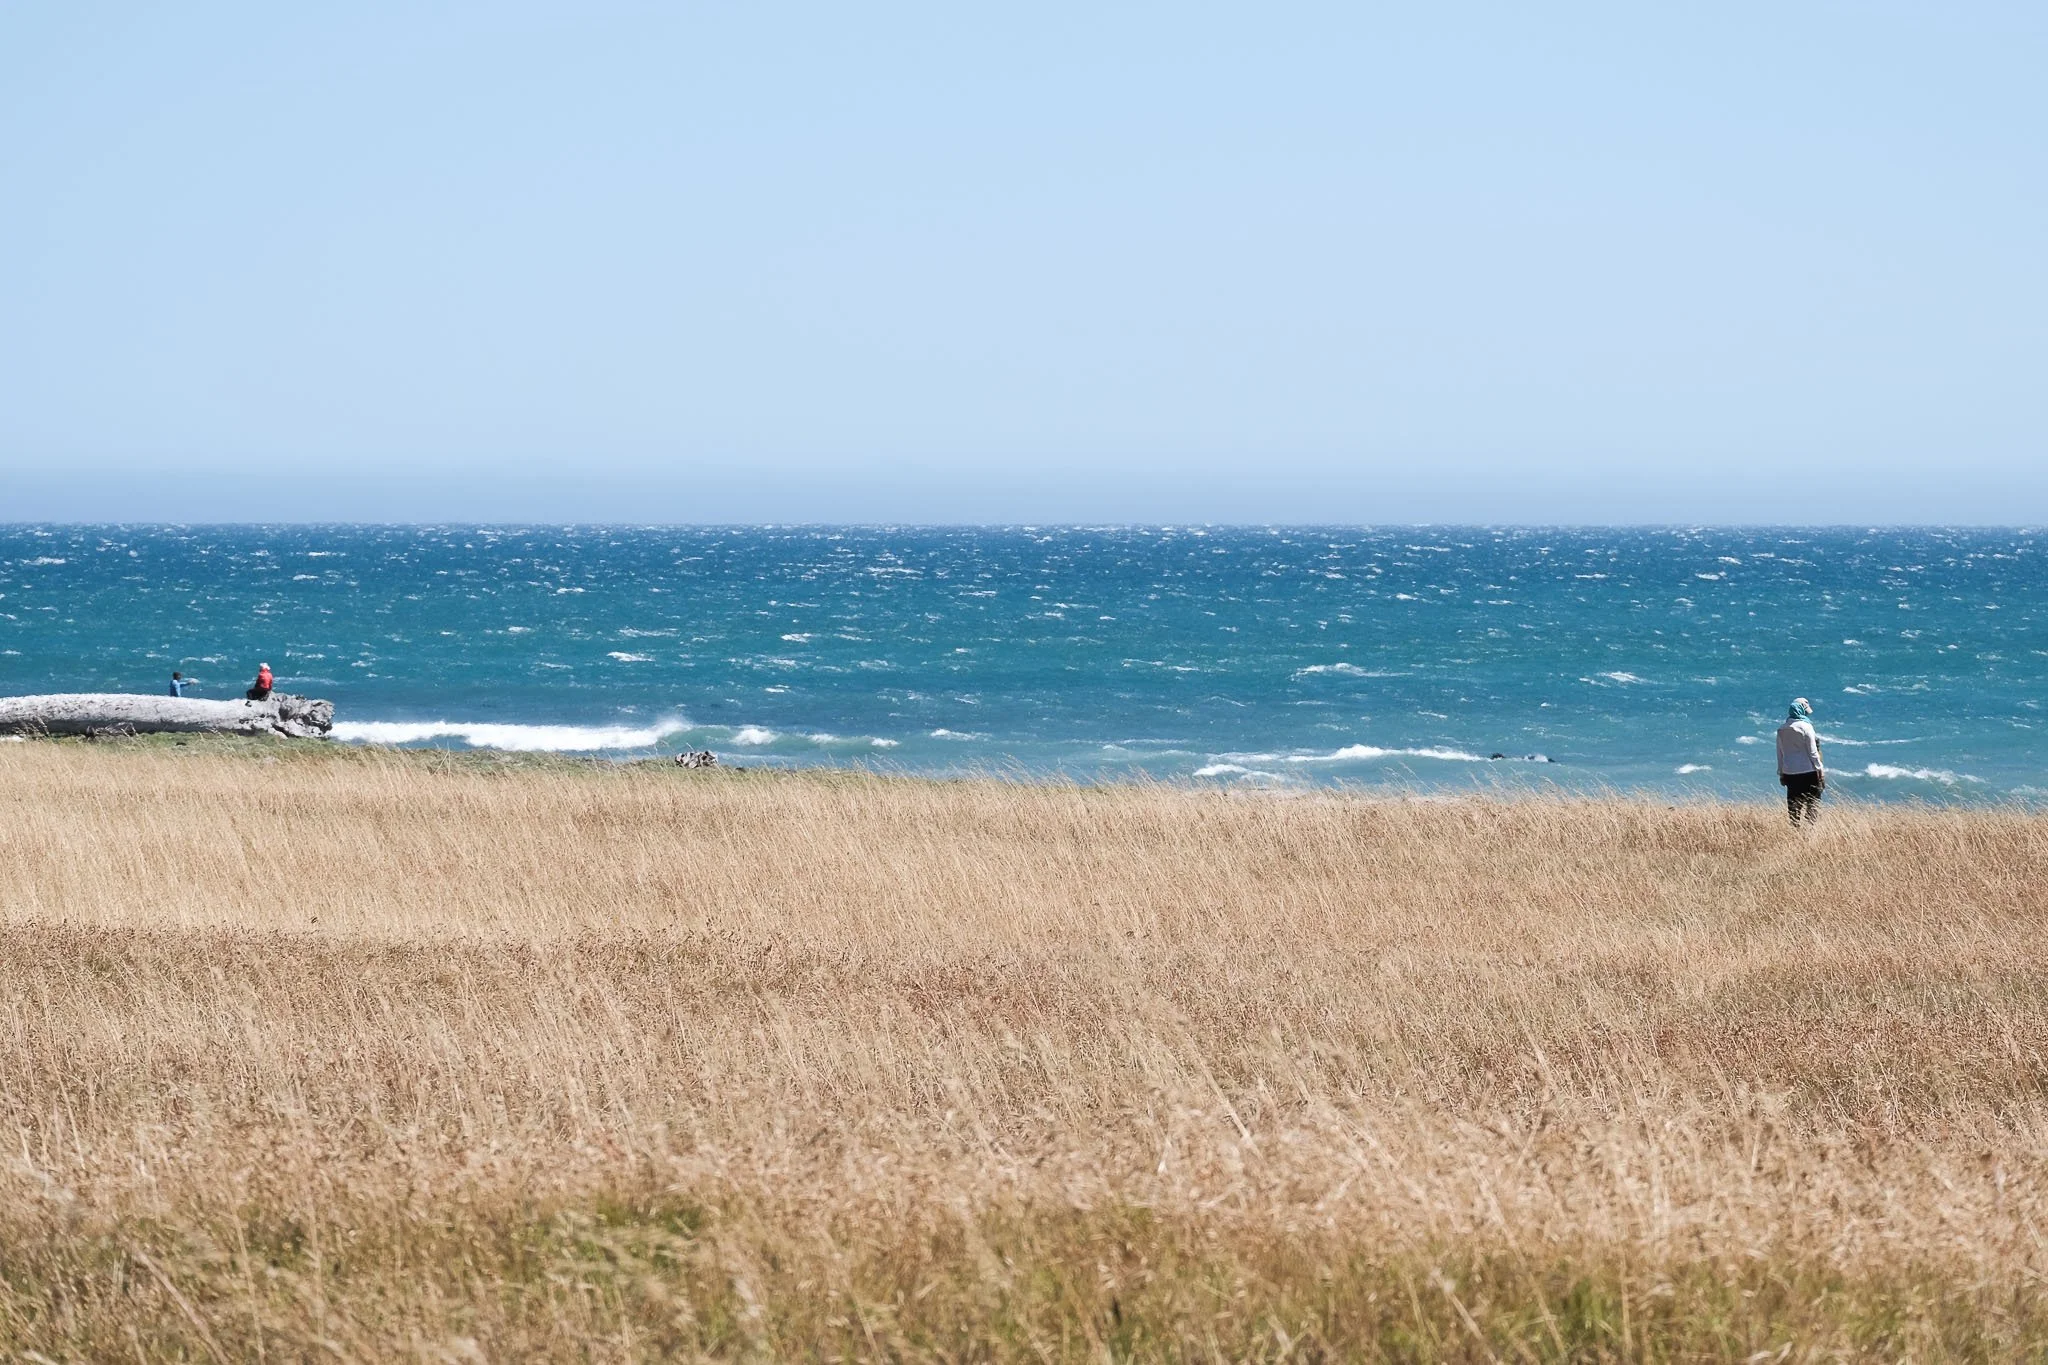
The wind can be very strong on the coast. Be confident that you can secure your tent properly. Also, do the hike north to south (in the direction of the prevailing winds) for an easier time. In mid-June, we had very strong wind during the day that calmed down at night.

Windy conditions at Big Flat
Expect to hike slower than you usually do when walking on the beach. Even though the trail has minimal elevation gain, you are not walking on solid packed ground for a majority of the trail. Walking over wiggly boulders and soft sand will slow you down more than you think. It is especially important to be conservative about your pace estimate for the impassable zones so that you aren’t under time pressure.
There are no designated campgrounds on the Lost Coast Trail, but most people camp at the named creeks. Even though you can technically camp anywhere along on the trail, camping by the creeks means a reliable water source and semi-established campsites that might have fire pits already set up and driftwood logs as wind protection.
What to Bring
For my general backpacking gear recommendations, check out my gear page. Here, I will highlight some gear that is notable to this trip.
Gaiters: I normally like to use trail-running gaiters to keep dirt and dust out of my shoes. They are especially useful on the Lost Coast trail because of the long stretches of hiking on sand.
Hiking sticks: I use these affordable and lightweight ones by Cascade Mountain Tech. I always use hiking sticks, but I would especially recommend them on this trip! Hiking sticks are nice for stability when walking over the many types of uneven surfaces on this trail: sand, pebbles, and larger rocks.

Binoculars: I’m not usually that focused on wildlife when I’m backpacking, partially because in my experience there isn’t that much wildlife to see in the Sierra. But this trip has tons of wildlife. I am not a binoculars expert by any means, but these Pentax ones were recommended to us by some fellow hikers and we love them! Without them, we definitely would have missed some of the coolest wildlife moments: seagulls swallowing starfish, a bird flying with a dead snake in its mouth, a vulture fanning its wings, and sea otters bobbing in the water.
Long pants (and shirt): I highly recommend wearing long clothing for this trip because of the ticks and poison oak found on this trail. Long clothing is also good for sun protection since almost the whole hike is exposed (no trees). My hiking outfit of choice is a sun hoody like the Patagonia Capilene Cool Daily Hoody on the top and breathable pants like the Mountain Hardwear Dynama 2 Ankle on the bottom.
Rain/wind protection: The Lost Coast trail is known for being windy and rainy, so I would recommend bringing a sturdy shell like the Arctery’x Beta LT.
Bear can: Bear cans are required on this trip. If you usually backpack in California, you are probably familiar with bear cans. I was surprised that bears live by the beach, but the bear tracks we saw in the sand proved me wrong. We managed to share a BV450 between 2 people for a 3 day trip.
Not too much water: This trail has plenty of water, even throughout the summer. The named creeks where the main camps are located flow year-round. I use the Katadyn BeFree water filter which lets me top up and filter water very easily throughout the day.
Lastly, I would encourage bringing as little as possible. In general, lightening up your pack will make backpacking more enjoyable. On this trail, the heavier you are, the more you will sink with each step, and the more arduous the beach hiking will become. It will also be easier to remain balanced and not fall when walking on the sections of beach with larger rocks.
Suggested Itineraries
Even though there are no designated camps on the Lost Coast Trail, most people camp next to the named creeks. These itineraries are just to give you some ideas. Ultimately, your tide chart will decide your itinerary.

| Mile | Camp |
| 0 | Mattole Beach (start) |
| 4.5 | Sea Lion Gulch |
| 6.5 | Cooskie Creek |
| 8.5 | Randall Creek |
| 10.5 | Spanish Creek |
| 12 | Kinsey Creek |
| 13.5 | Big Creek |
| 16.5 | Big Flat |
| 18.5 | Shipman Creek |
| 20 | Buck Creek |
| 21.5 | Gitchell Creek |
| 23.5 | Horse Mountain Creek |
| 25.5 | Black Sands Beach (end) |
3 Day Itineraries
I think a 3 day itinerary is perfectly doable for an average hiker who does not mind doing longer days. Since the Lost Coast trail is all flat, the miles are not too strenuous from a cardio perspective. However, walking on the variety of uneven beach surfaces can get tiresome.
Cooskie Creek
Night 1 Camp at Cooskie Creek
| Distance | Camp at | |
| Day 1 (shuttle) | 6.5 miles | Cooskie Creek |
| Day 2 | 10 miles | Big Flat |
| Day 3 | 9 miles | - |
This was our itinerary. We took a shuttle in the morning from Black Sands Beach to Mattole Beach. Then we hiked to Sea Lion Gulch. There was a short low tide window in the afternoon, so we had lunch while waiting for the tide to go out, and then completed 2 miles of the impassable zone to camp at Cooskie Creek.
Cooskie Creek is a beautiful camp that is well-protected from wind. It was cool to see the tide come in after we arrived and swallow the coastline in both directions.
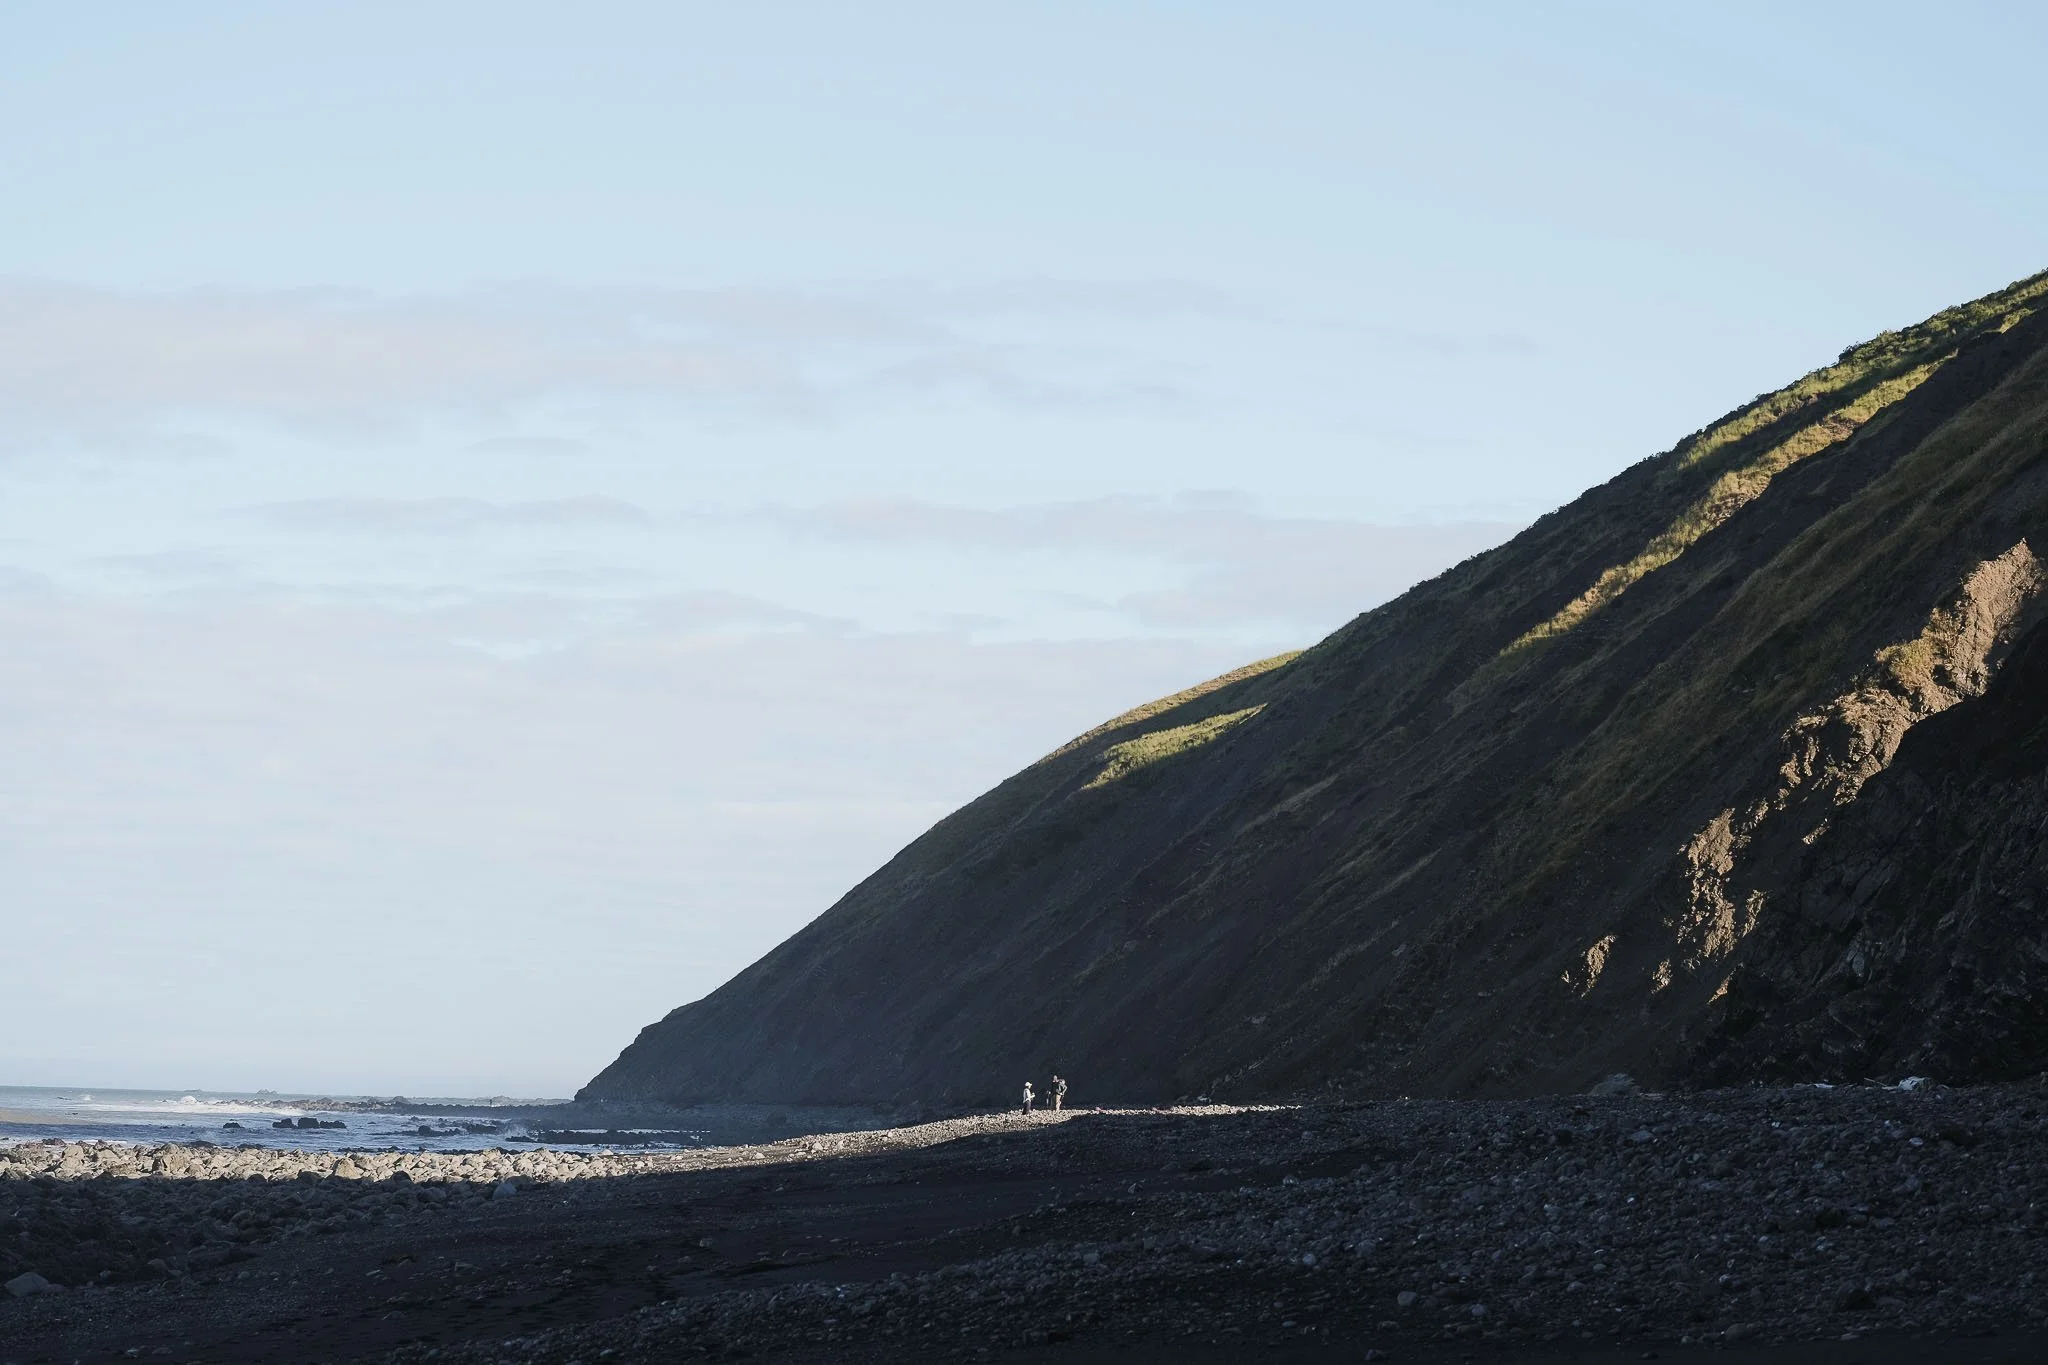
The impassable zone near Cooskie Creek during high tide.
Night 1 Camp at Sea Lion Gulch
| Distance | Camp at | |
| Day 1 (shuttle) | 4.5 miles | Sea Lion Gulch |
| Day 2 | 9 or 12 miles | Big Creek or Big Flat |
| Day 3 | 12 or 9 miles | - |
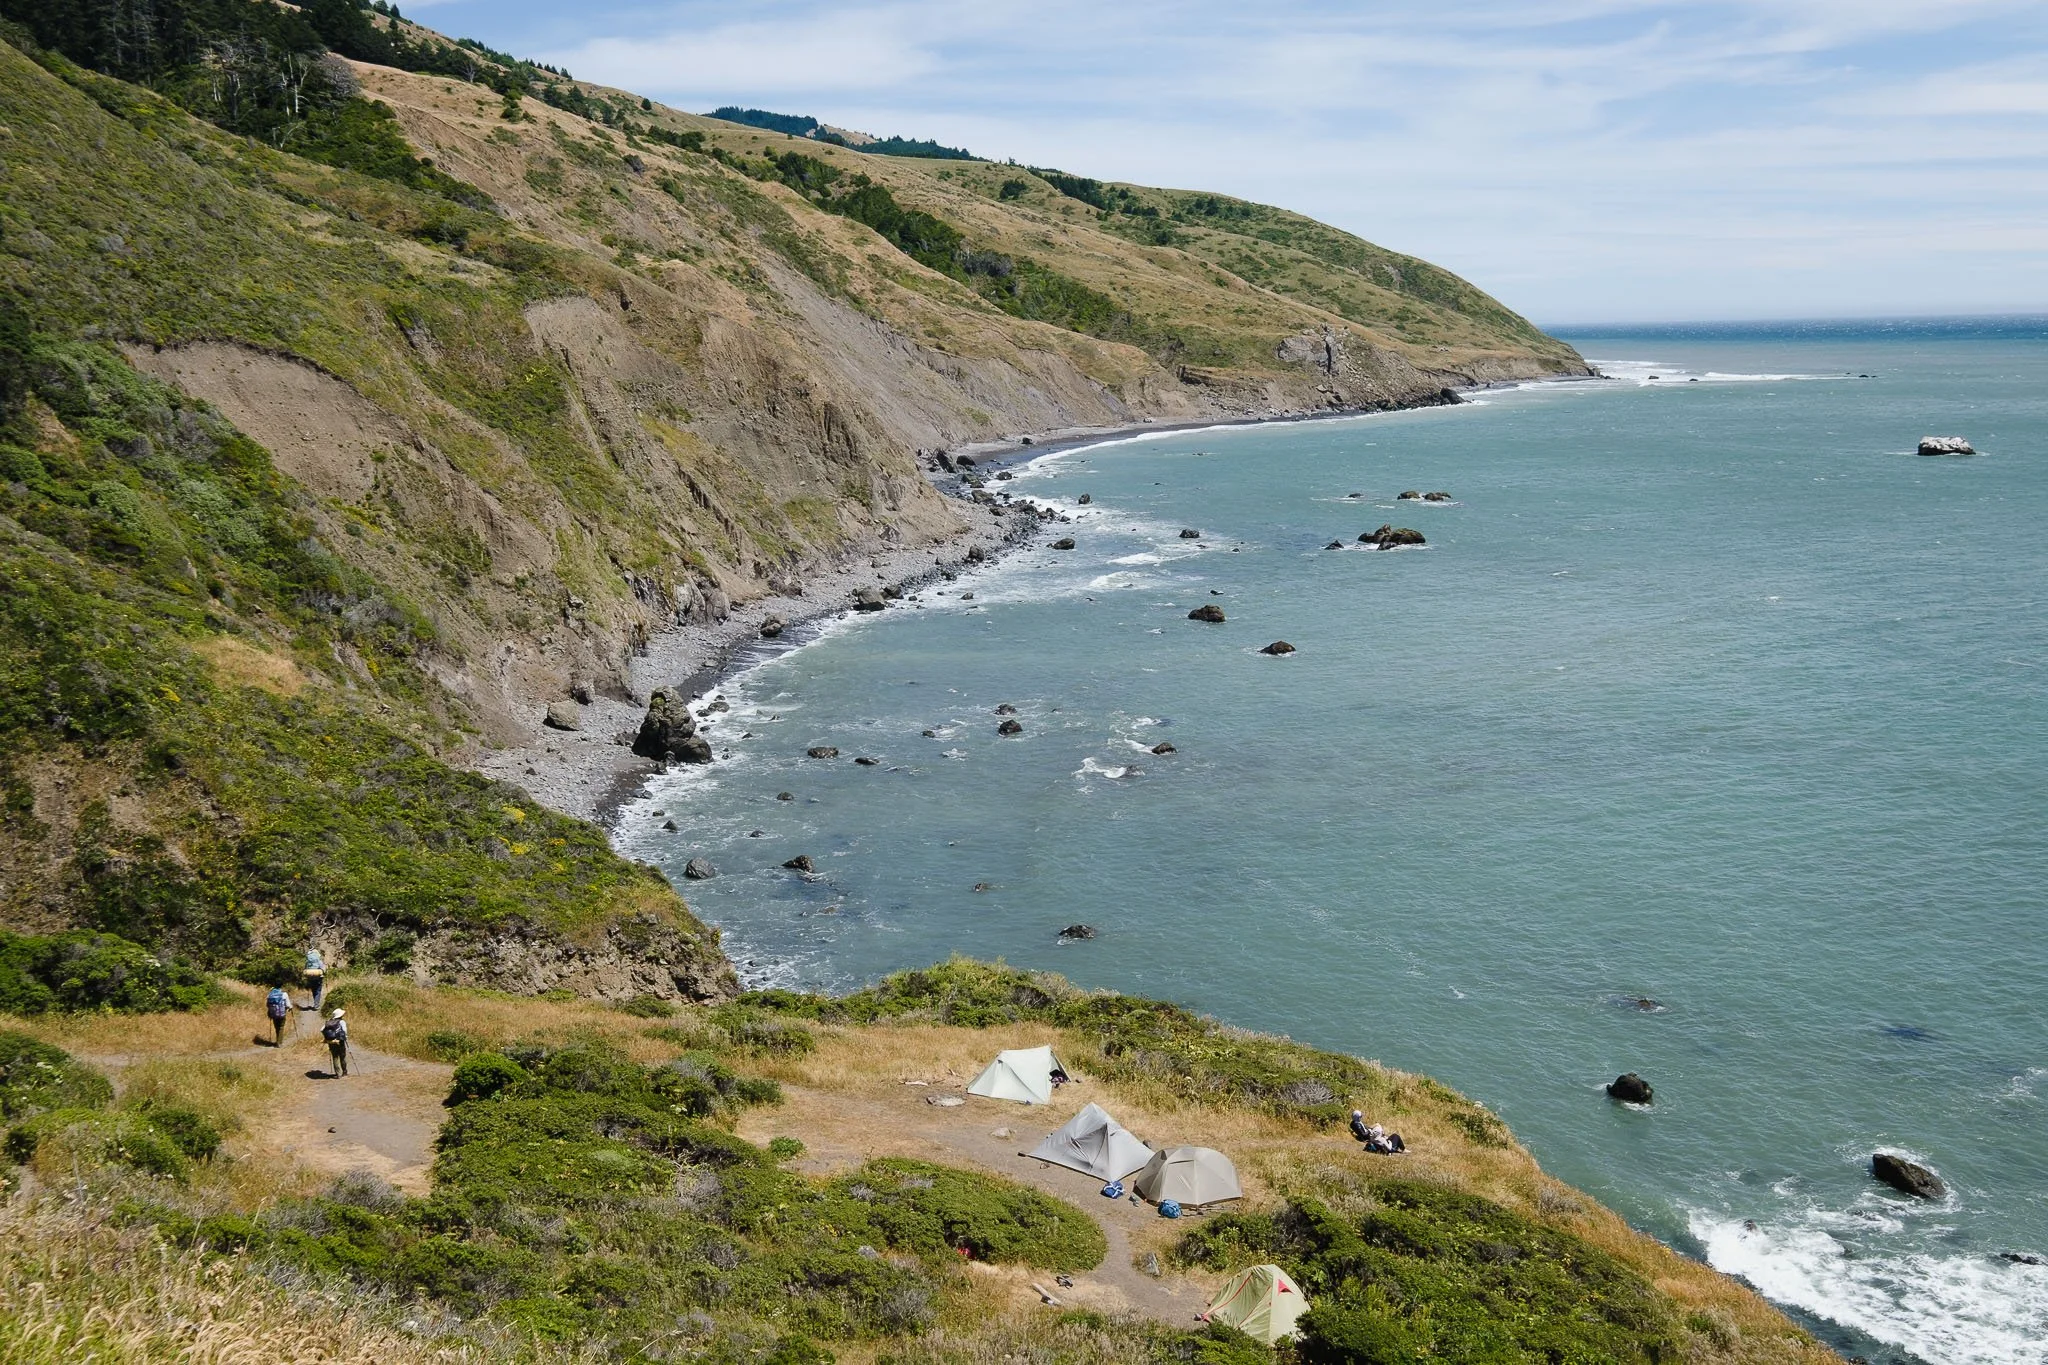
Camping at Big Flat
Since low tide is usually in the morning, shuttling on Day 1 may mean not being able to start impassable zone 2. This forces a rather short first day that ends at Sea Lion Gulch. The camping at Sea Lion Gulch is high up on an exposed bluff with great views, but be prepared for windy conditions.
On Day 2, push on to Big Flat for a longer day or camp at Big Creek 3 miles earlier. Because your permit does not require camping at a specific destination, you can make the call the day of based on how fast you’re going.
Exposed camp at Sea Lion Gulch.
Night 1 Camp at Randall Creek
| Distance | Camp at | |
| Day 0 (shuttle) | - | Mattole Campground |
| Day 1 | 8.5 miles | Randall Creek |
| Day 2 | 10 or 11.5 miles | Shipman Creek or Buck Creek |
| Day 3 | 7 or 5.5 miles | - |
Arrive at Black Sands Beach the day before your hike and take the shuttle on Day 0. You can camp at the trailhead at Mattole Campground, which has 15 first come first serve campsites.
This itinerary will allow you to get an earlier start on Day 1. If it works with your tide chart, you can potentially complete all 4 miles of impassable zone 2 on Day 1.
For Day 2’s camp, Shipman Creek and Buck Creek offer much more solitude since most people camp at Big Flat. These campsites are 2 and 3.5 miles into impassable zone 3.
4 Day Itineraries

The 3 day itineraries above usually involve at least 1 or 2 long days. Four day itineraries are more relaxed and also more forgiving if you need to spend part of a day waiting out the tide.
| Distance | Camp at | |
| Day 1 (shuttle) | 4.5 miles | Sea Lion Gulch |
| Day 2 | 9 miles | Big Creek |
| Day 3 | 8 miles | Gitchell Creek |
| Day 4 | 4 miles | - |
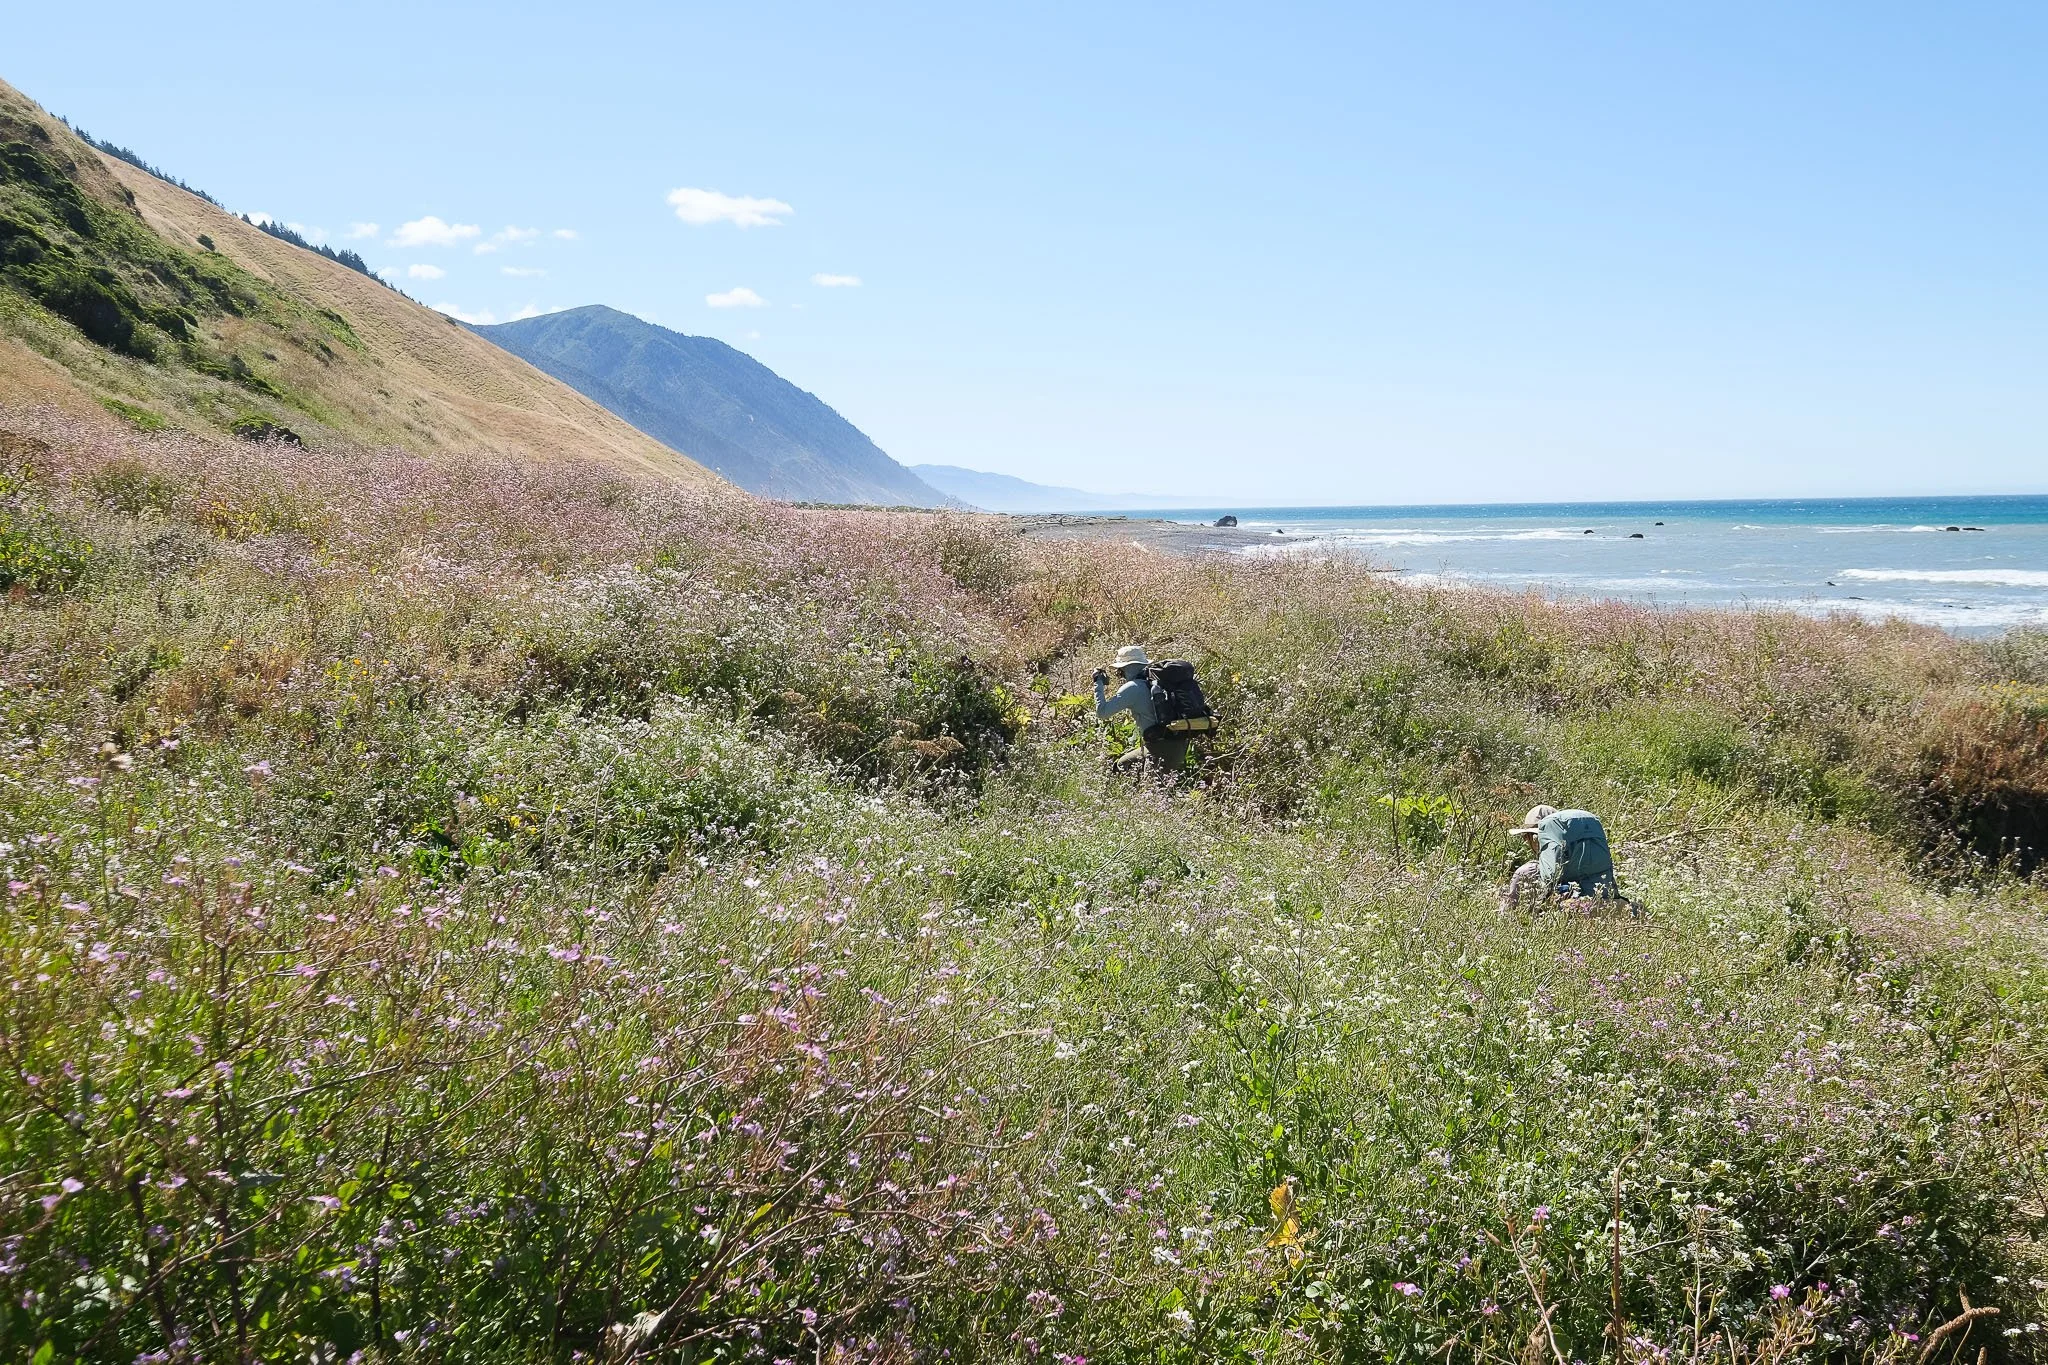
Shipman Creek. Can you spot the tent in this picture?
| Distance | Camp at | |
| Day 1 (shuttle) | 6.5 miles | Cooskie Creek |
| Day 2 | 5.5 miles | Kinsey Creek |
| Day 3 | 6.5 miles | Shipman Creek |
| Day 4 | 7 miles | - |
Lost Coast Trail Overview
Mile 0-3: Mattole Beach to Punta Gorda Lighthouse
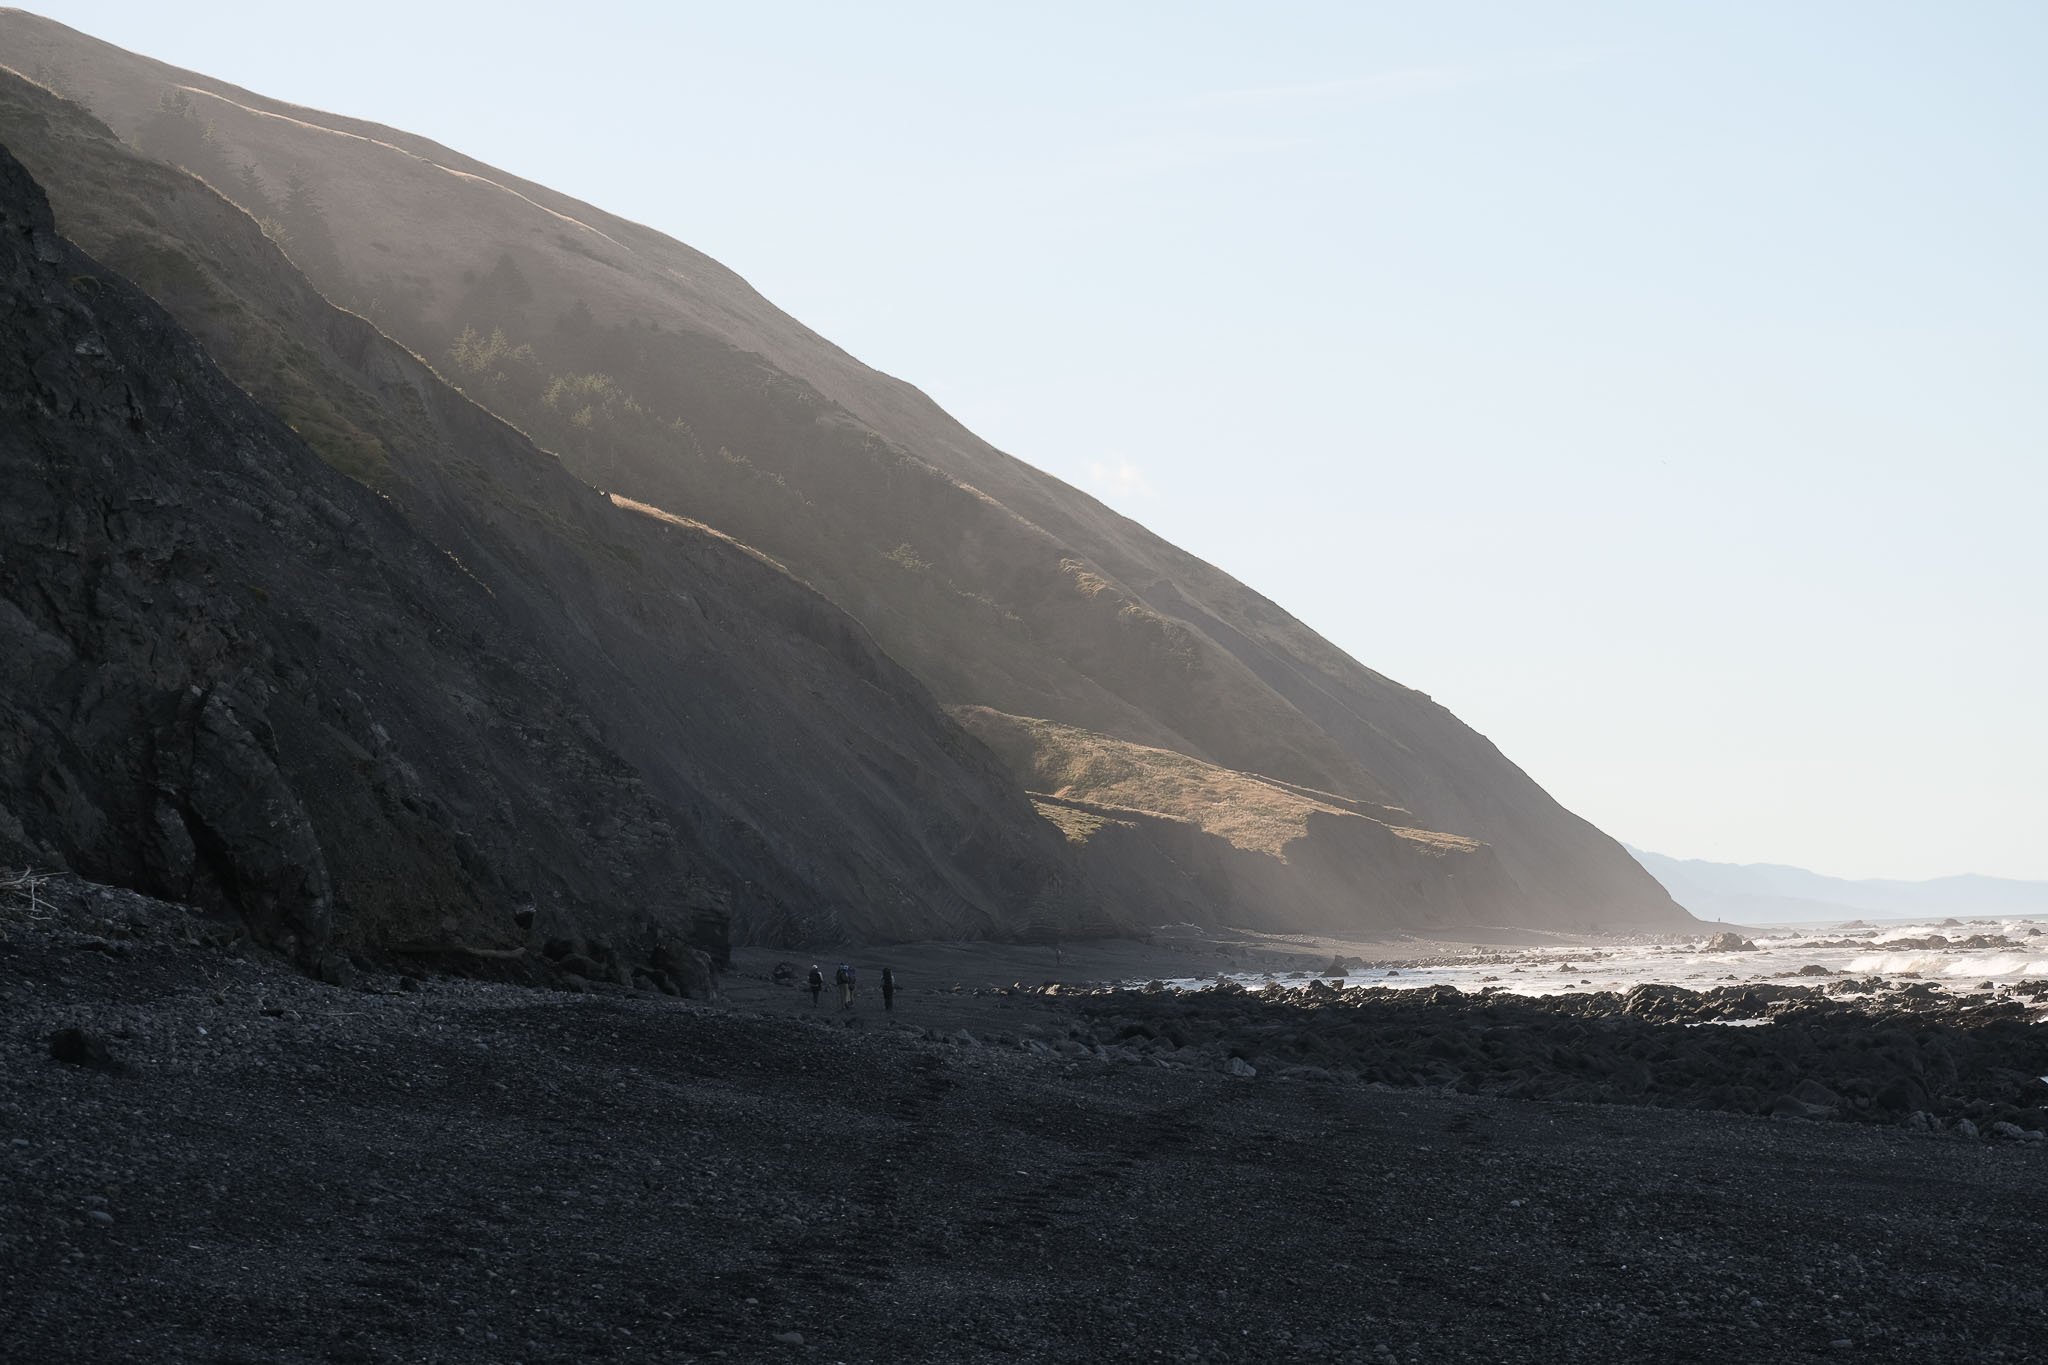
Begin your hike at Mattole Beach. You can walk directly on the beach or farther back in the grassy dunes. Enjoy dramatic views of the headlands rising from the beach.
The sand transitions to pebbles and the beach narrows as you round the first impassable zone at Punta Gorda. This one is just a single pinch point, and the tide threshold is much higher and not usually difficult to schedule around.

Day hikers from Mattole Beach stroll this first section.

Nearing Punta Gorda

When you’re tired of walking on sand, you can choose to walk on the nice hardpack trail right next to the beach.

Crossing Fourmile Creek.

Mile 3-4.5: Punta Gorda Lighthouse to Sea Lion Gulch
The lighthouse has a spiral staircase that you can ascend to get a higher view of the beach. Spring and summer is elephant seal molting season. A large group of them like to hang out by this lighthouse. An active few barked loudly and butted heads amongst the rest who lounged peacefully in the sun. We spent a while here being entertained by their antics.
After the lighthouse, the trail stays off the beach and climbs up the sheer headlands. There are great views overlooking the ocean before arriving at Sea Lion Gulch. Sea Lion Gulch is located on the bluffs and is named for the sea lions that inhabit the area off the coast. Dozens of sea lions sprawl on a few rock islands. The campers here get to enjoy a sea lion cacophony. It can also get quite windy since there is no protection from the wind on the bluff.
Find the water source by following the trail down a narrow gulch where it crosses a creek that empties out on to the beach.
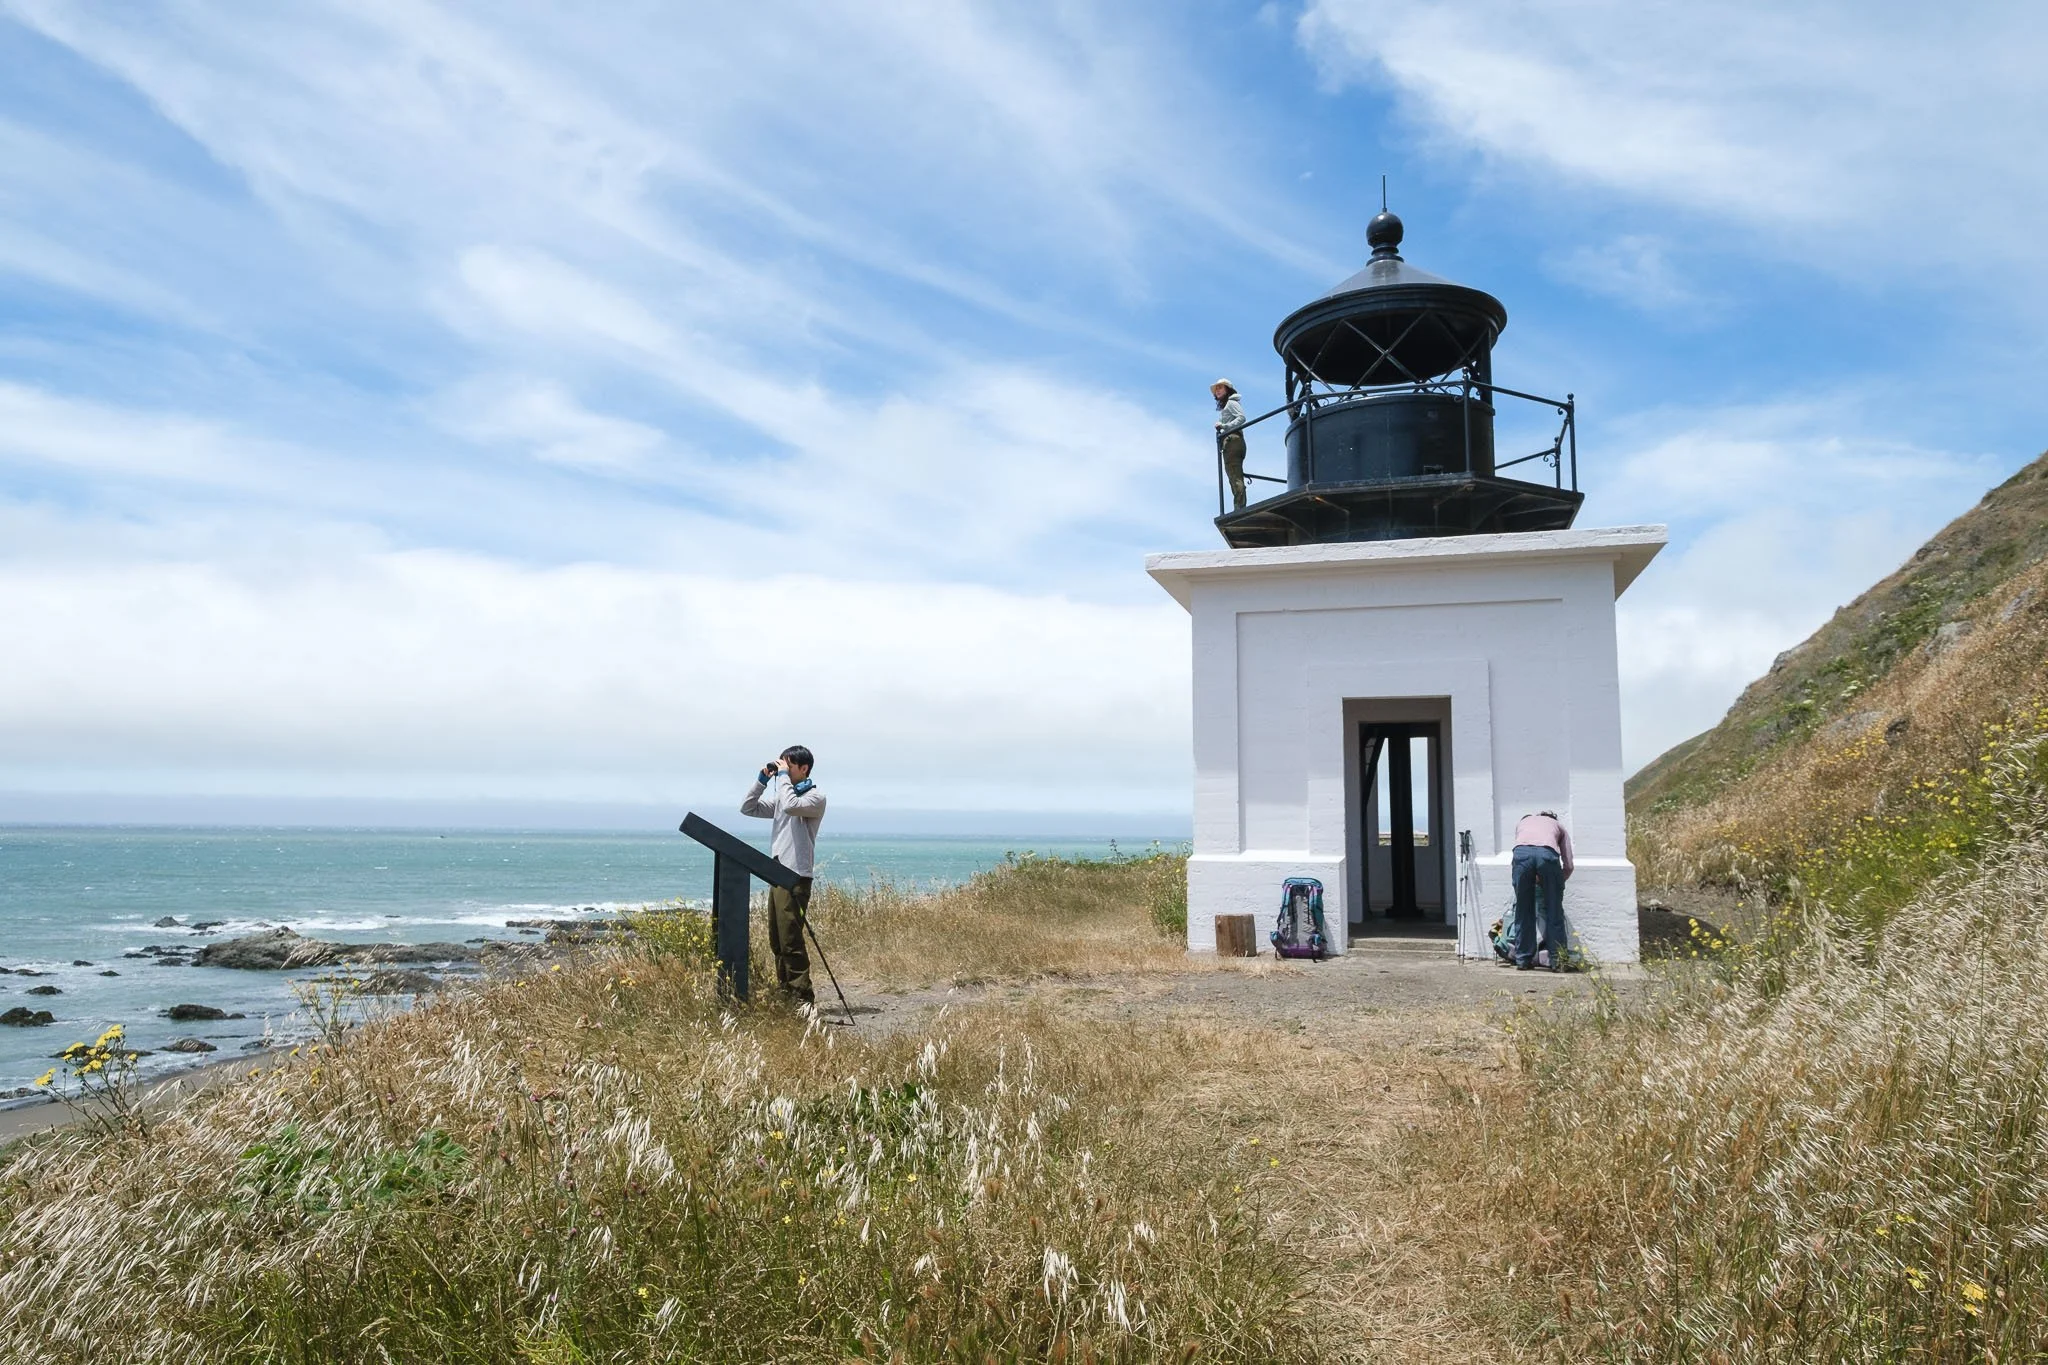
Punta Gorda Lighthouse

A molting elephant seal

A wrinkly seal pup


You can see the sea lion covered rocks on the right of this photo.
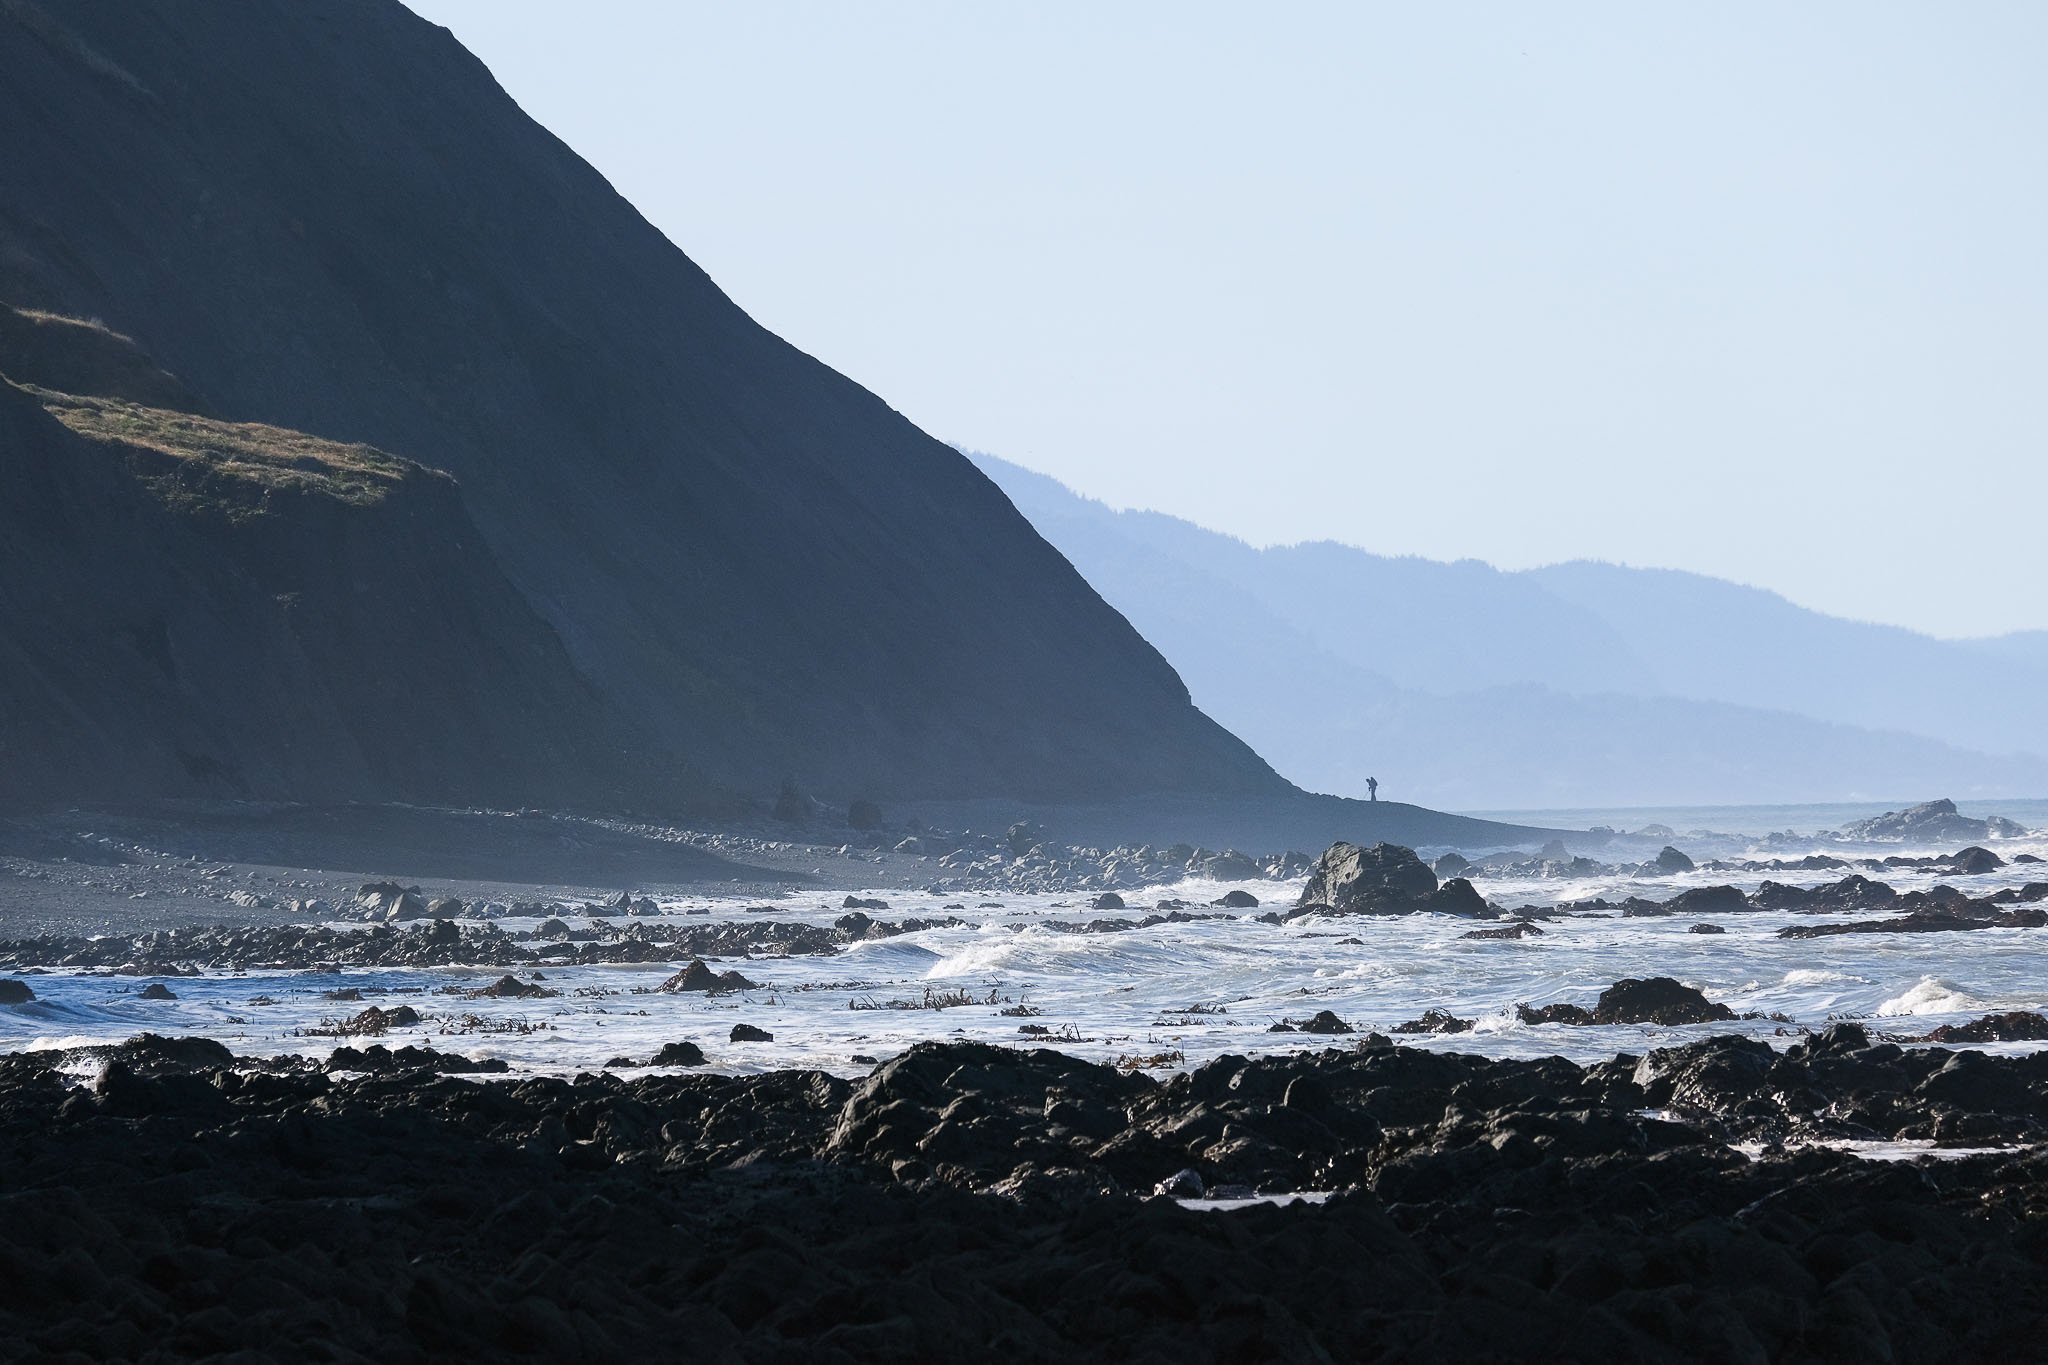
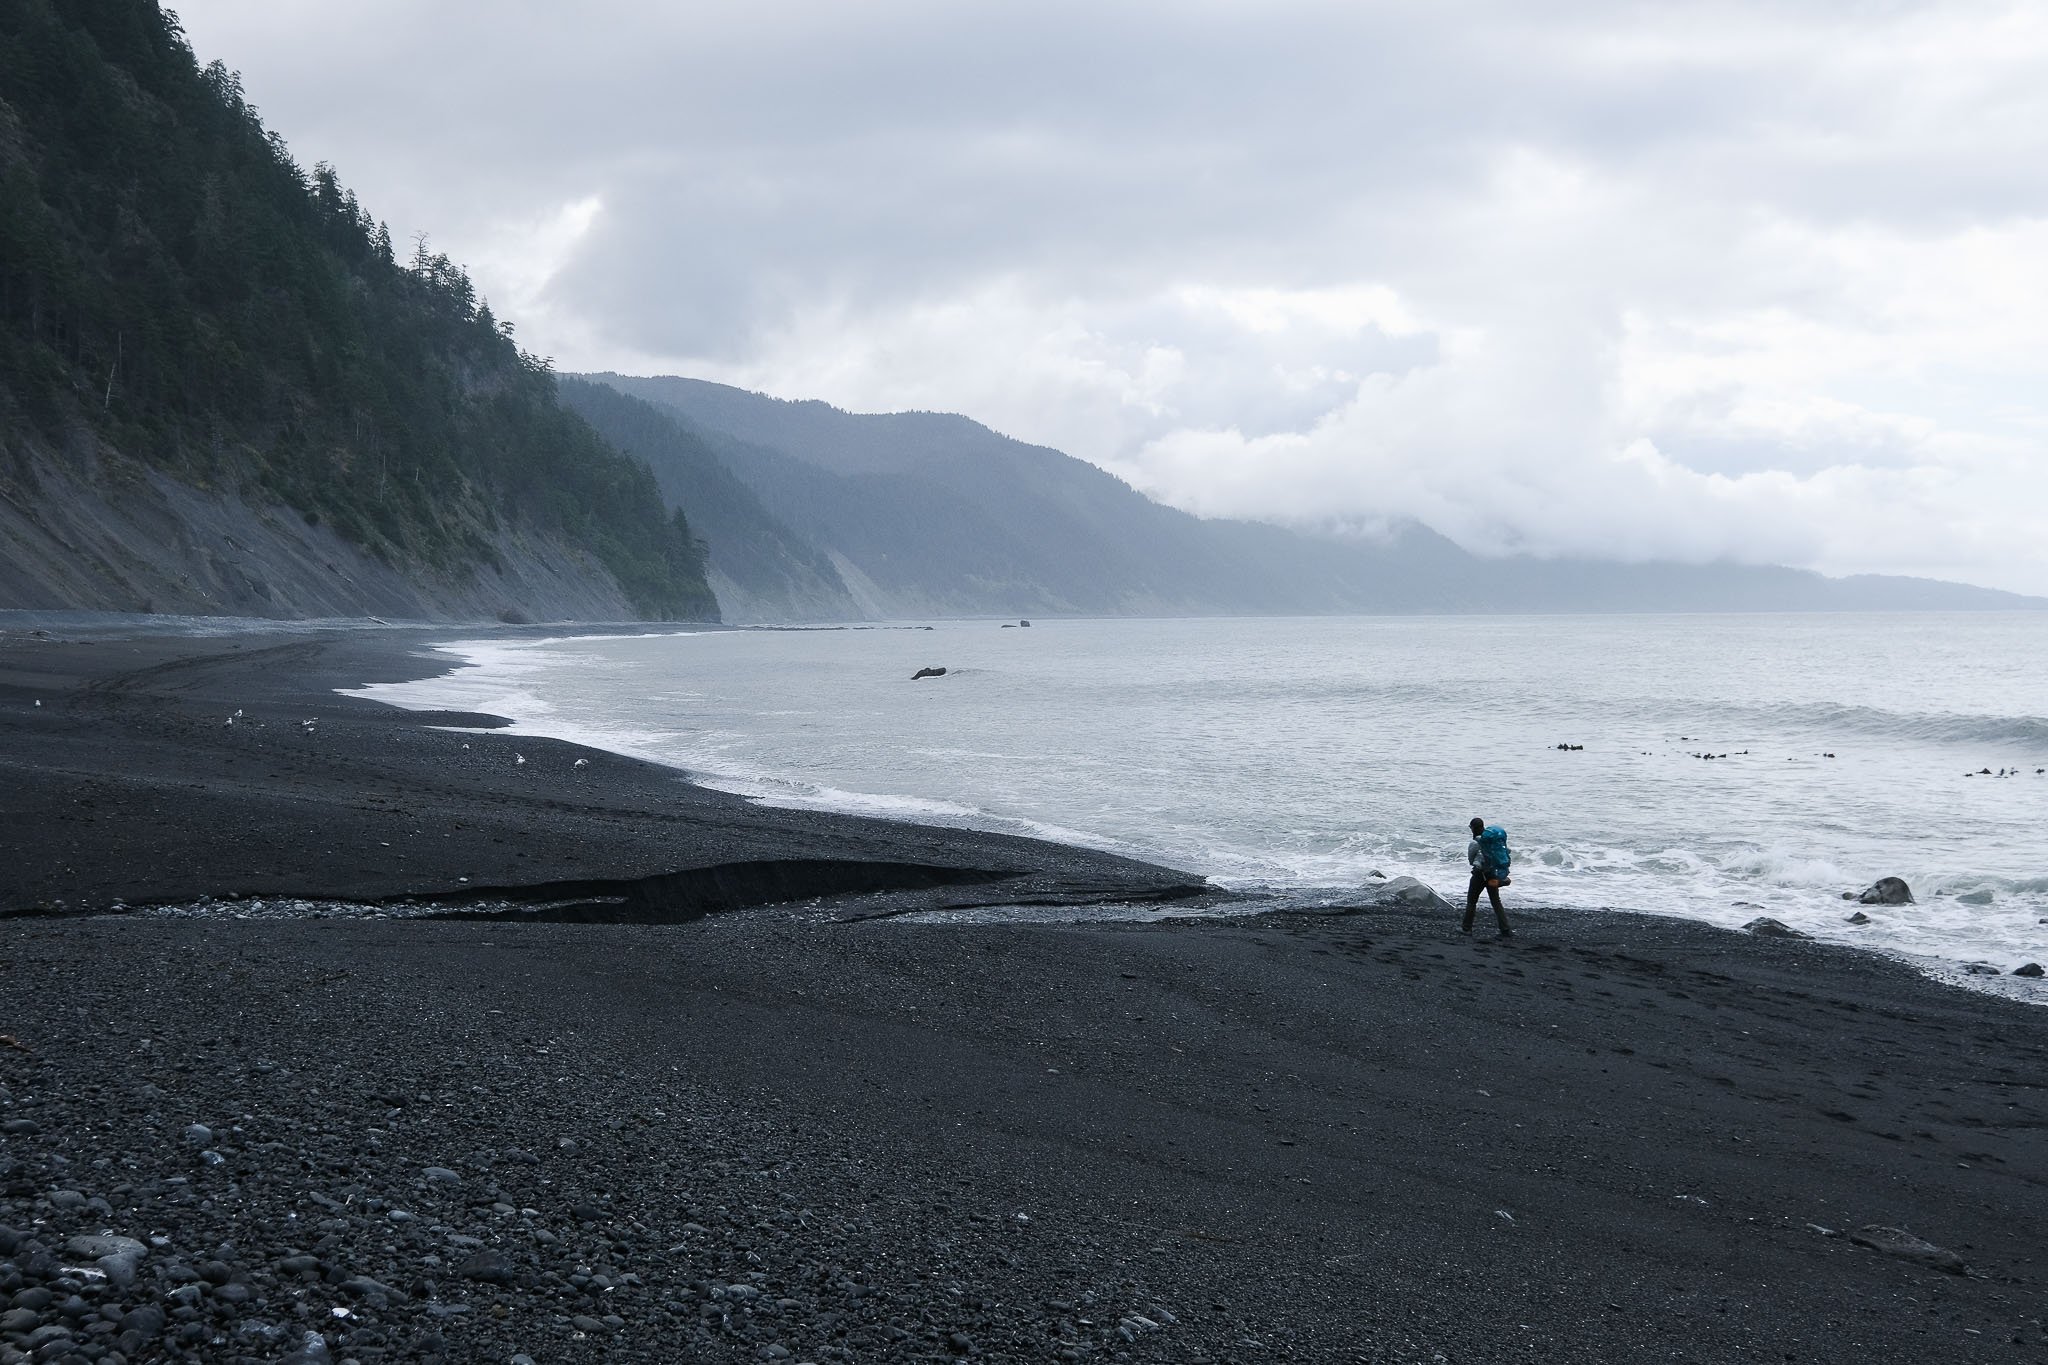
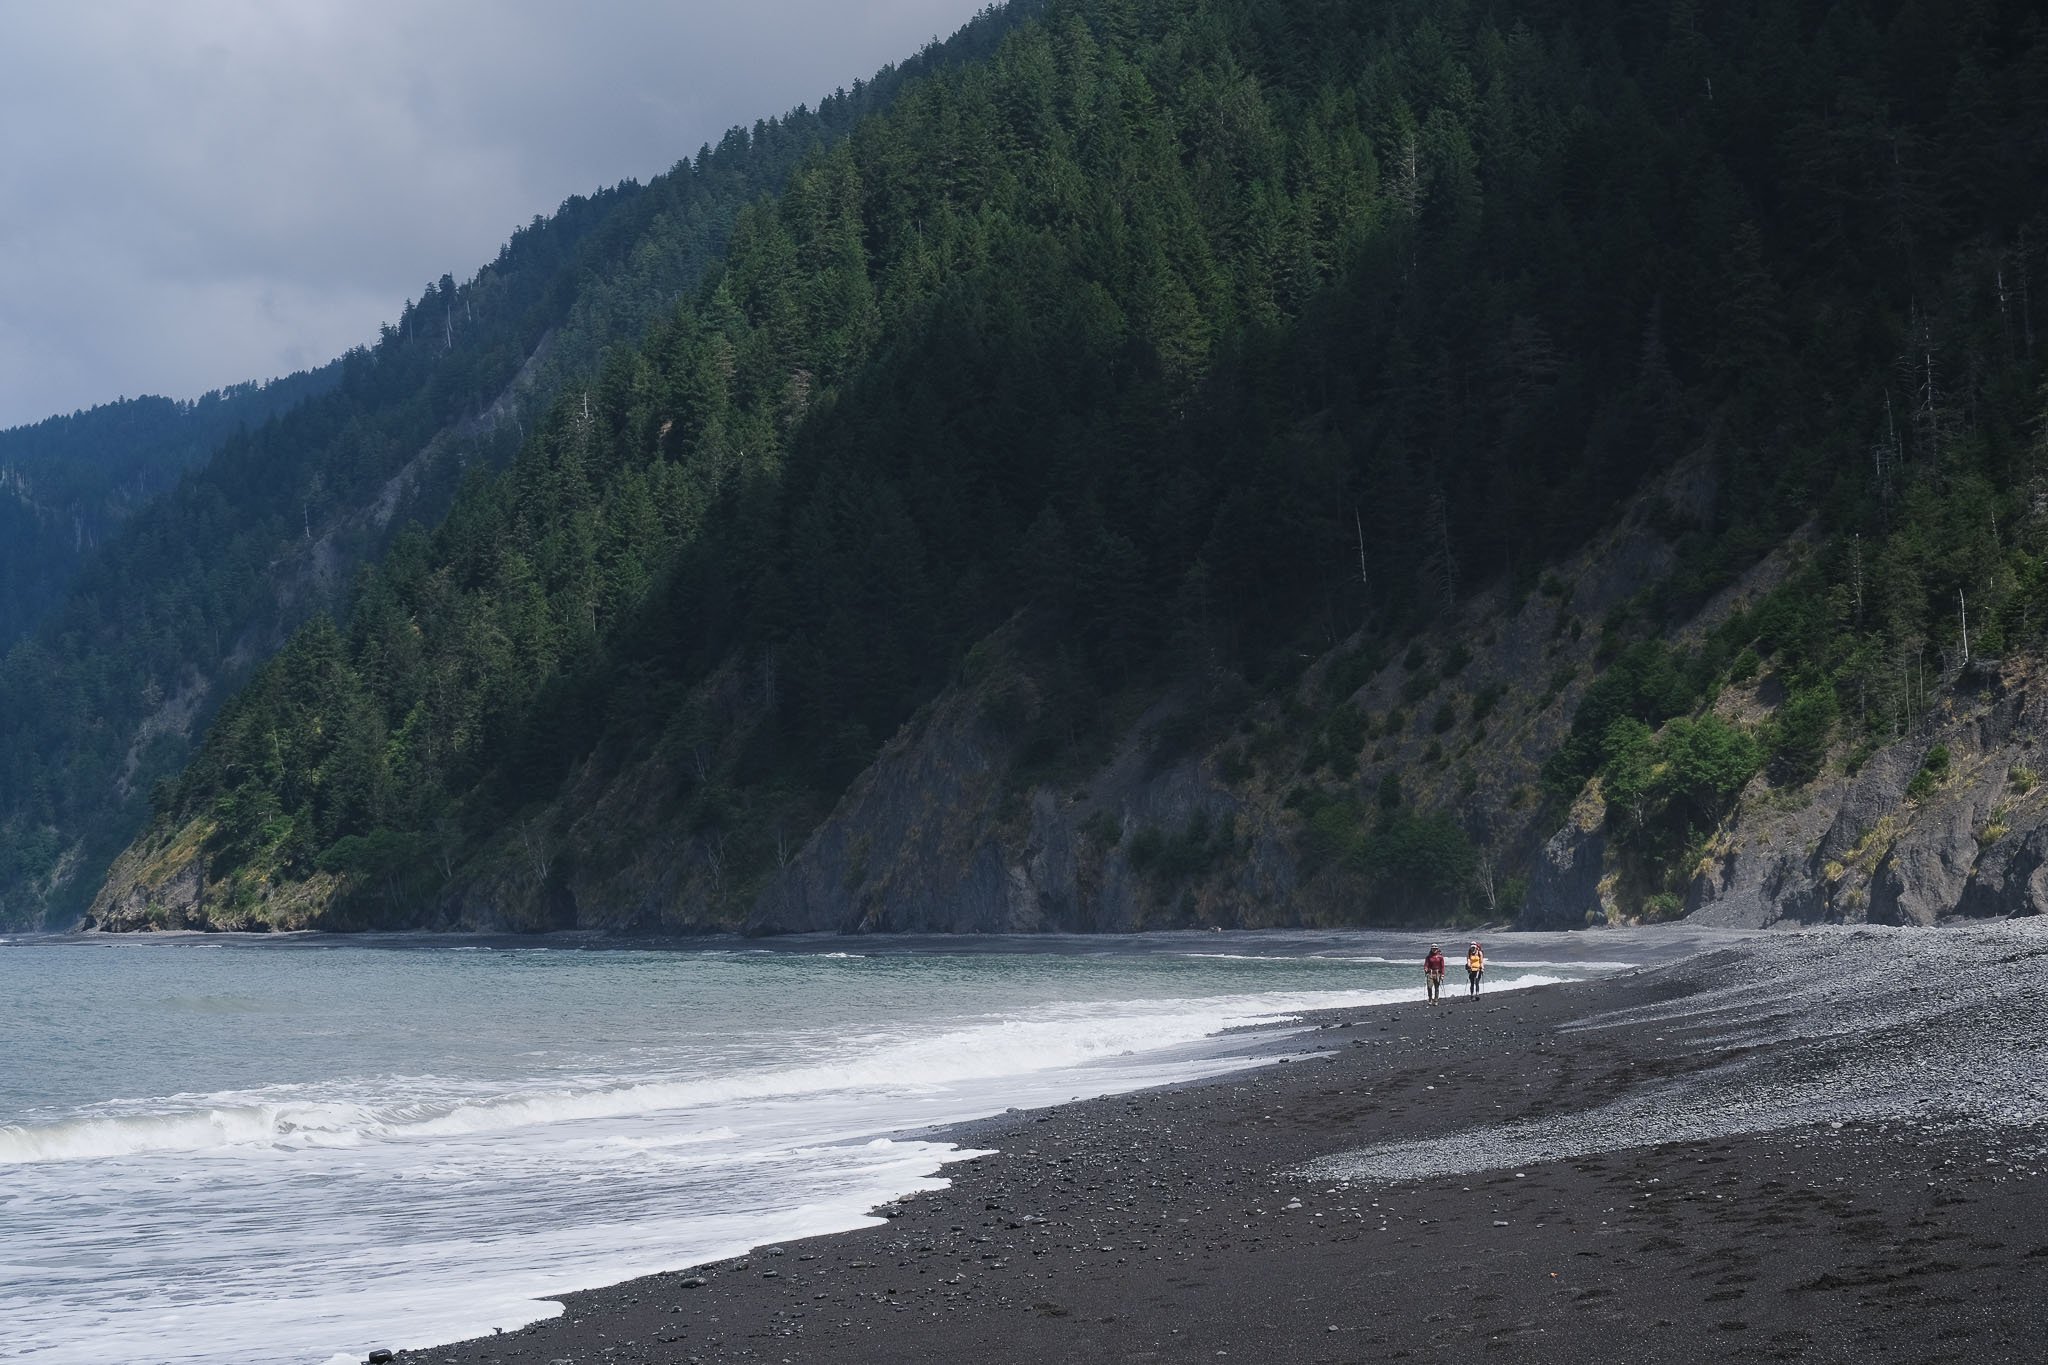
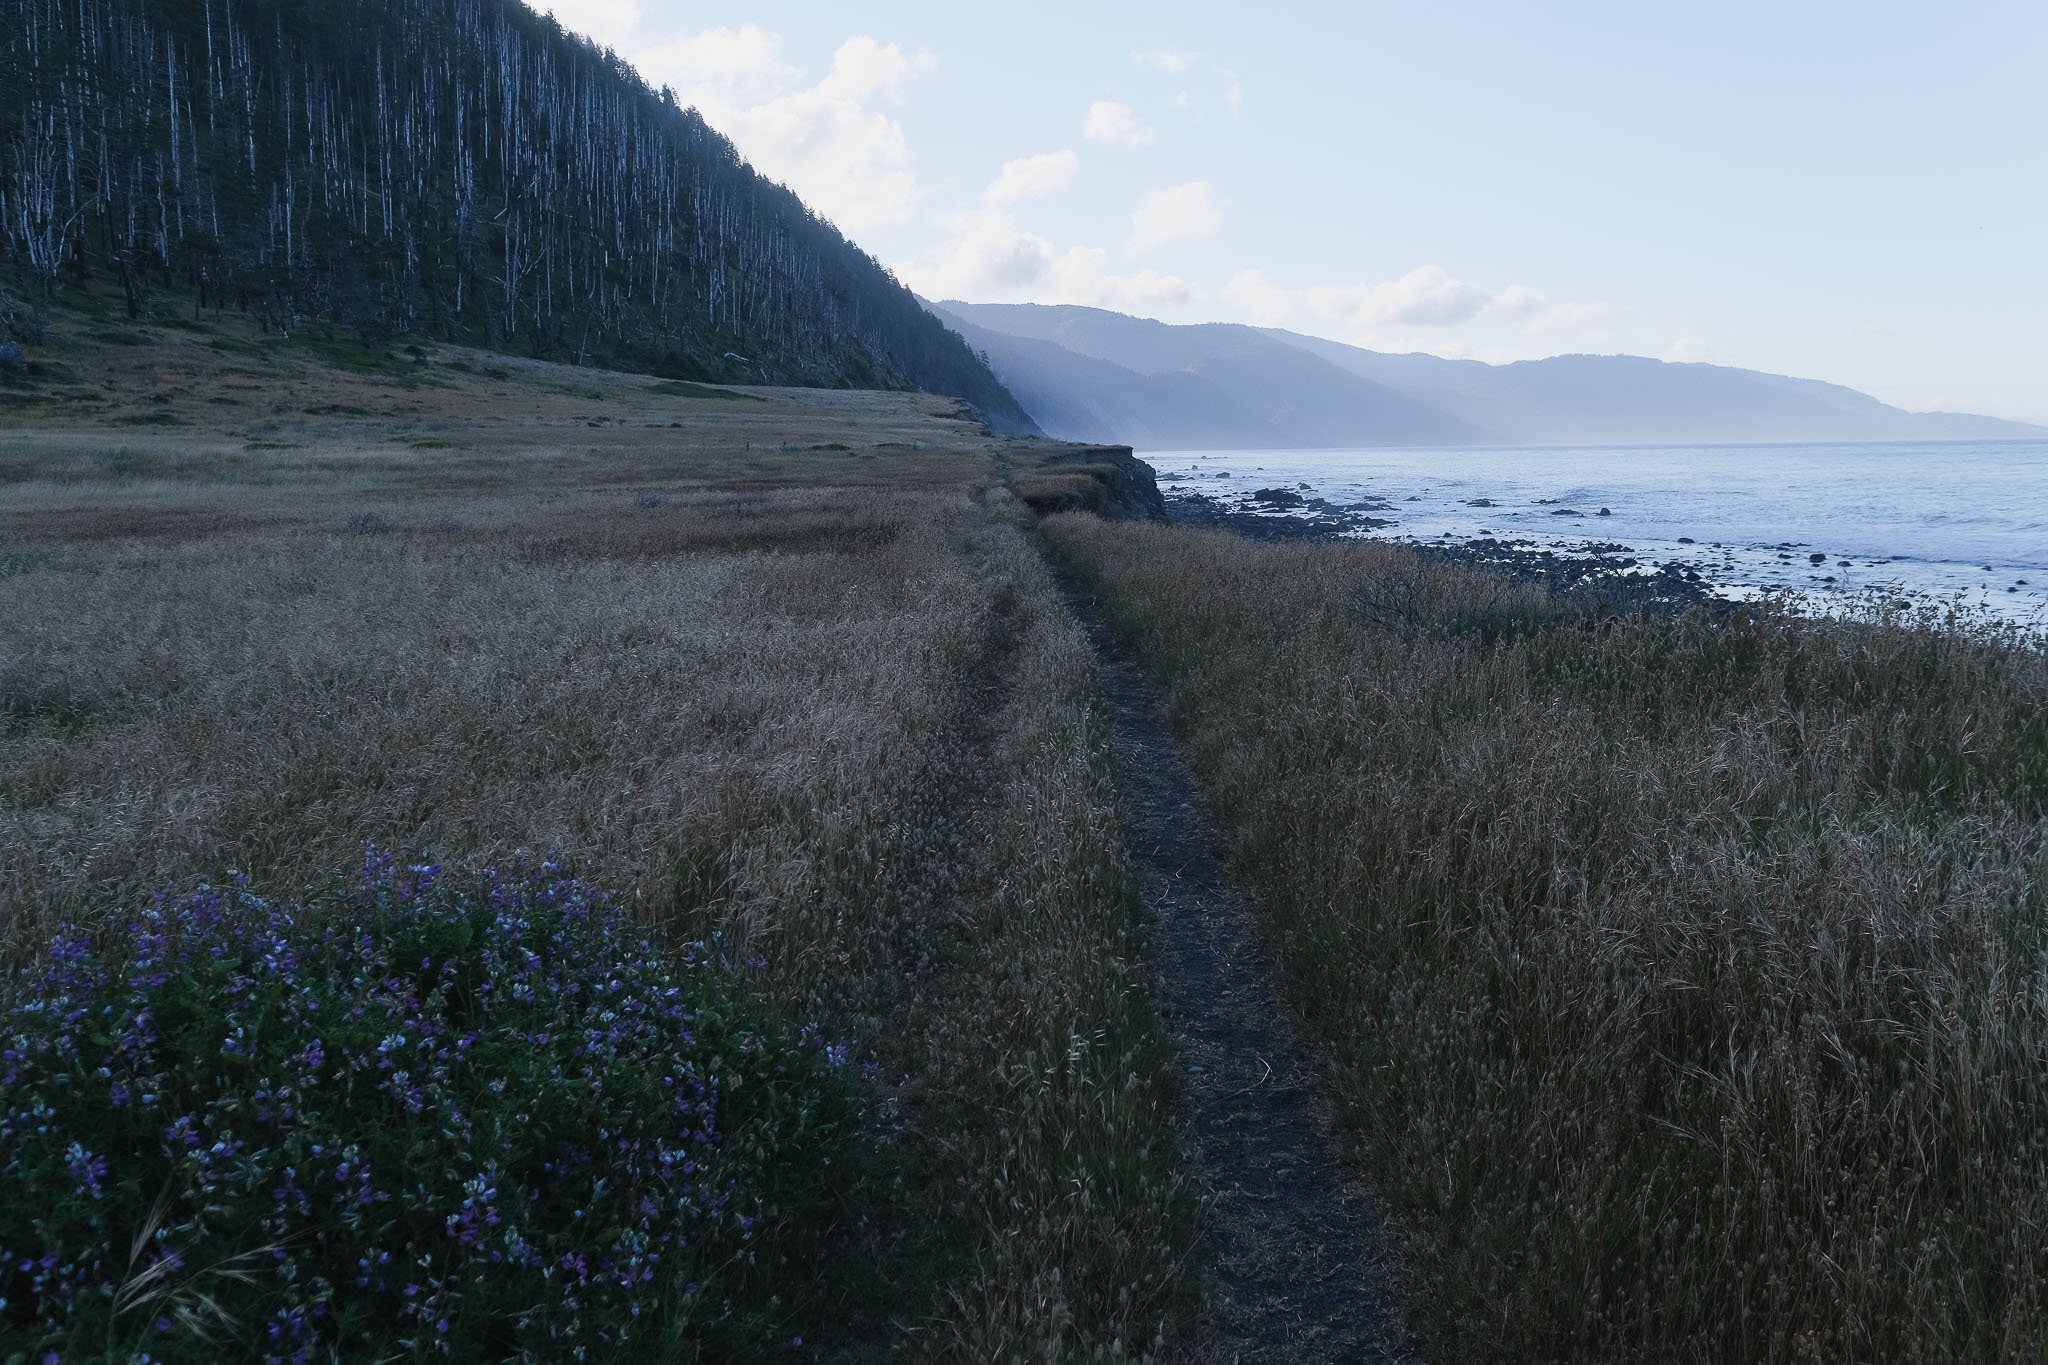
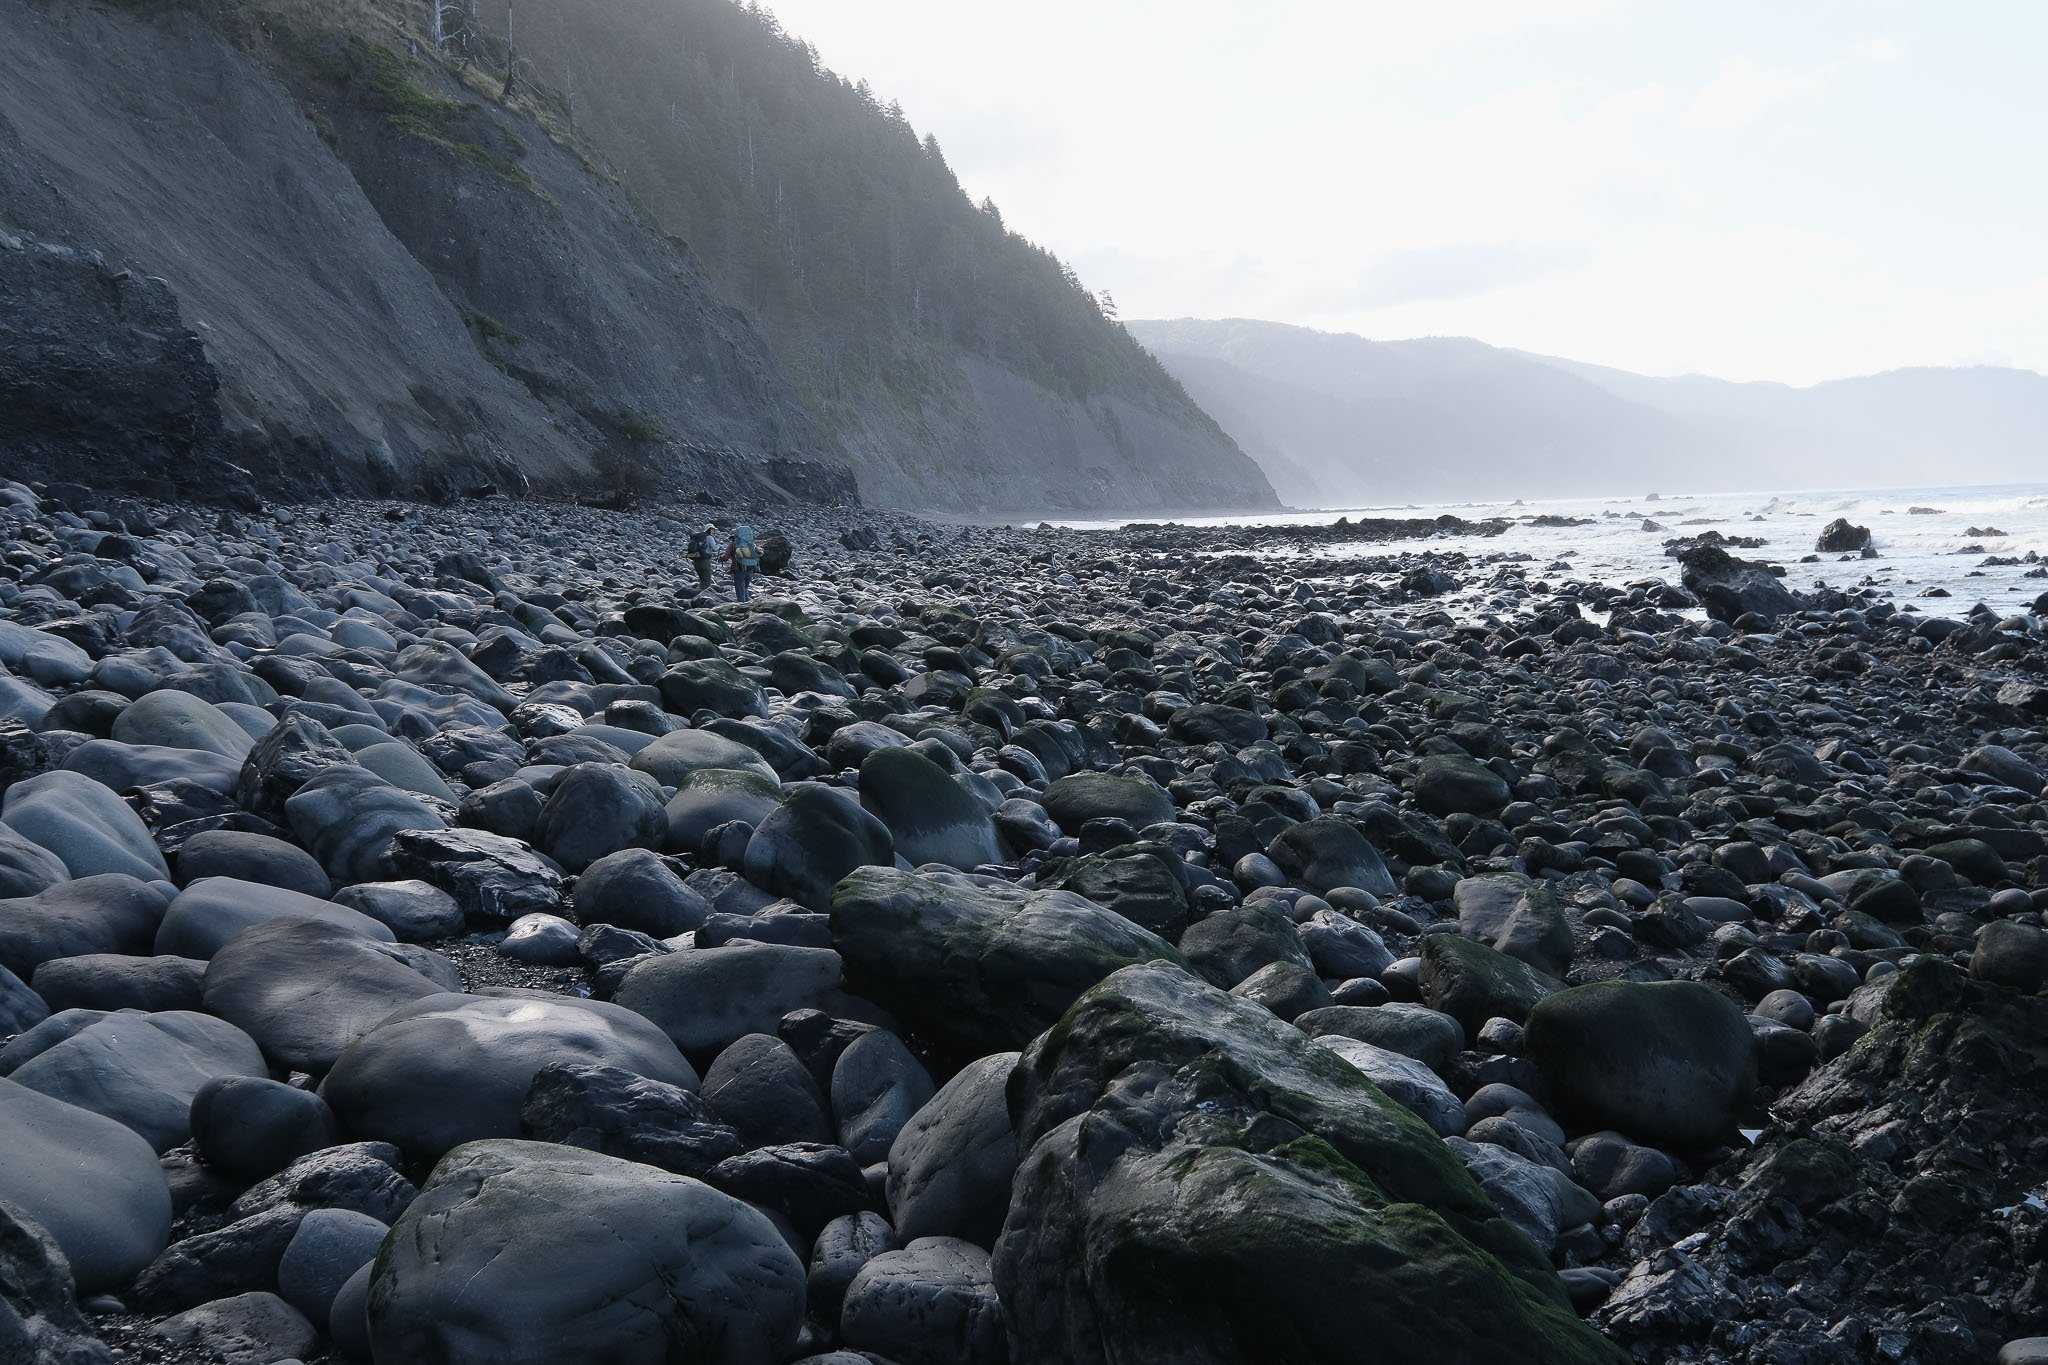
Mile 4.5-6.5: Sea Lion Gulch to Cooskie Creek
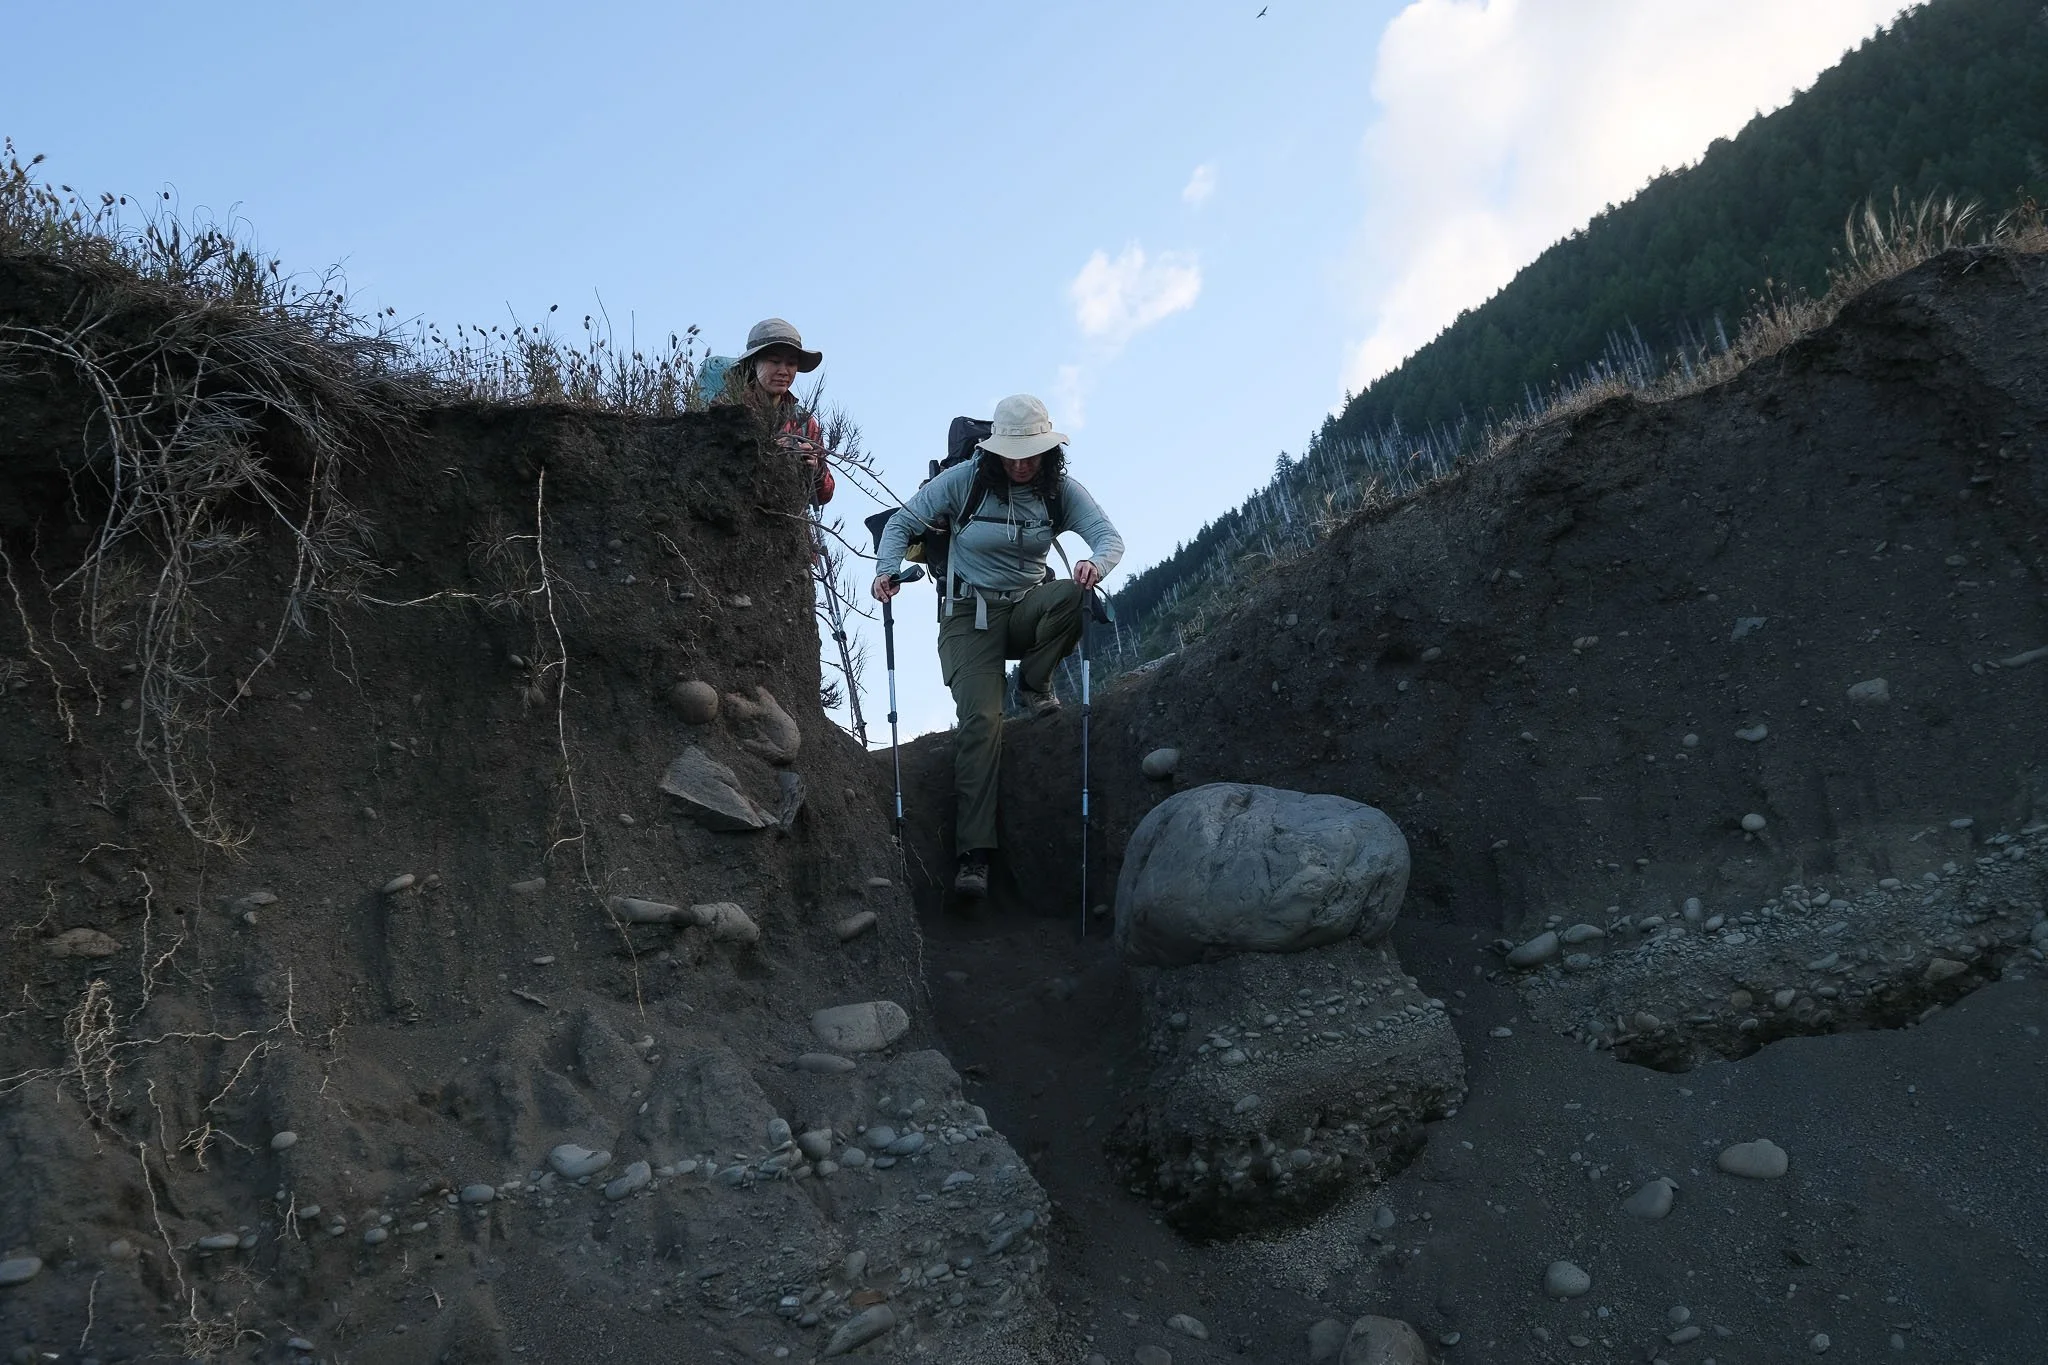
This is the first half of the 4 mile-long impassable zone between Cooskie Creek and Randall Creek. This beach is made up of boulders of all shapes and sizes. After a half mile, it looks like the beach ends. This is where the trail detours back up to the bluffs. Take this detour to avoid the pinch point here, regardless of tide levels. The detour is marked as the Lost Coast Trail on AllTrails (NOT the Cooskie Spur Route).
Anecdotally, we had no problem doing this section above the recommend 2.5 feet tide threshold. We wanted to camp at Cooskie Creek instead of Sea Lion Gulch our first night. Our tide schedule gave us a few hours in the afternoon where the tide dipped to between 2.9 and 3 feet, so we decided to go for it.
Starting impassable zone 2

The beach looks like it comes to an end at the rocky outcropping where the waves are crashing.

Take the bluff detour to avoid the pinch point.

Looking back towards Sea Lion Gulch
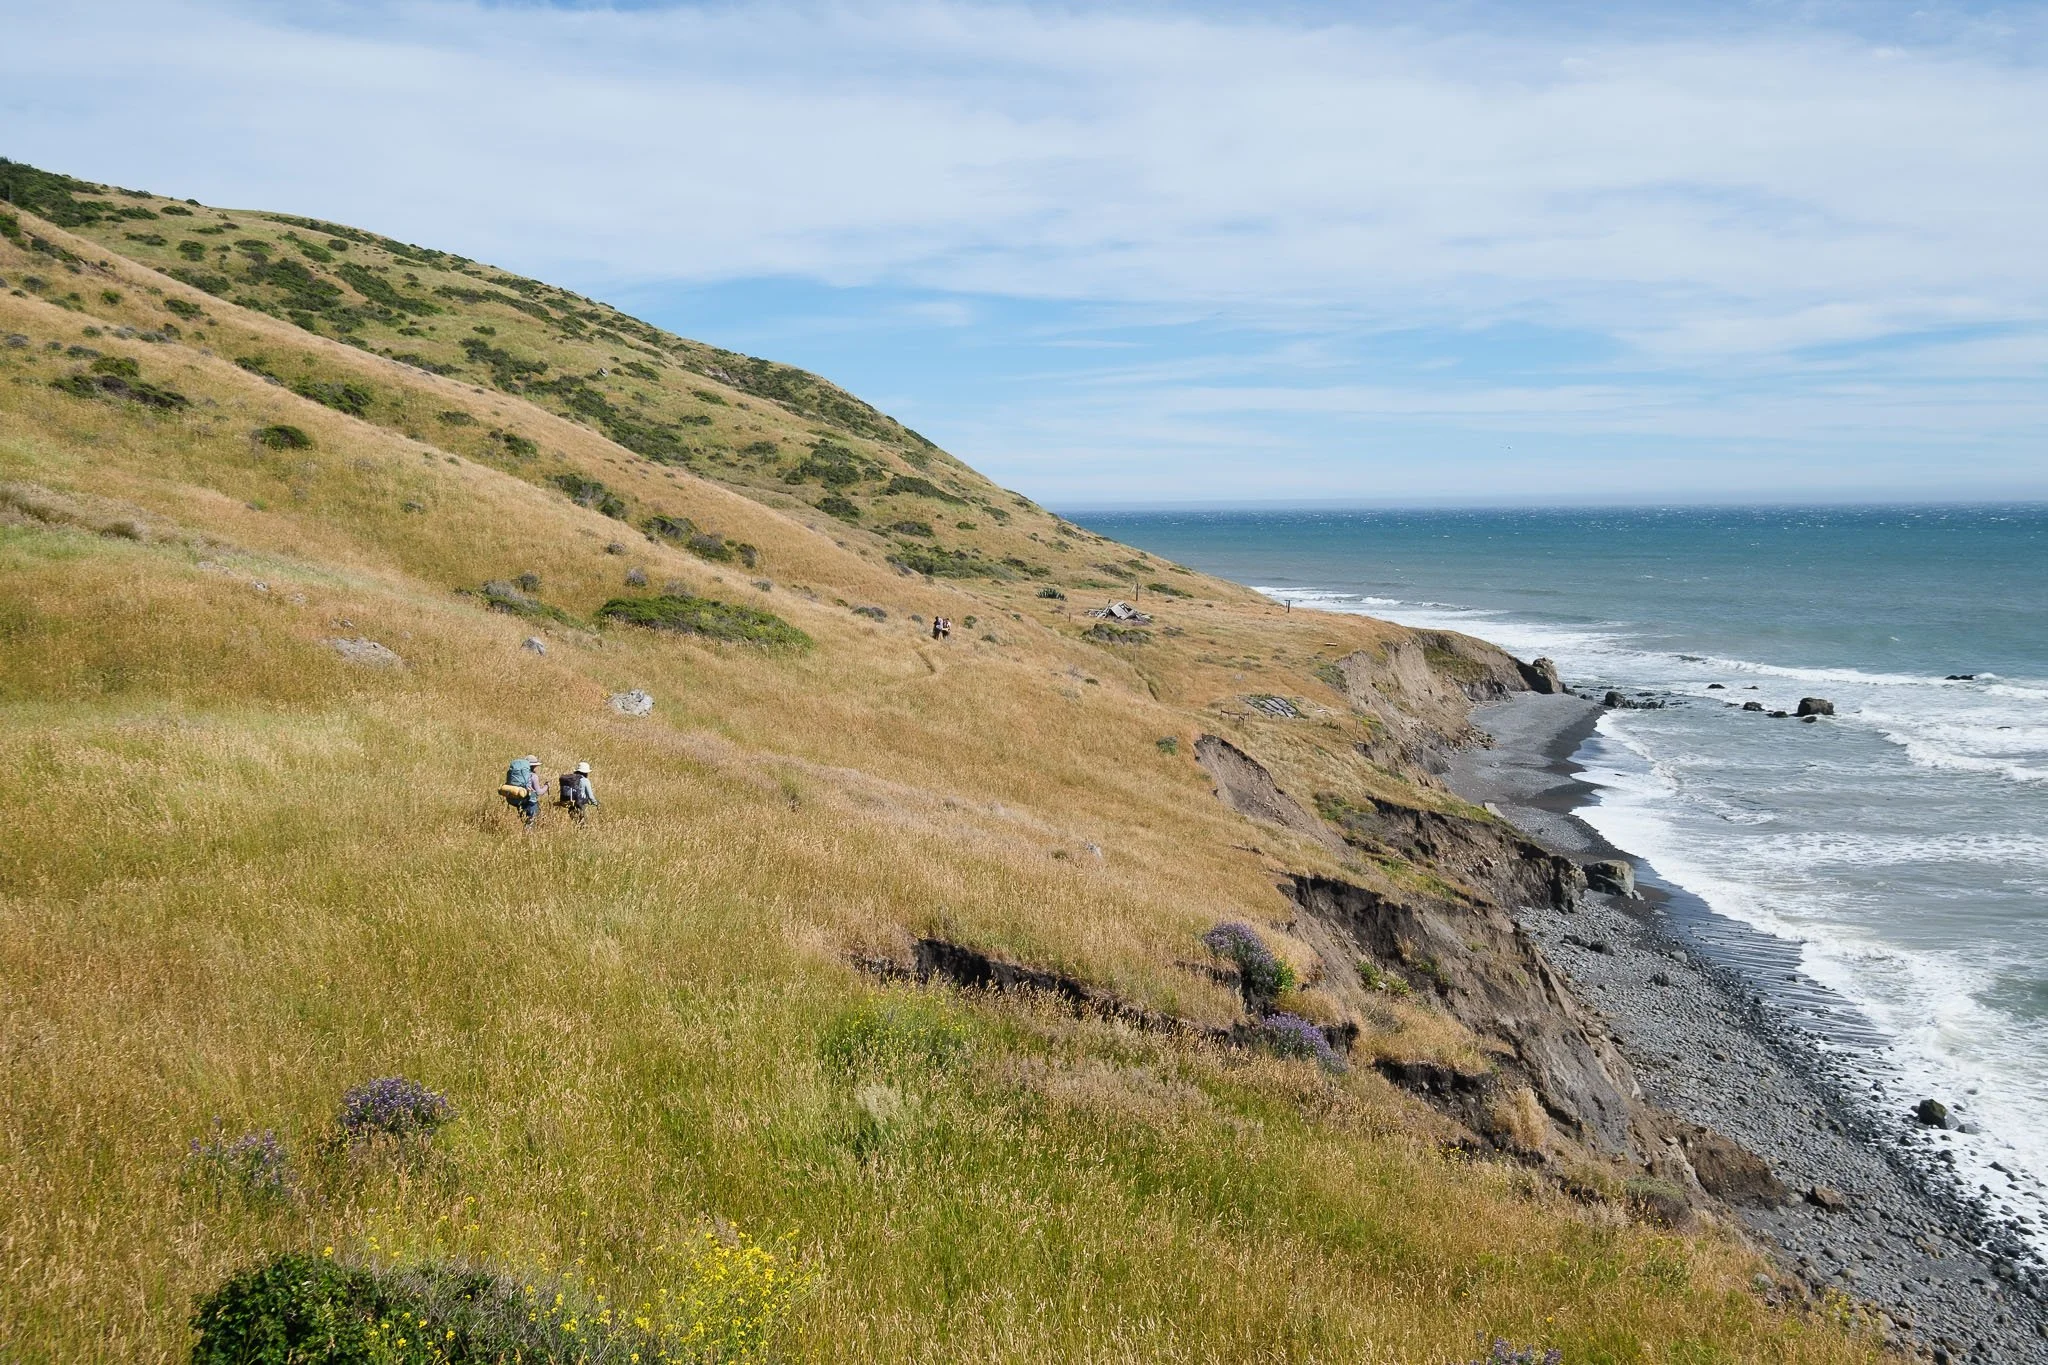
The bluff detour has great beach views.

Back to rocky beach hiking. This is before Cooskie Creek.

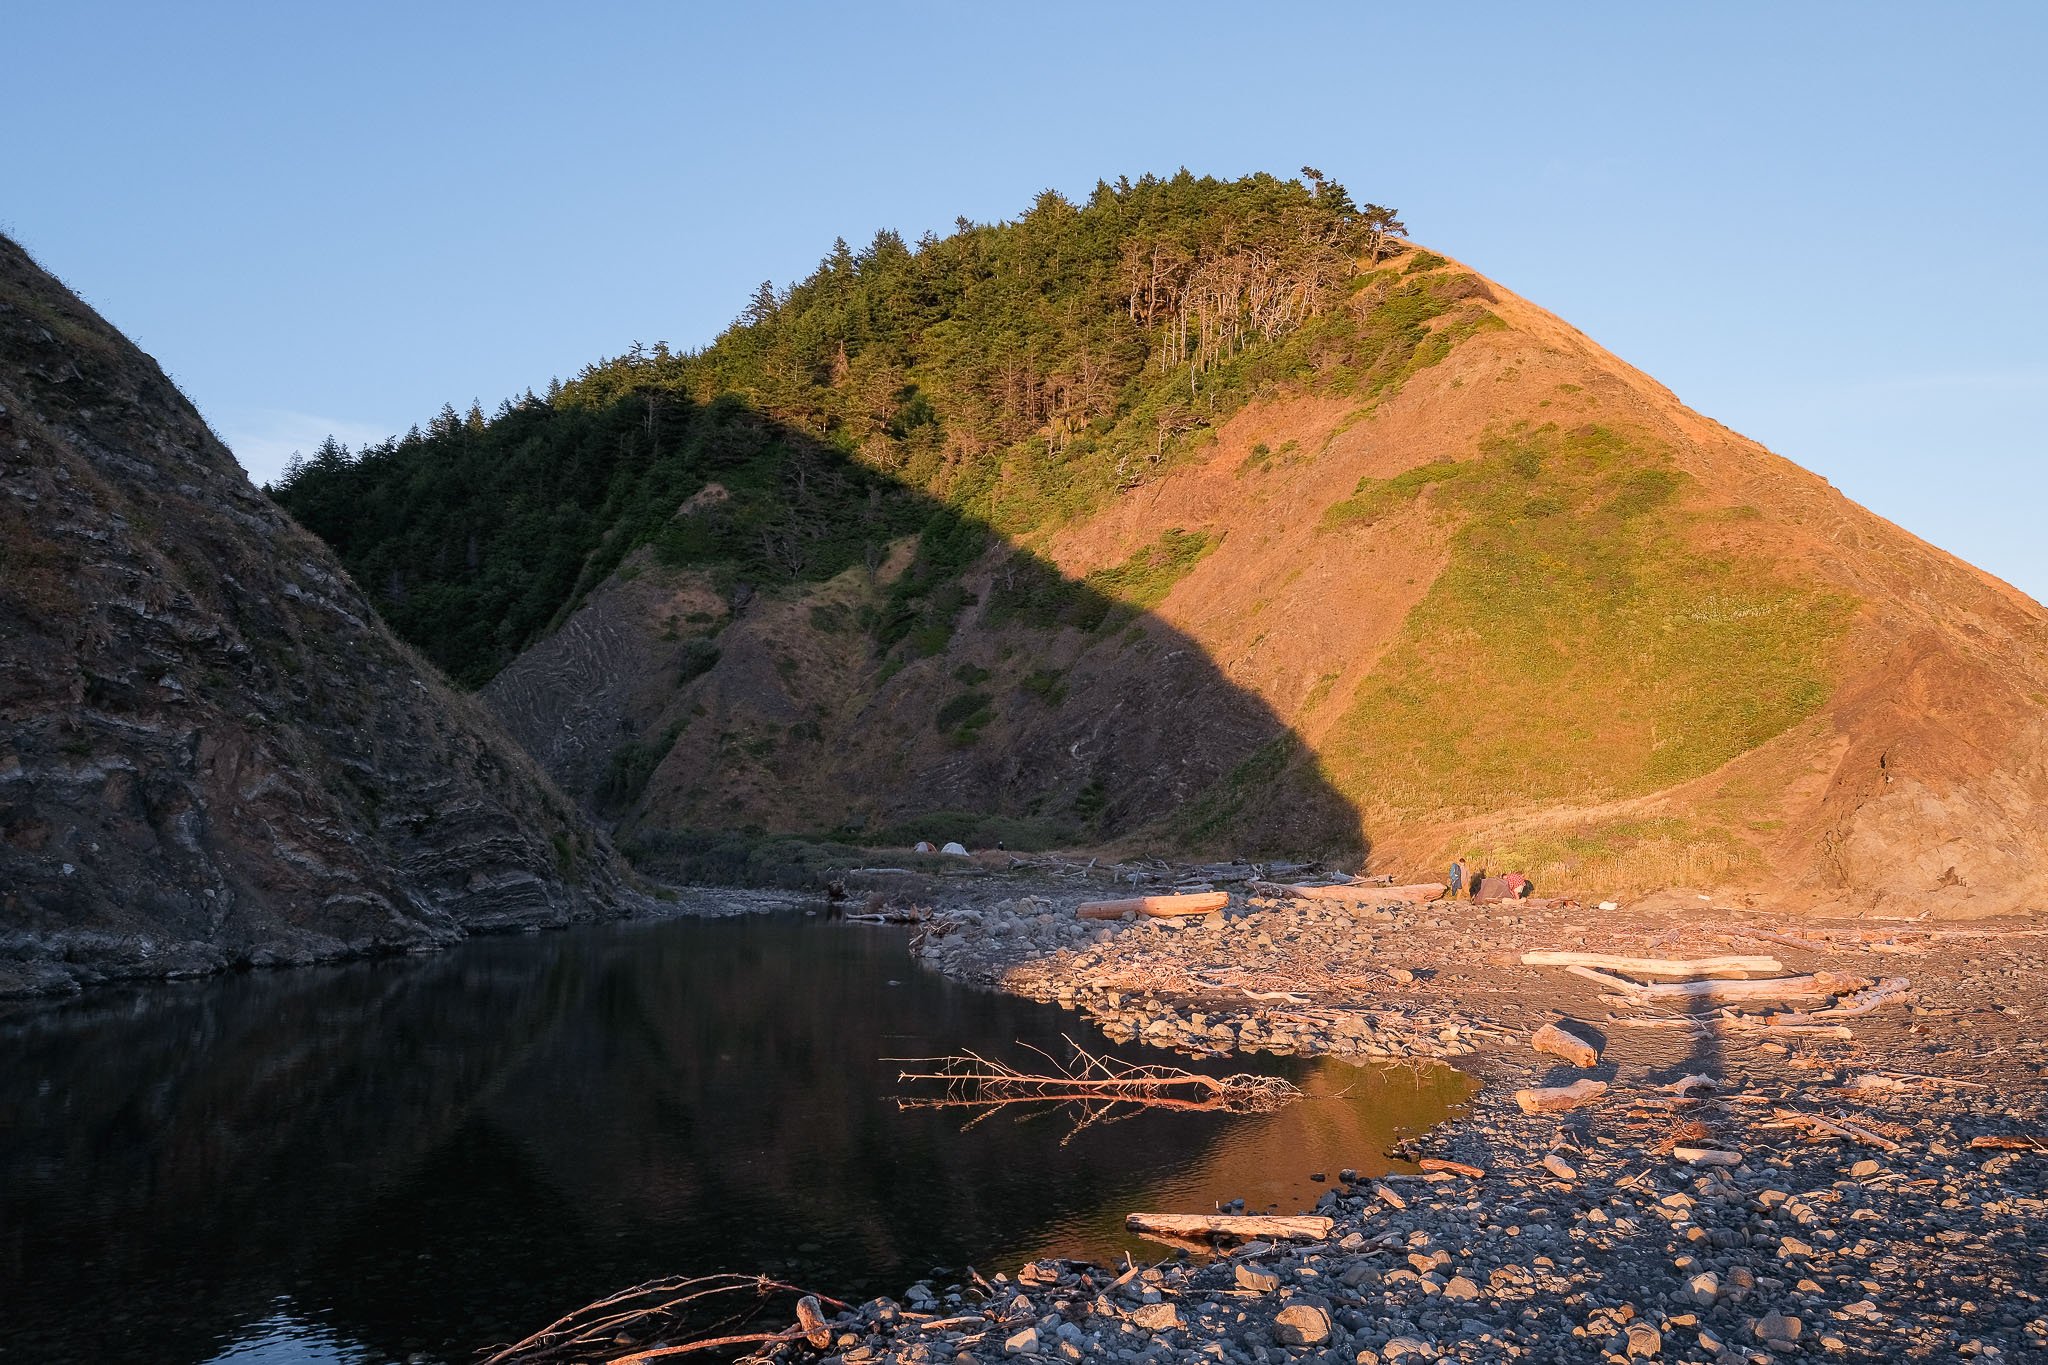
Arriving at Cooskie Creek.

The beach near Cooskie Creek at sunset.
The canyon walls protect the campsites at Cooskie Creek from wind.
Mile 6.5-8.5: Cooskie Creek to Randall Creek
The second half of the 4 mile impassable zone is all beach hiking. The low tide exposes tide pools filled with barnacles, sea anemone, and starfish. I’d never seen so many starfish in my life. They were splayed on rocks and nestled in crevasses, and showed off varying intensities of red and orange colors.
The pinchiest part of the impassable zone is near the end around Randall Creek.
Starting the second half of impassable zone 2 in the early morning

So many tidepools. I would have loved to explore these for longer but we were on a schedule!

Gravelly beach before Randall Creek

There were some tight areas around Randall Creek as we neared the end of our tide window.
Mile 8.5-13.5: Randall Creek to Big Creek
This section alternates between beach walking and an inland trail. You can’t really go wrong as there are various places to cross back and forth since the trail is not high on a cliff.
The inland trail is pretty far back from the beach at some points, and it feels hot and dry on a sunny day. Beware of ticks and rattlesnakes when passing through the more overgrown sections. My allergies were off the charts.
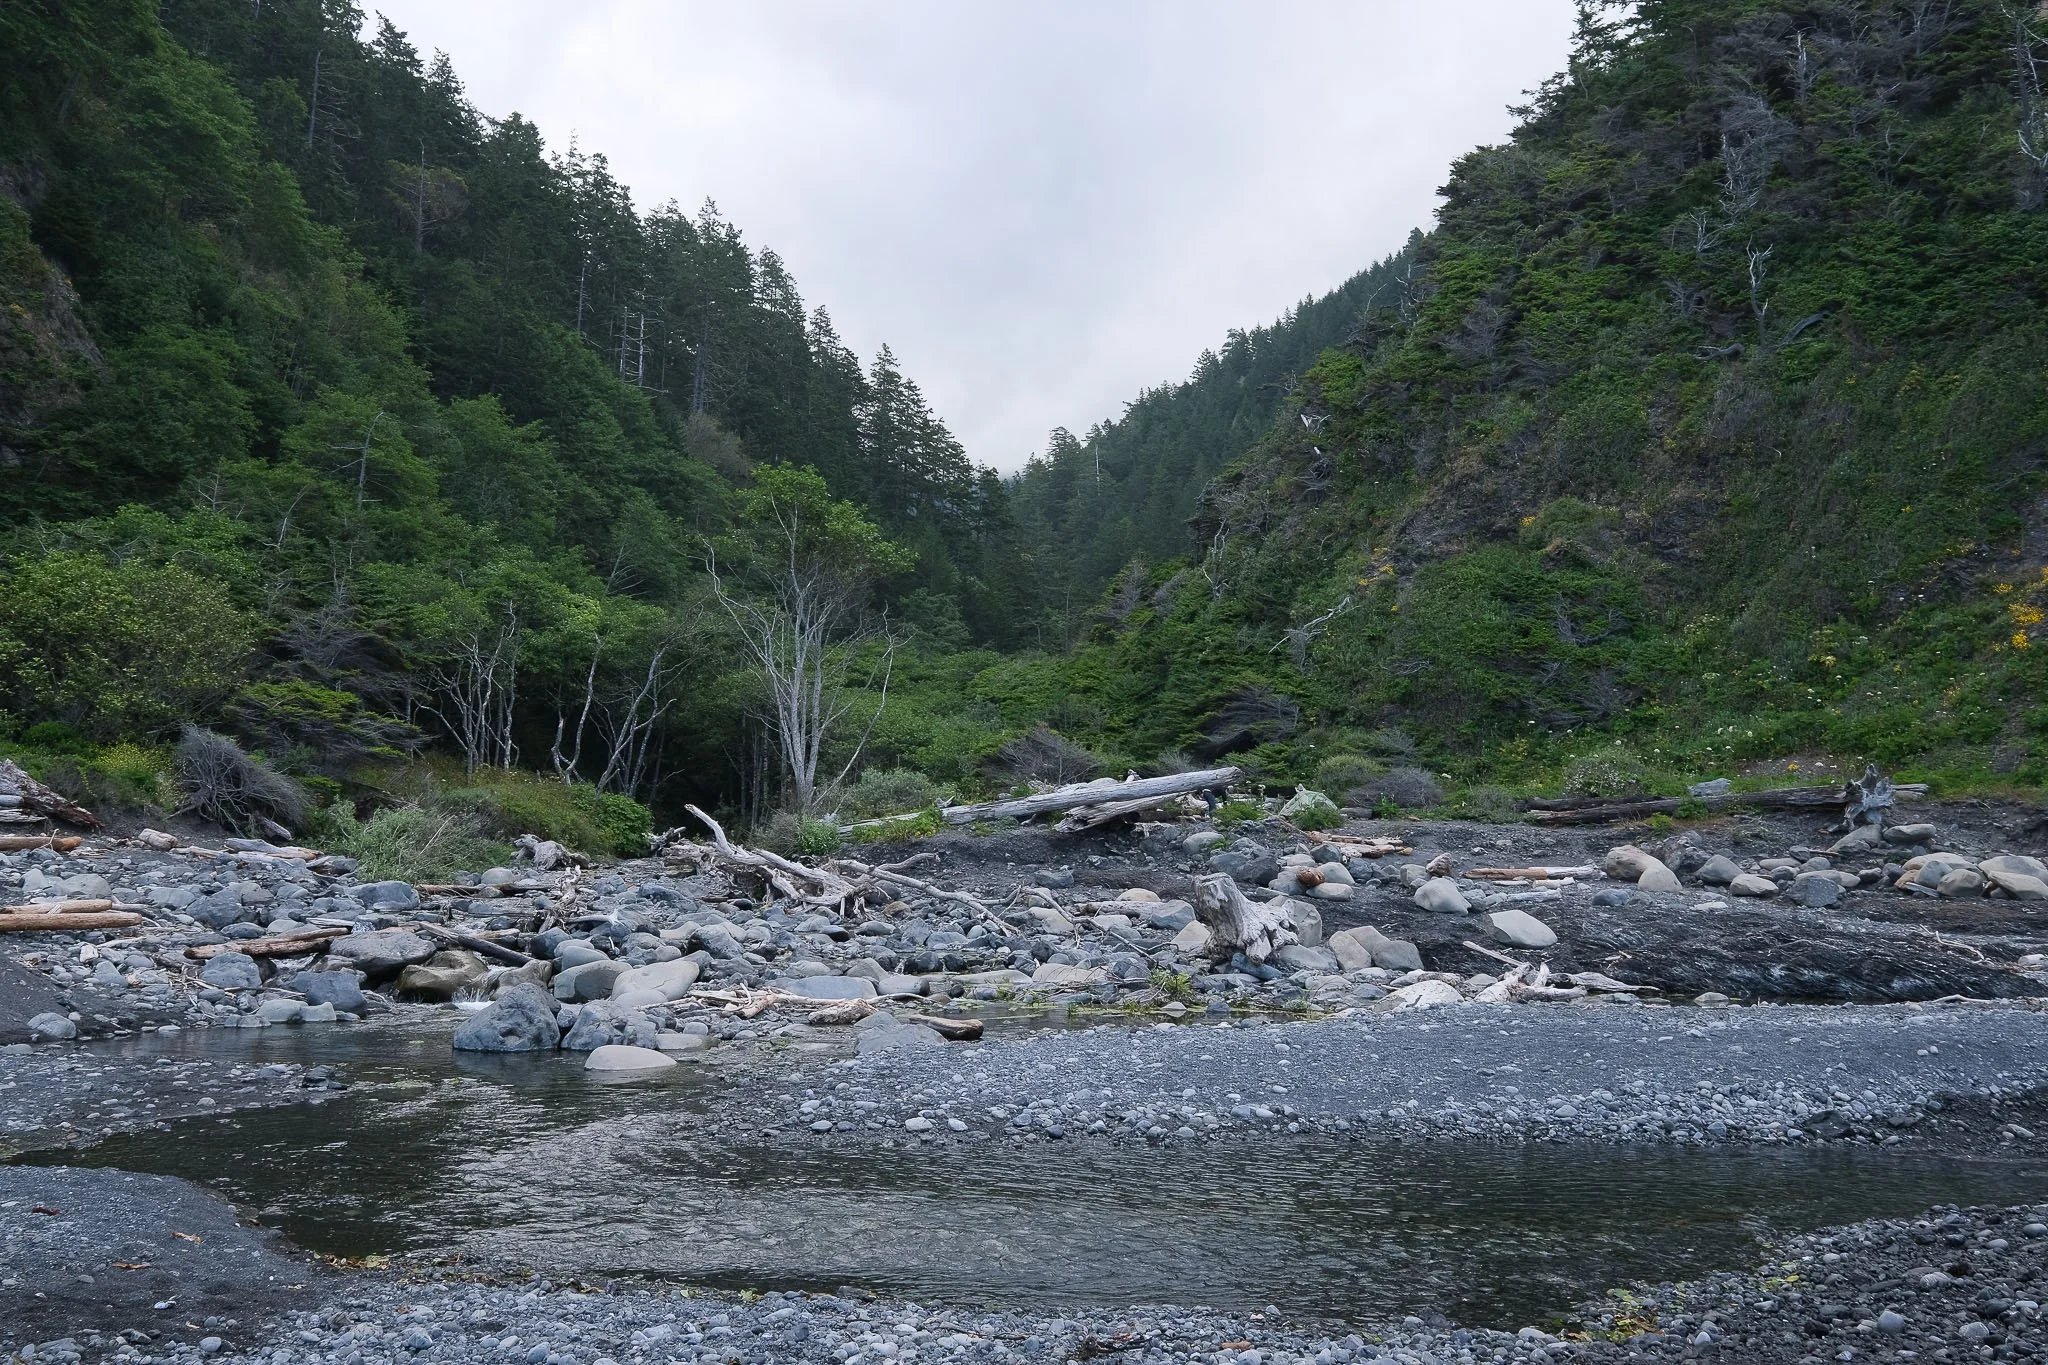
Between Spanish Flat and Kinsey Creek is a water source called Oat Creek. I don’t know of any camping here, but we stopped here to have a nice lunch break on the beach.
After Kinsey Creek, the trail returns to the rocky beach until Big Creek. Big Creek is a popular campsite with sandy beach sites as well as forested sites inland along the creek.
Ocean views from the inland trail

Crossing Big Creek, a popular camp spot.
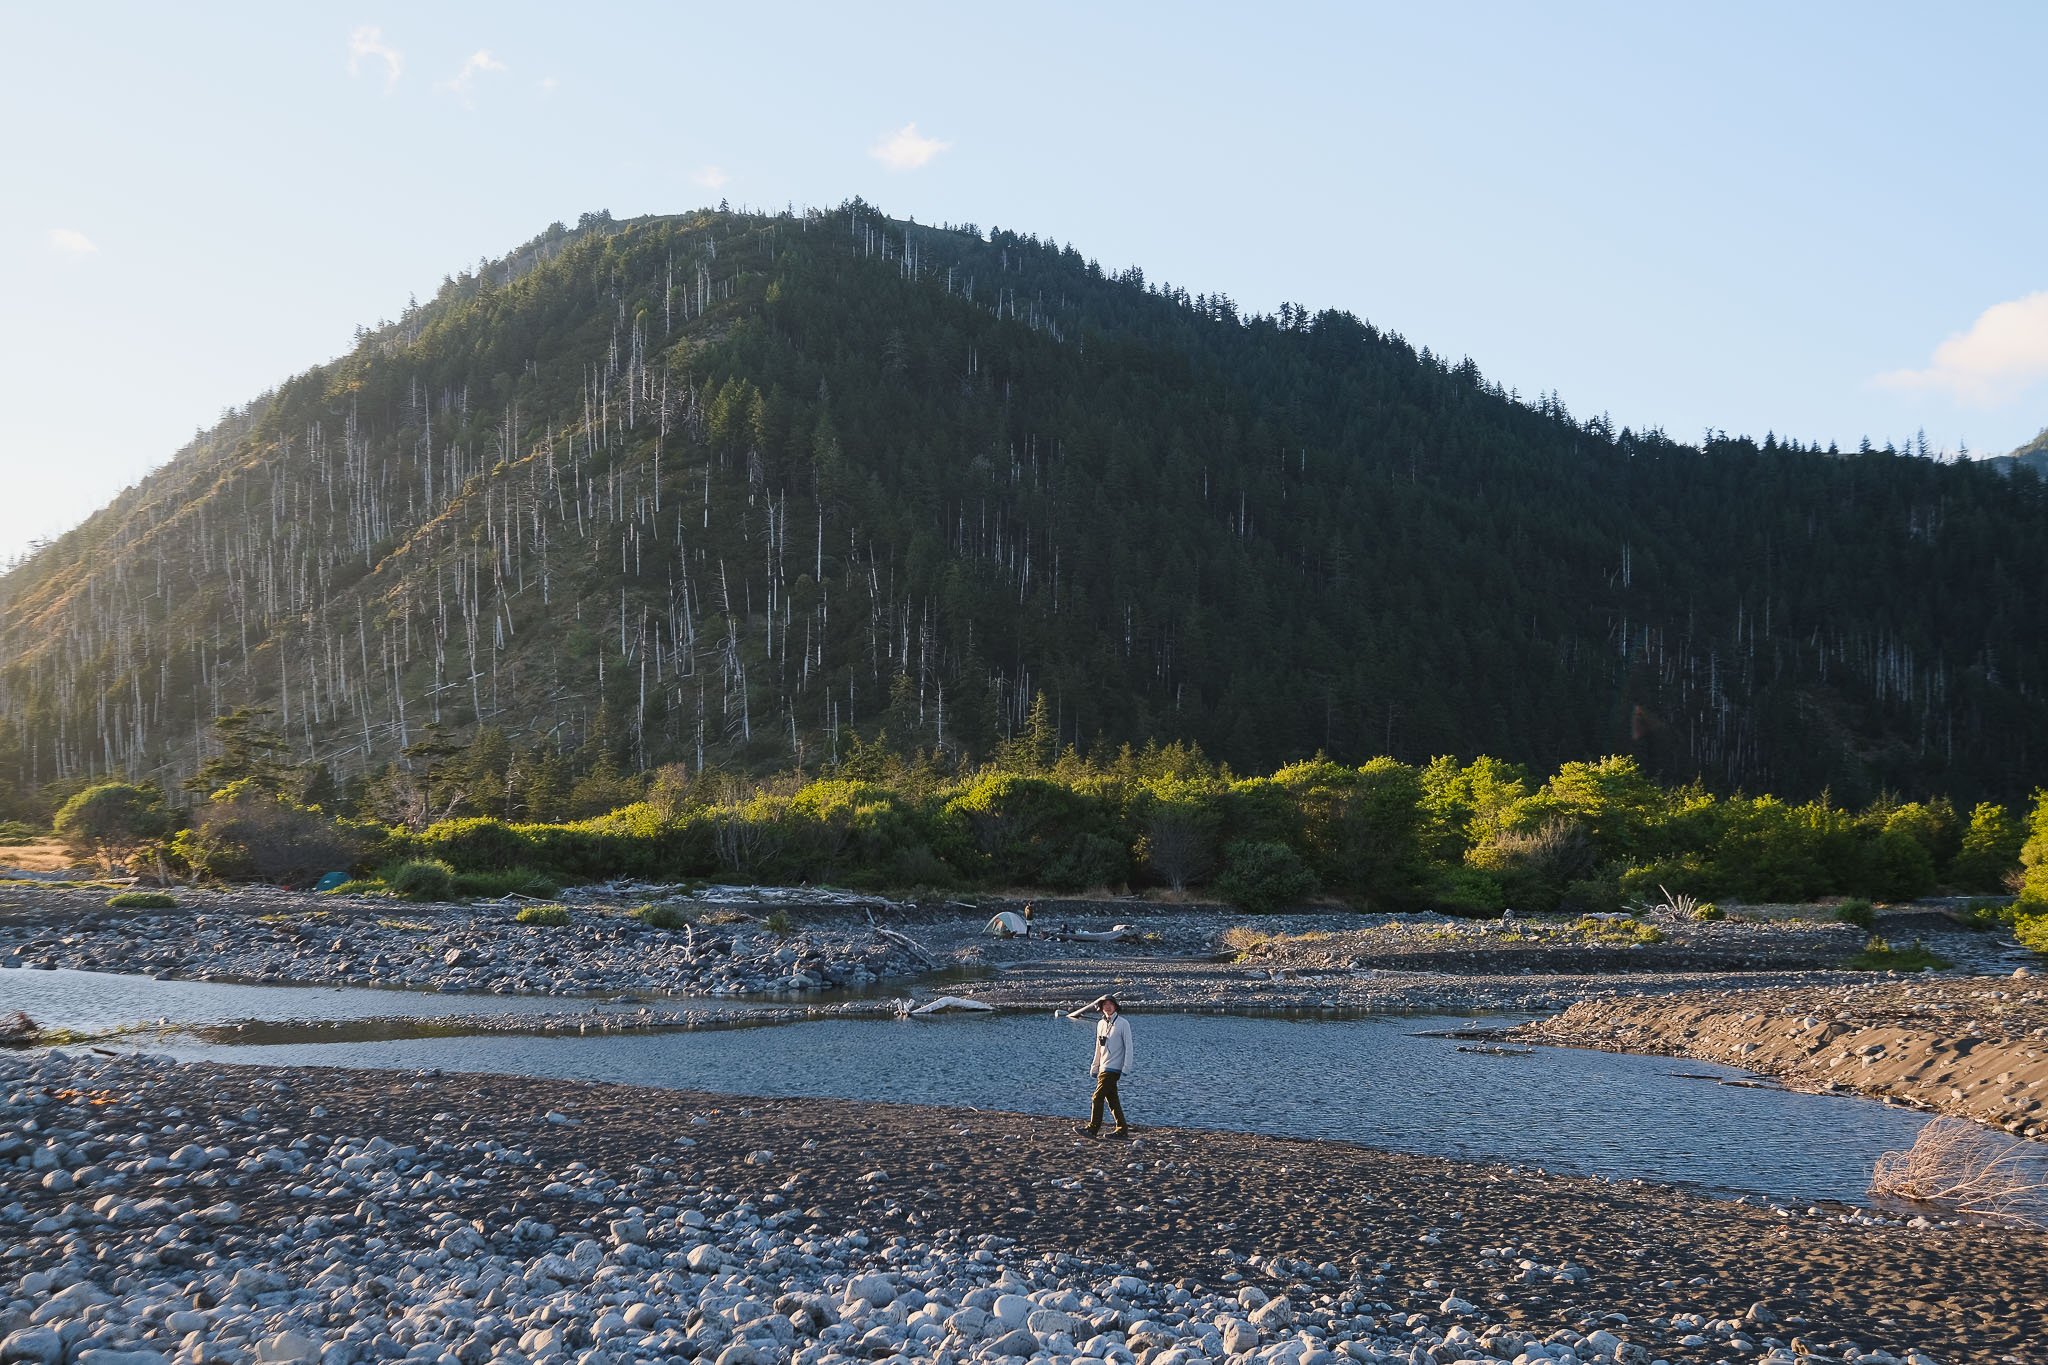
Mile 13.5-16.5: Big Creek to Big Flat
About a mile after Big Creek, the trail climbs up on to the headlands for a bit before descending to a wide and straight path that leads to Big Flat. On our way to Big Flat, we passed some homes at the base of the mountains to our left that looked very inhabited (turns out there was some kind of meditation and camping retreat happening at the time. We saw at least 10+ tents set up right after.)
Big Flat is a sprawling open area with a large creek running through it. The beach is made up of smooth stones where the waves are crashing, but there are also sandier areas interspersed with rocks and driftwood and tufted with beach plants. There are campsites out in the open and also more protected ones amongst the cluster of trees near the creek. Deer are often seen wandering in the beach grass around Big Flat.

The trail leaves the beach for a while between Big Creek and Big Flat.

Views from the dirt road as you approach Big Flat

Looking up the valley containing Big Flat Creek. You can see a tent set up on the left of the photo and another in the trees on the right.
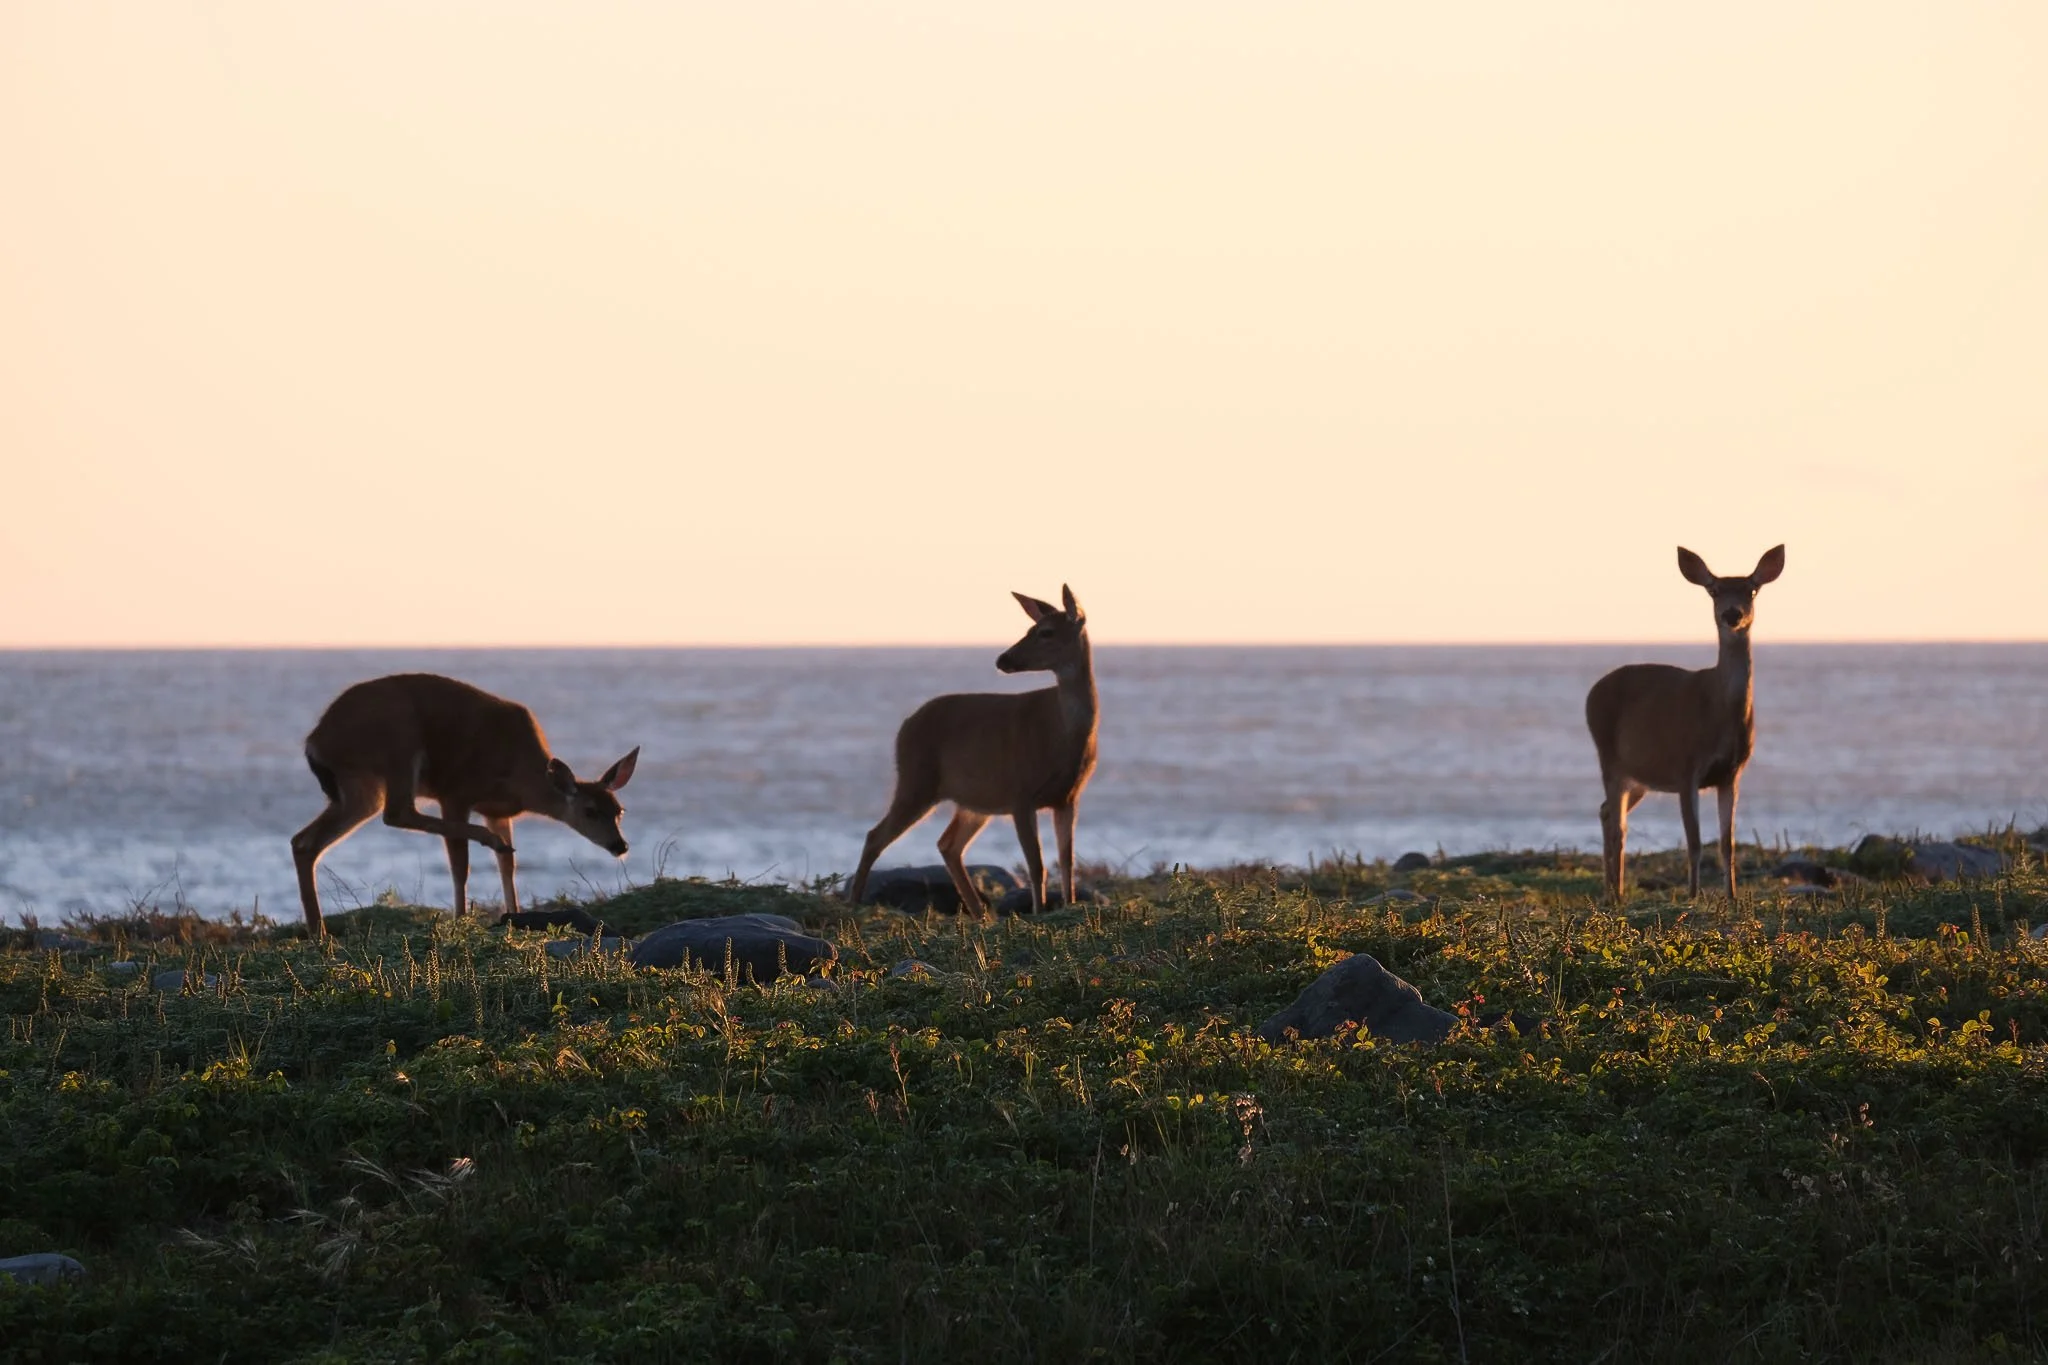
Deer at sunset
Alpine glow on the mountains seen from Big Flat
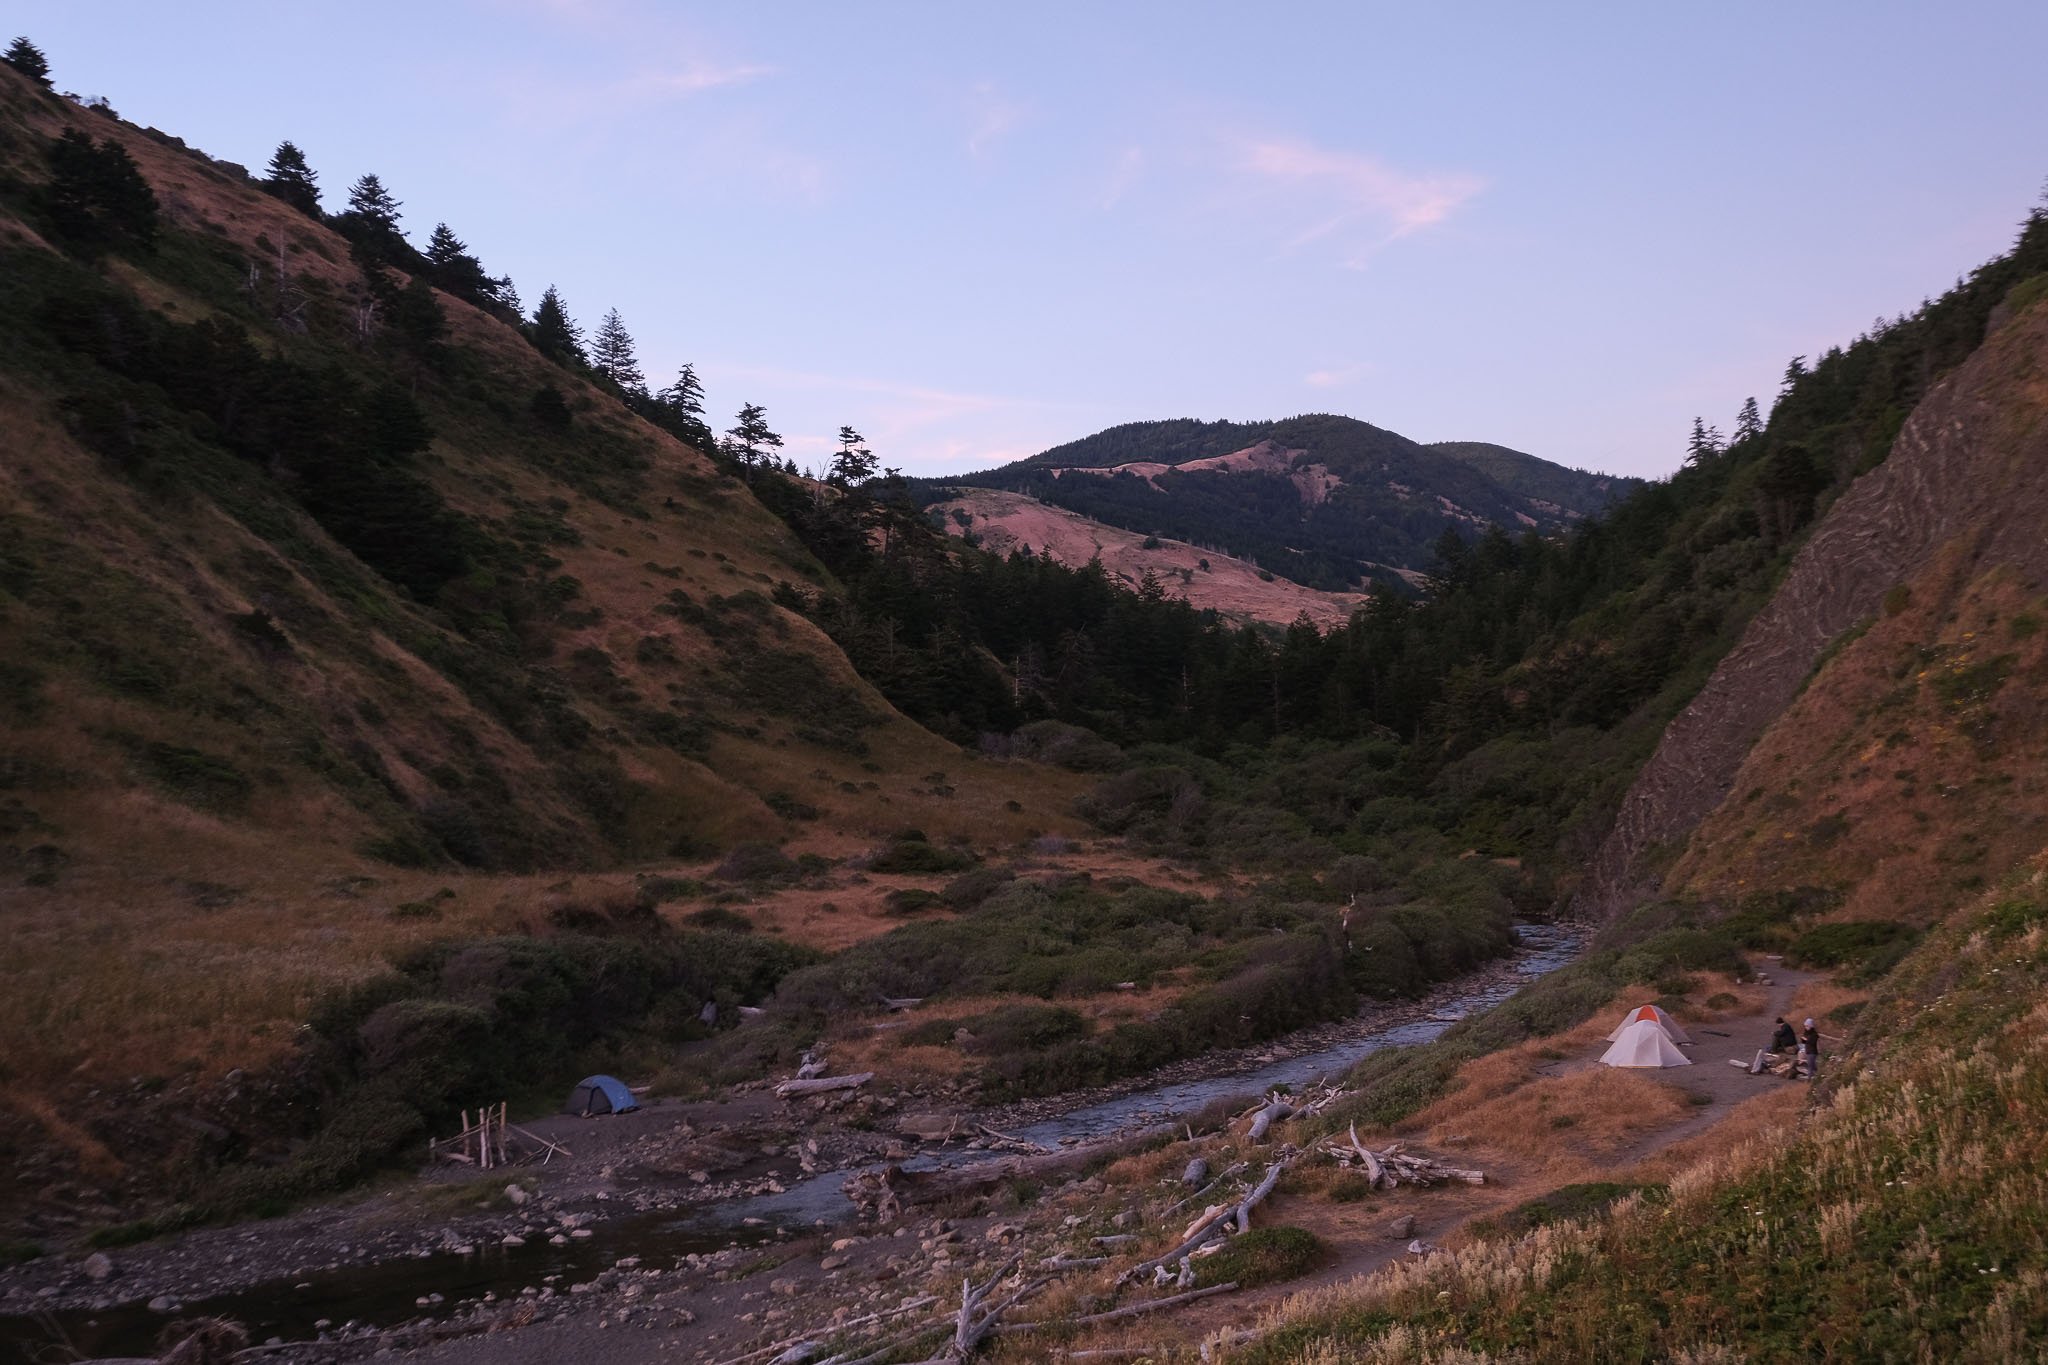
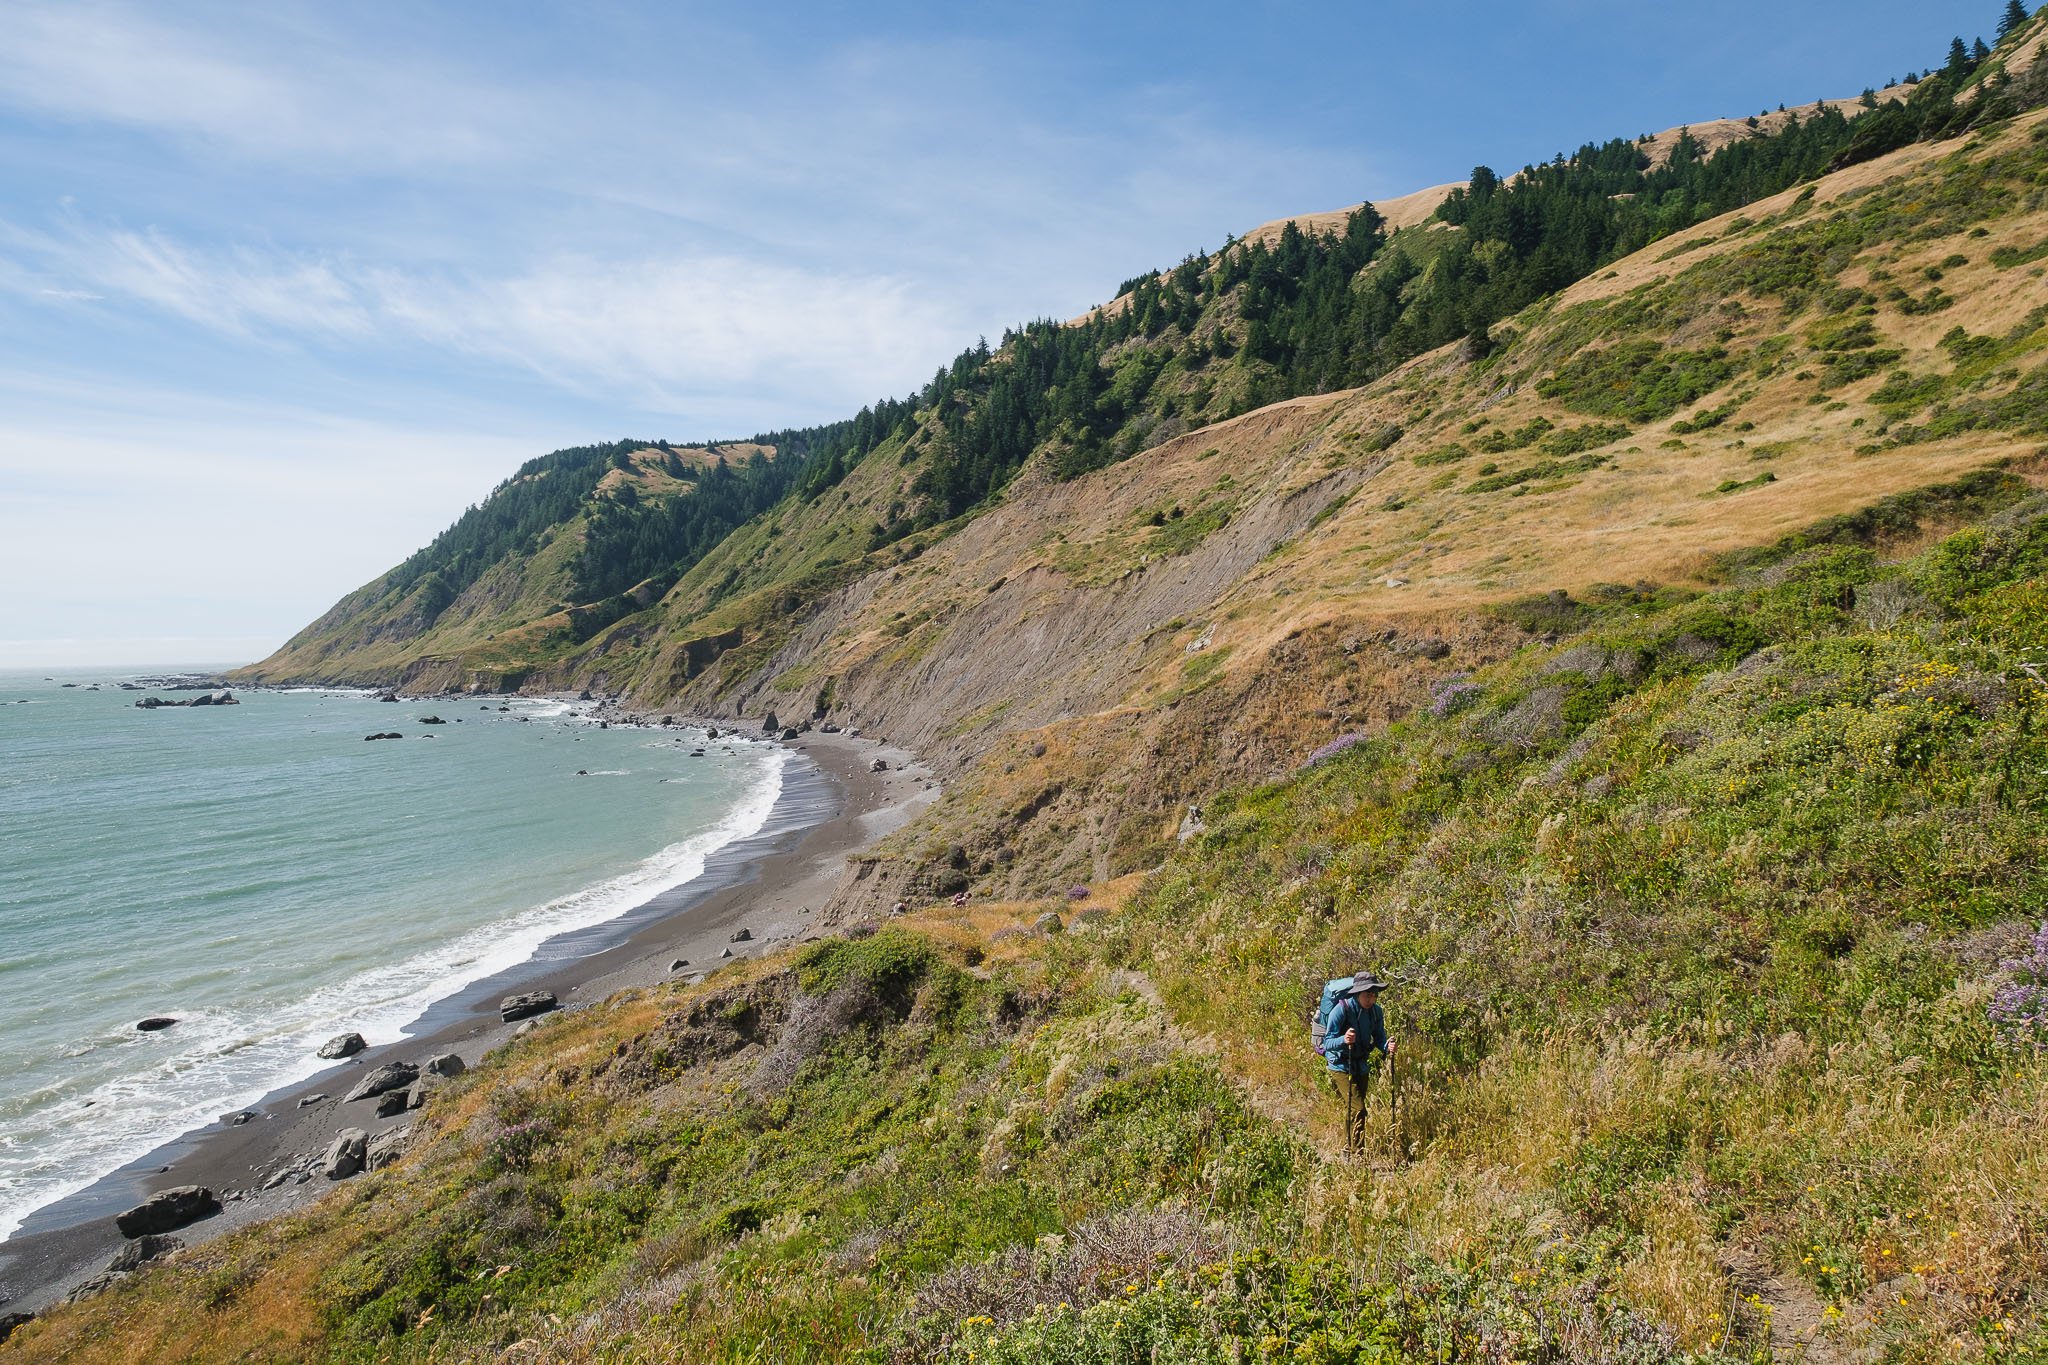
Mile 16.5-21.5: Big Flat to Gitchell Creek
After leaving Big Flat, there is about half a mile of walking on the bluff through Miller Flat before the trail drops down to the beach to start impassable zone 3. If you’re following the AllTrails map, this happens at mile 17.0 and is currently marked by driftwood and stones. There may be other entry points down to the beach too, but this one is tried and true. The bluffs after this point are becoming increasingly unstable due to erosion. There are some holes in the trail where the bluff has crumbled towards the beach.
The 2 camps that we passed in this section, Shipman Creek and Buck Creek, have a similar layout. They’re tucked away at the base of a tree-covered hillside next to a bubbling stream but still have close views of the ocean, especially when the tides rise and the ocean encroaches on the beach. Both looked cozy and idyllic compared to the more populated Big Flat.
Miller Flat in the early morning
The sandy steep slope down to the beach from the end of Miller Flat
Views throughout impassable zone 3
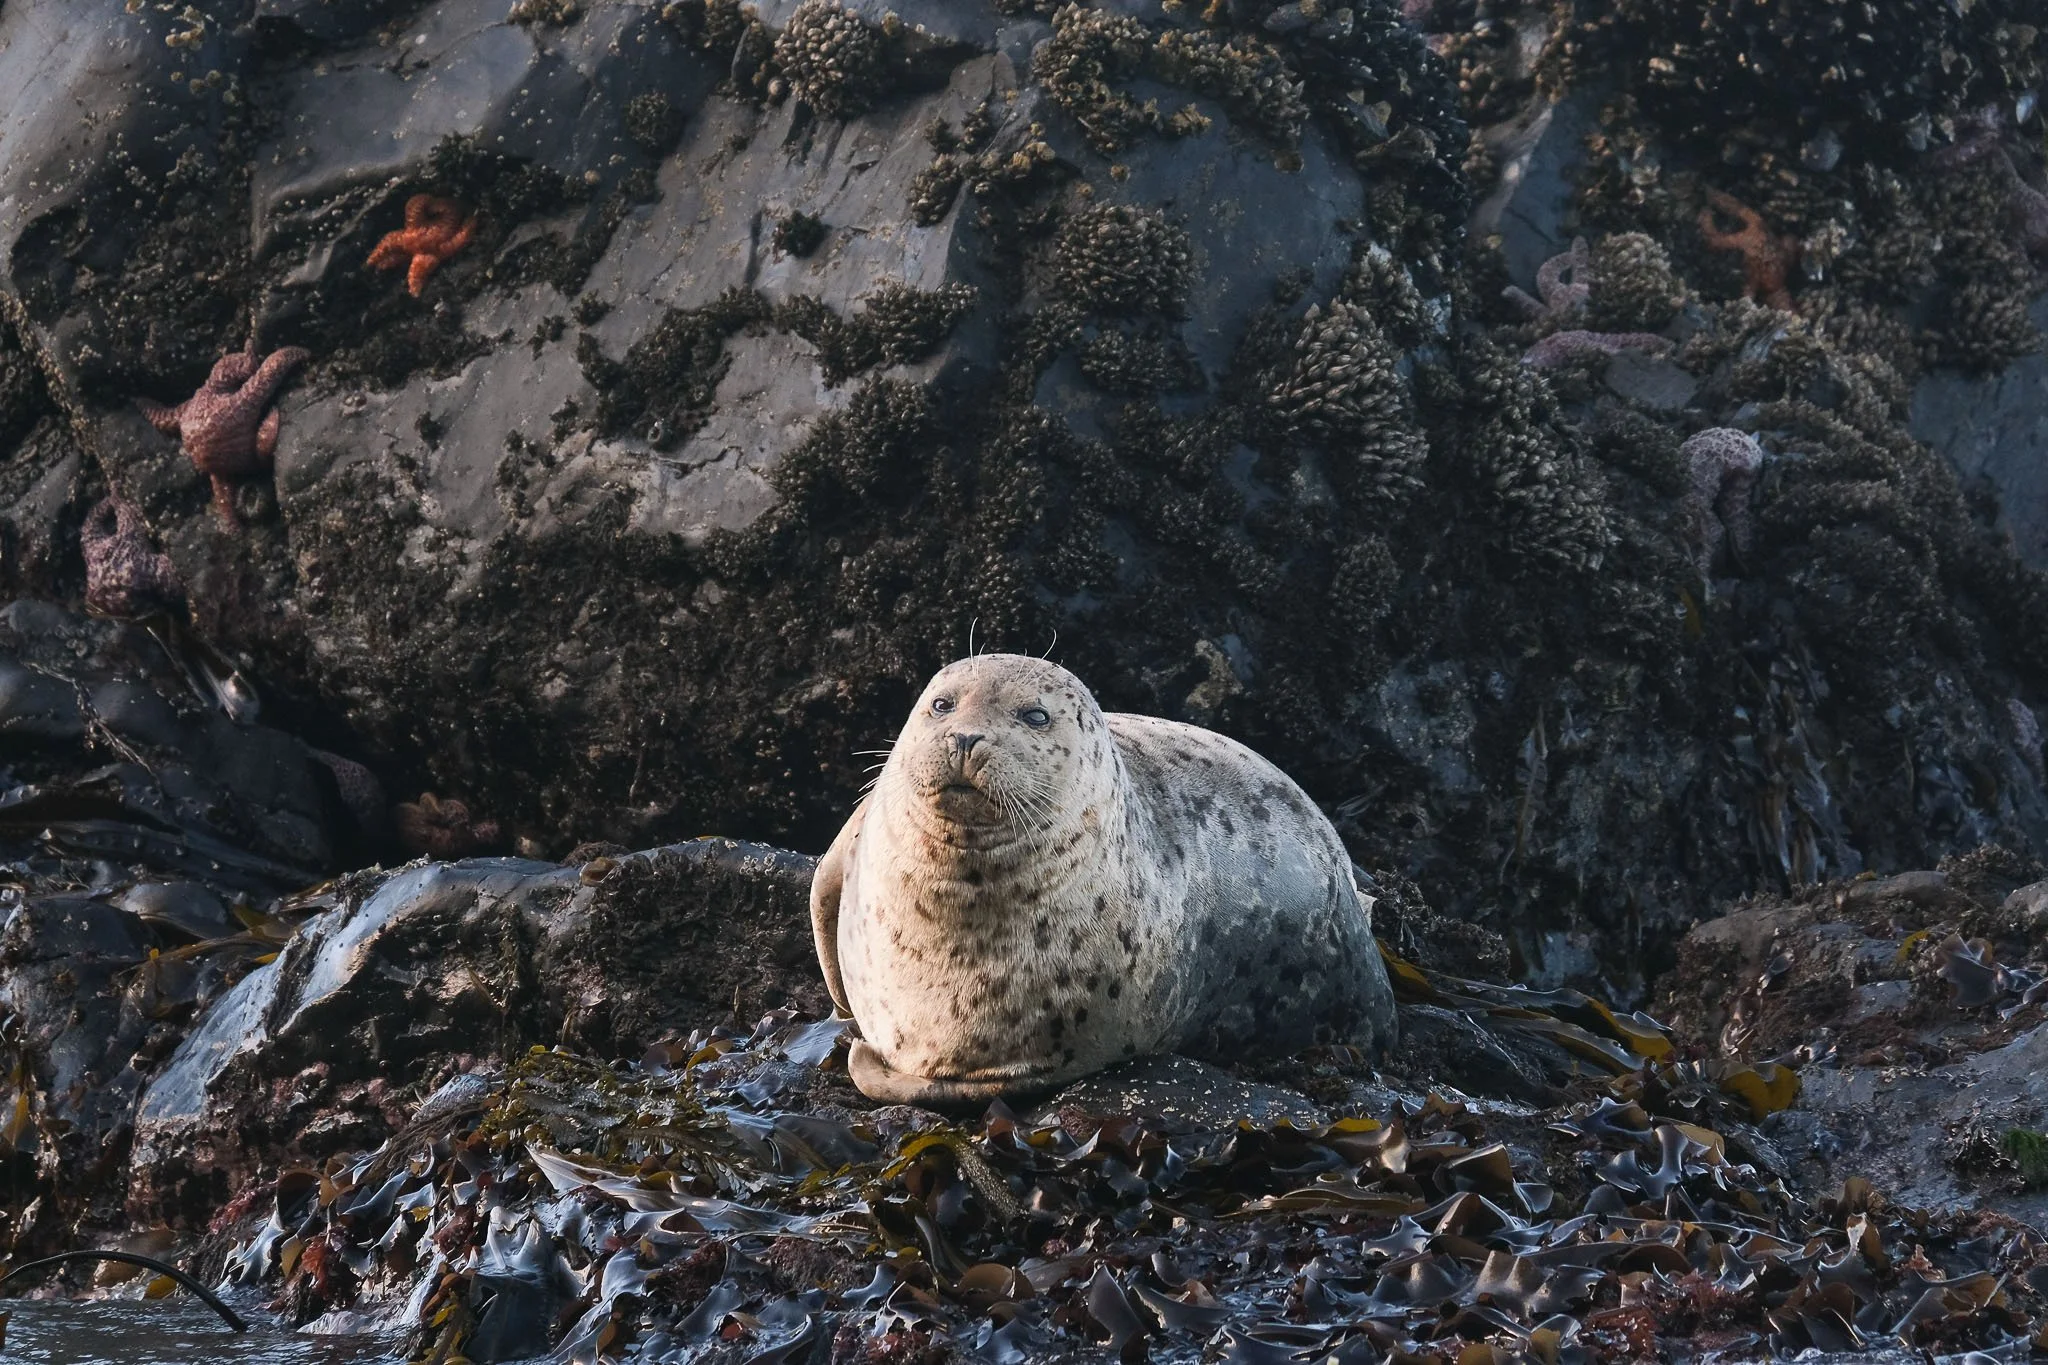
Harbor seal on a seaweed throne

Let’s play count the starfish in this photo. I count…32!
The weather was so moody on our last day.

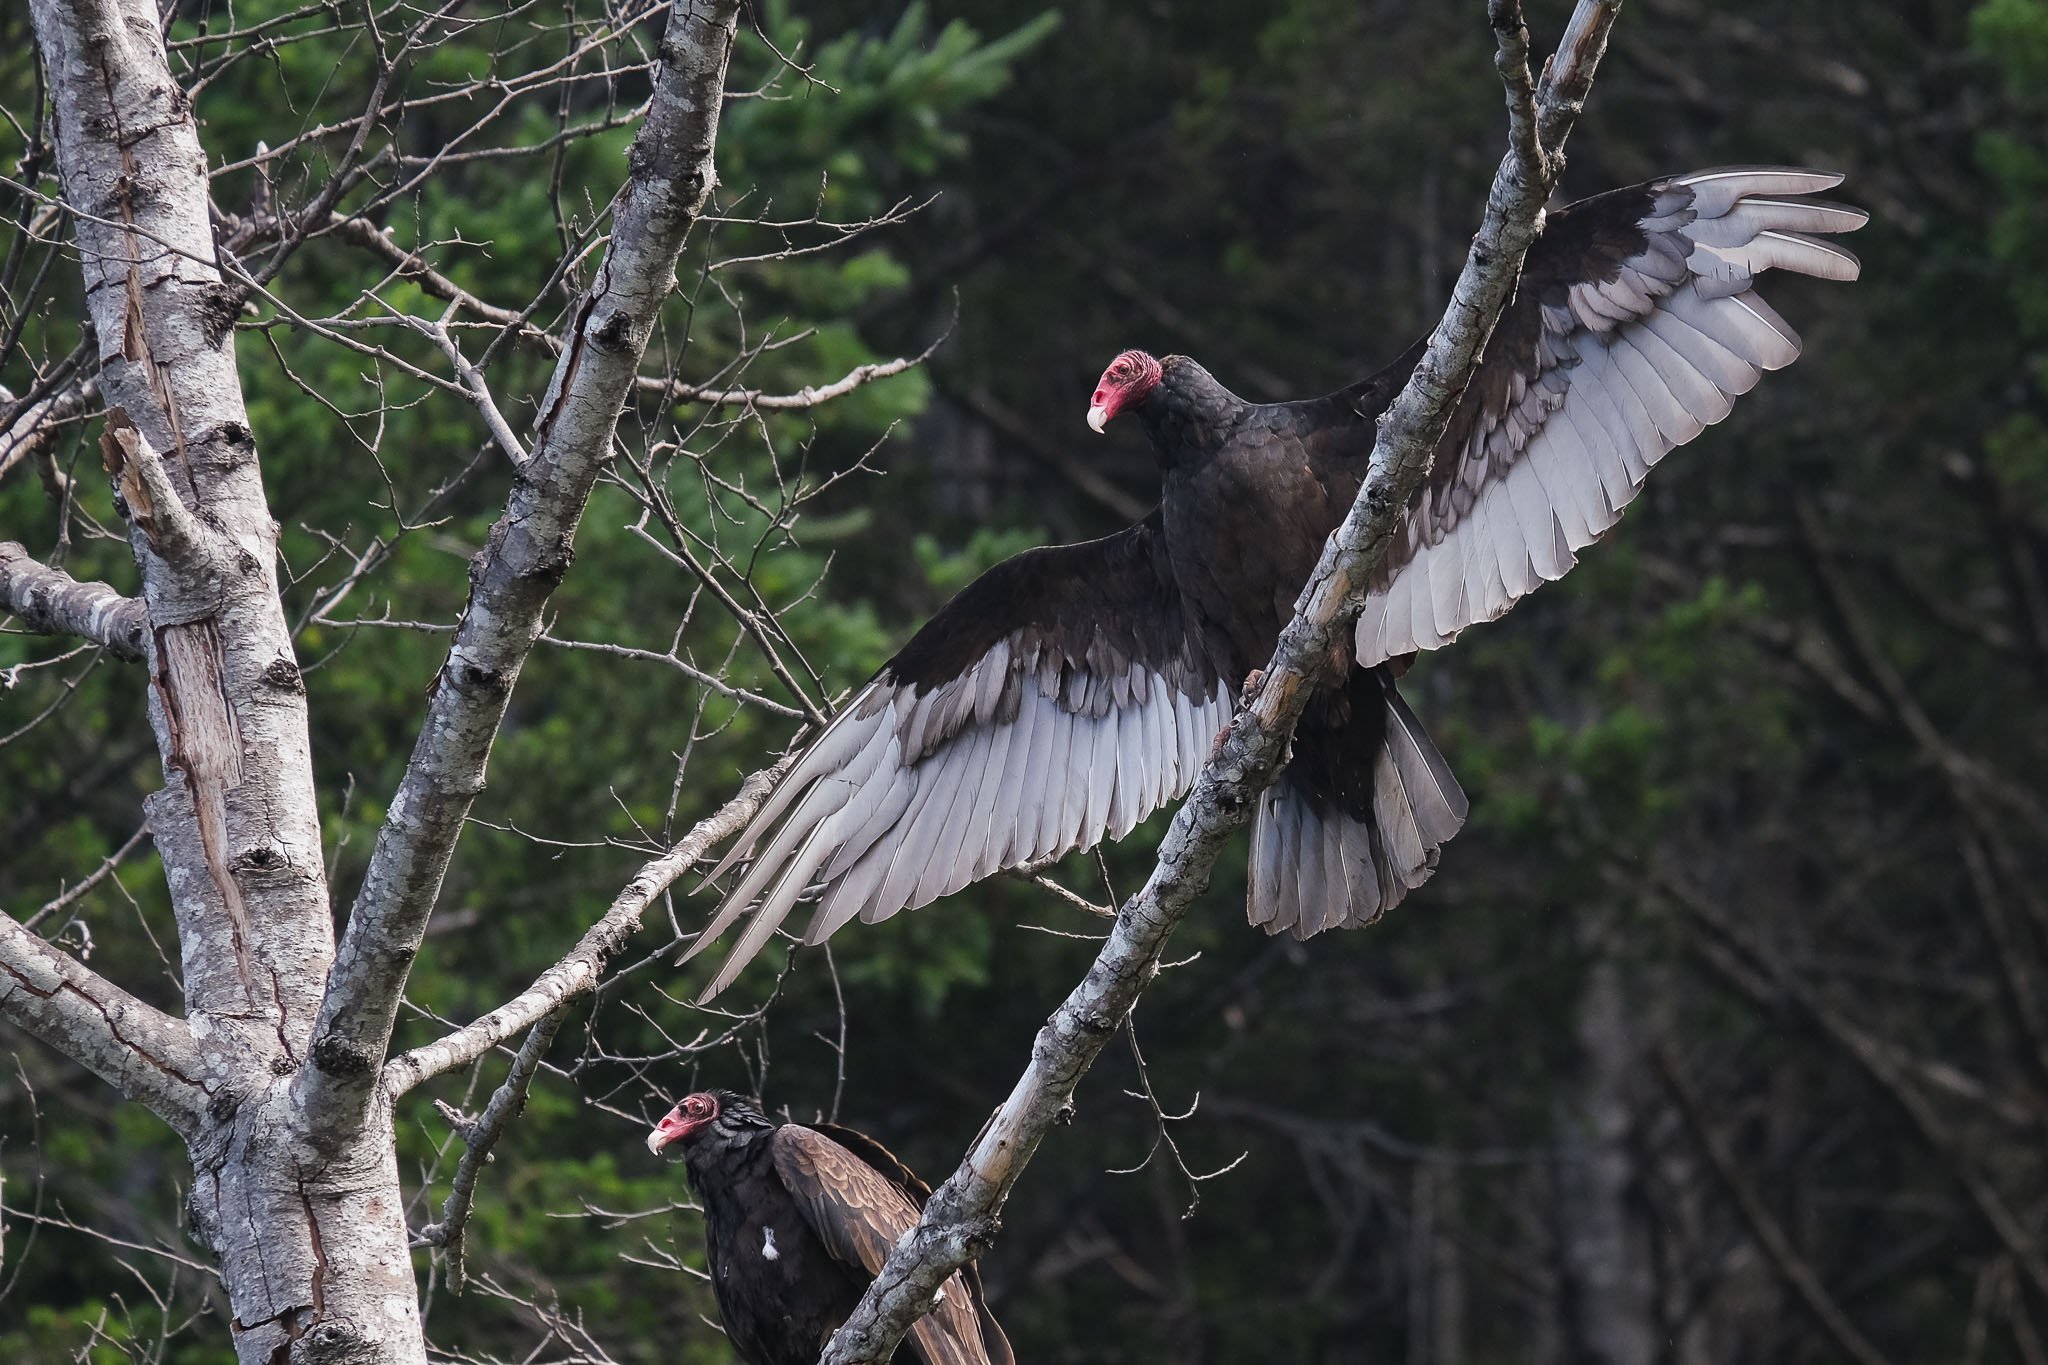
We saw 3 turkey vultures perched on this tree.
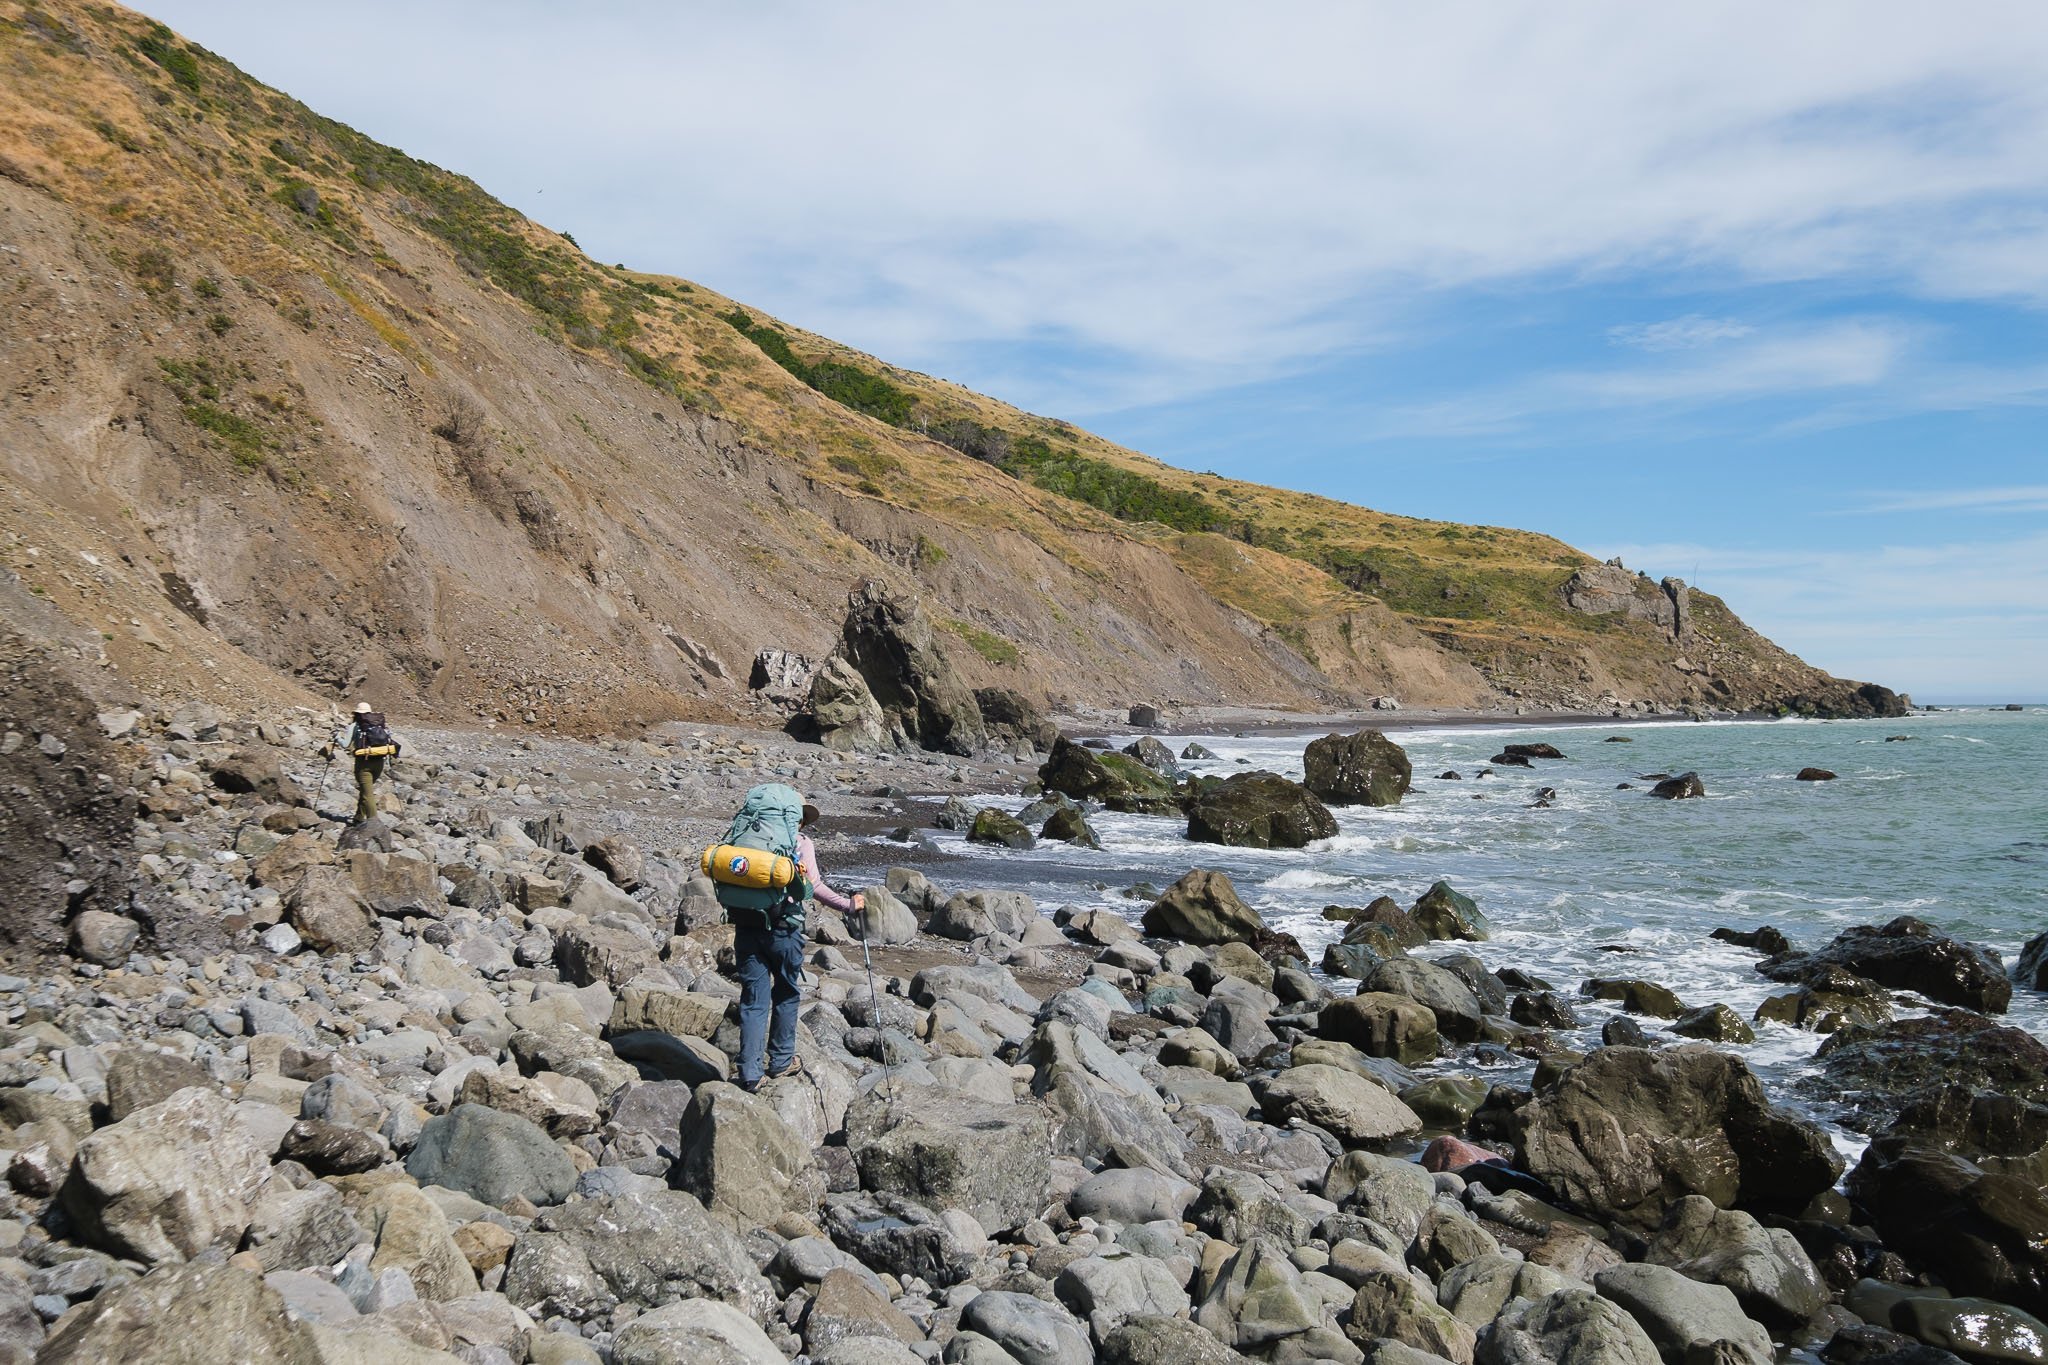
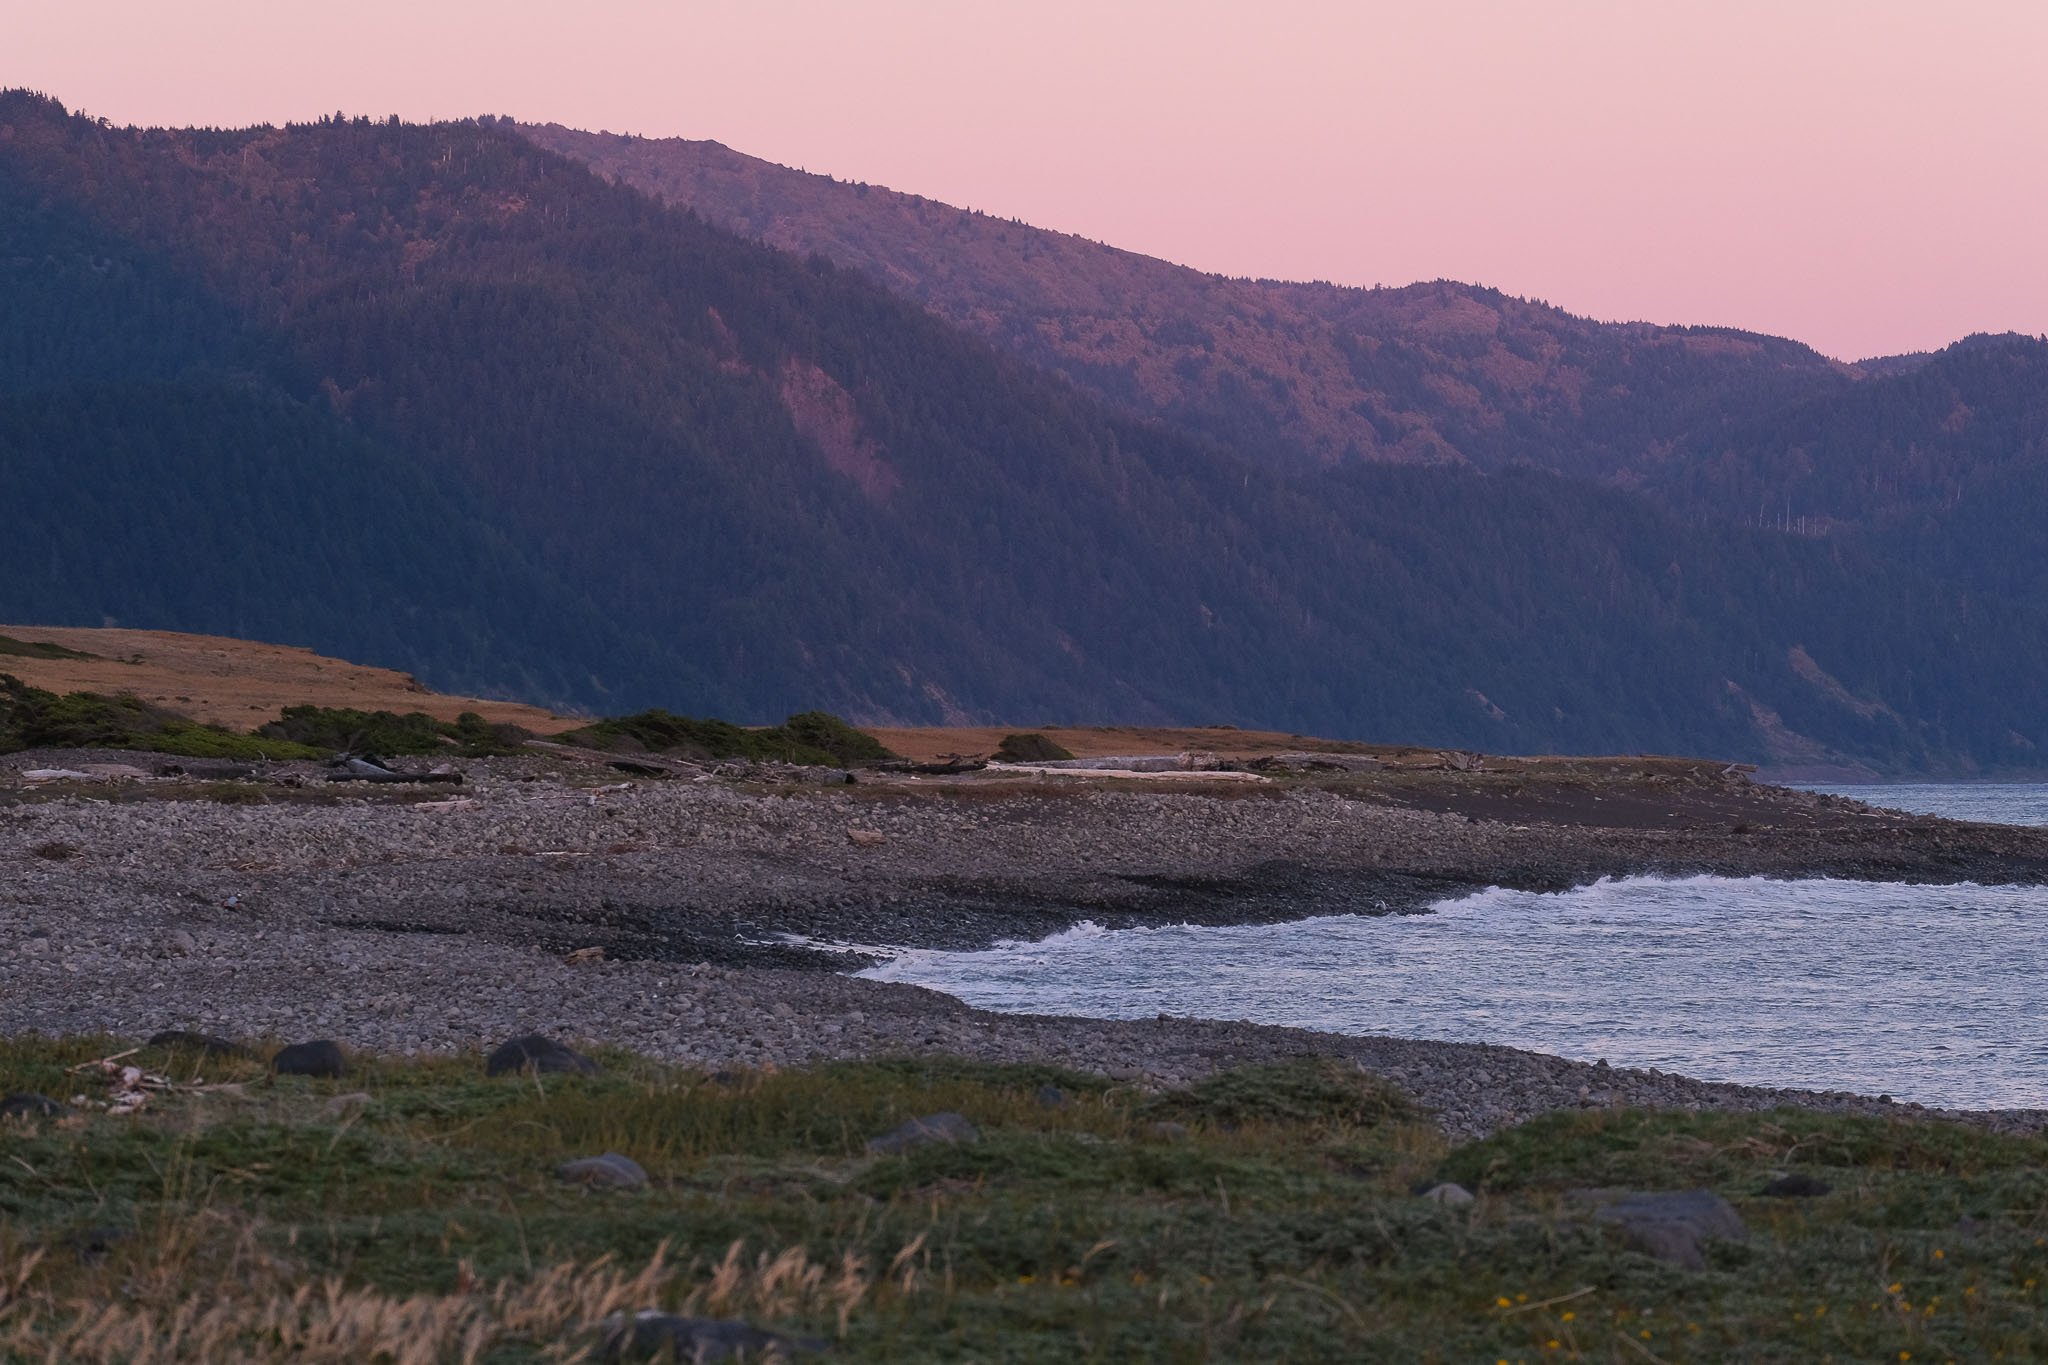
Mile 21.5-25.5: Gitchell Creek to Black Sands Beach
This section looks similar to the last except that the beach becomes wider and there are no more impassable zones. The beach is mostly small pebbles instead of big rocks. I found that the wet packed sand closer to the ocean was a little easier to walk on, although that means playing a constant game of running away from sneaky waves so that your shoes don’t get wet.
Because of the curvature of the coastline, Shelter Cove at the end of the trail can be seen throughout this whole stretch. It does not look far, especially when you can already start to make out signs of development on the distant shore. But then after 30 minutes of hiking, the end does not look any closer, and you check the map and it’s still 3 miles away.
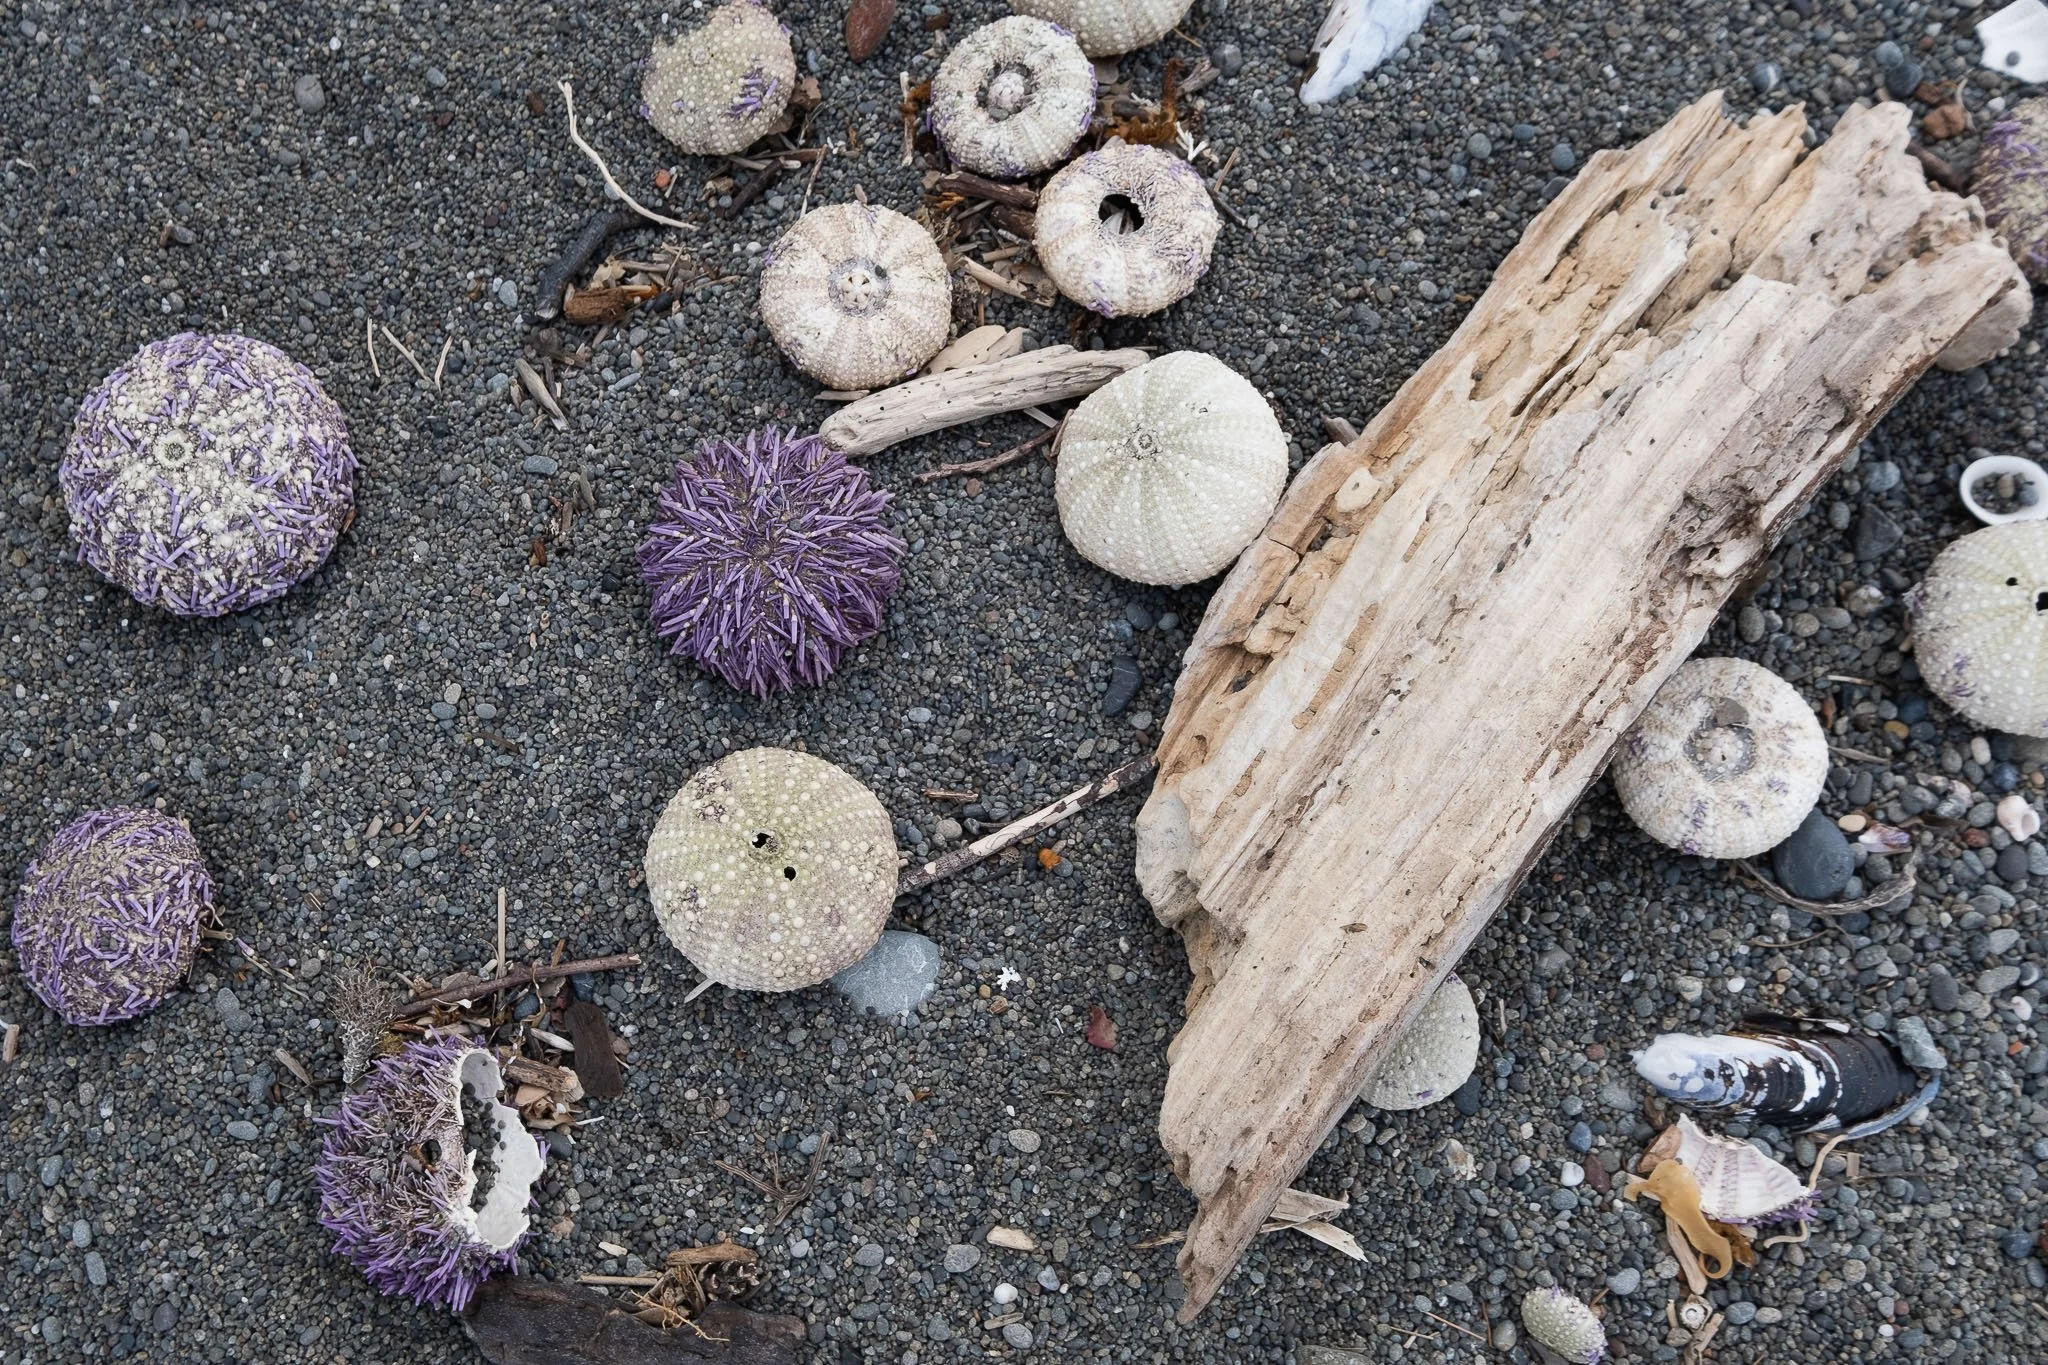
I really enjoyed the last 2 sections from Miller Flat to Black Sands Beach. Towering cliffs covered in greenery form a wall along the beach, so there’s no wondering whether you should take an inland trail. There is a lot more to see when you walk on the beach. We found washed up jellies, starfish, urchins, and a massive abalone. The coast felt so lush, although I’m sure that was amplified by the clouds and mist veiling the ridges.

Gitchell Creek camp. Shelter Cove can be seen at the tip where the mountains meet the horizon.

Harbor seals hanging out on seaweed-covered rock

A seagull swallowing a starfish. This is triggering my gag reflex.


Fin.

Looking back at the beach after reaching the trailhead
Helpful Resources
BLM Tide Safety Brochure: a concise breakdown of tide safety on the Lost Coast Trail
Reserve King Range Wilderness permits on Recreation.gov
NOAA tide prediction chart: tide chart generator so that you can plan your hiking schedule
I hope you found this guide helpful. Feel free to leave any questions in the comments!
Disclosure: this page contains Amazon affiliate links. If you click them and make a purchase, I will receive a small commission at no cost to you. Thanks for supporting my blog!